
Installing SQL Server Express 2014 With Tools for OMNIA
Setting up SQL Server Express 2014 with Tools for OMNIA
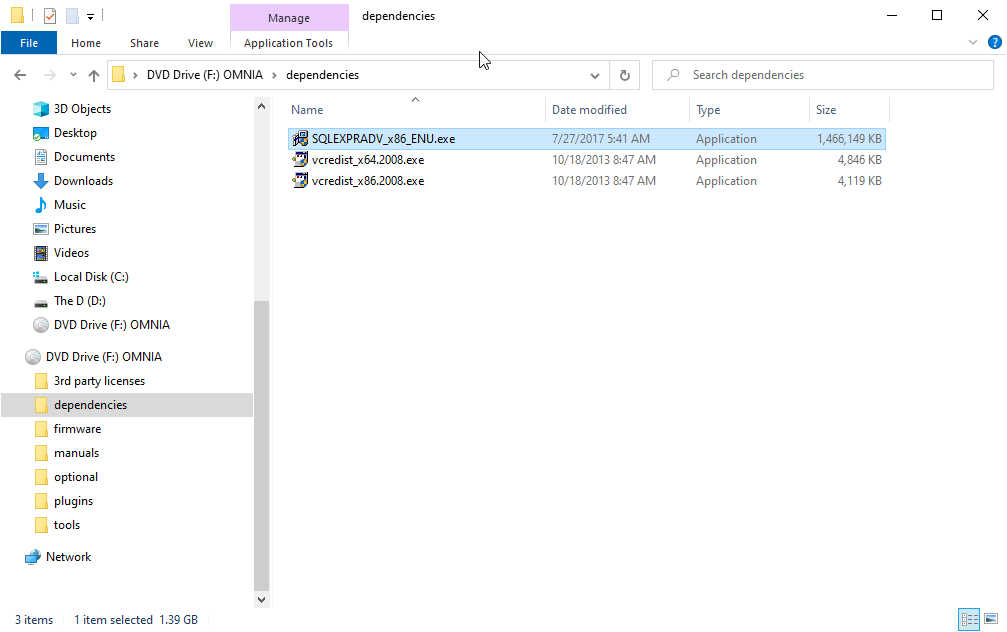
Run the installer executable.
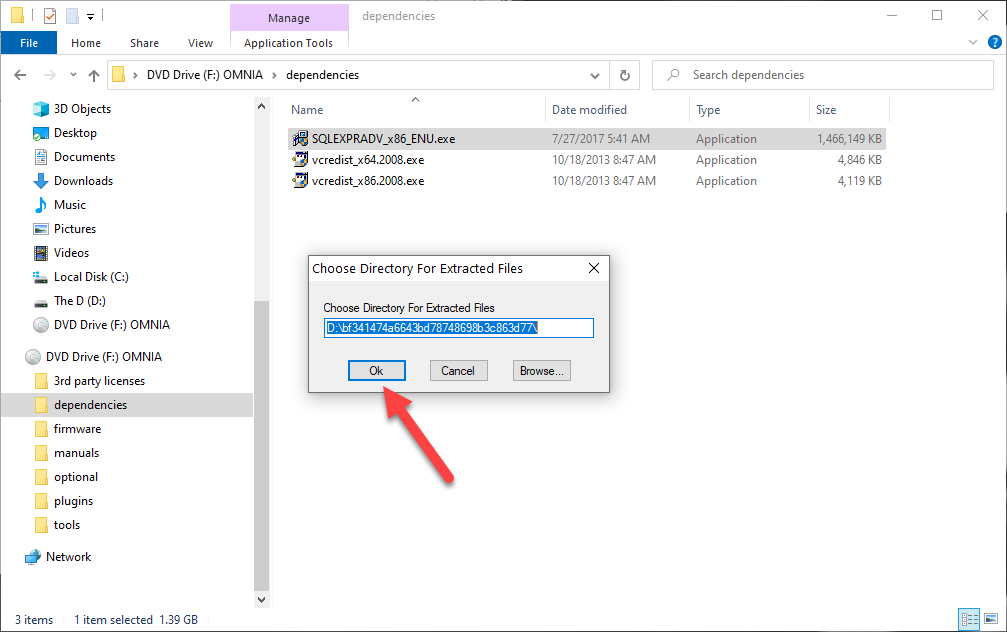
Wait for file extraction to complete.
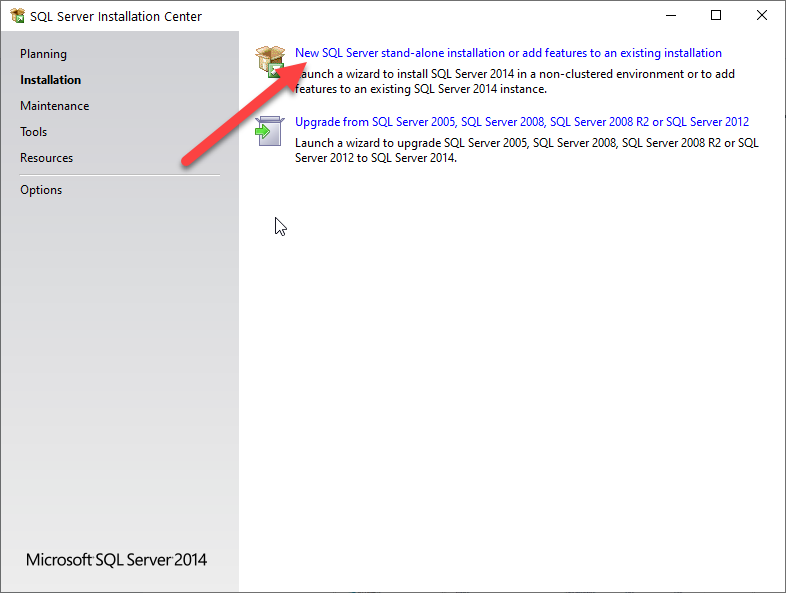
Select ‘New SQL Server stand-alone installation or add features to and existing installation.
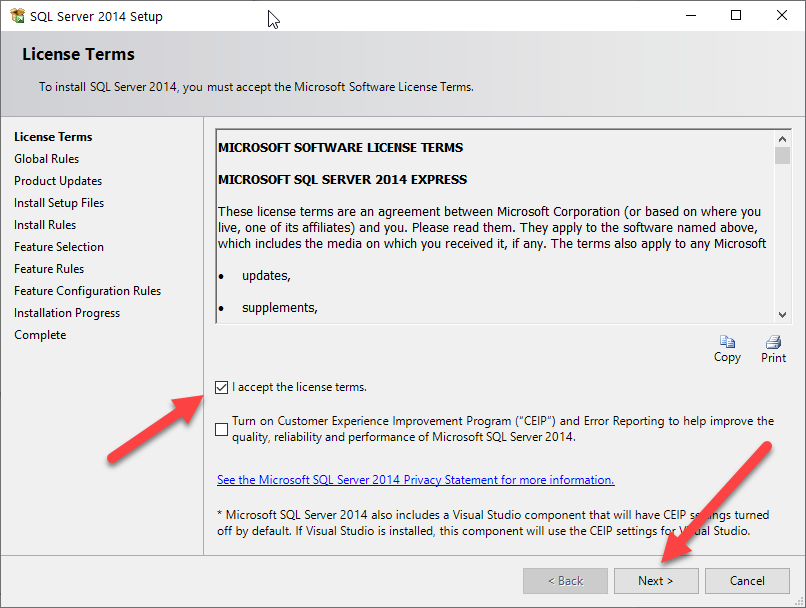
Make sure you click “I accept the license terms” and then “Next”
Leave the feature selection as default and click on “Next”
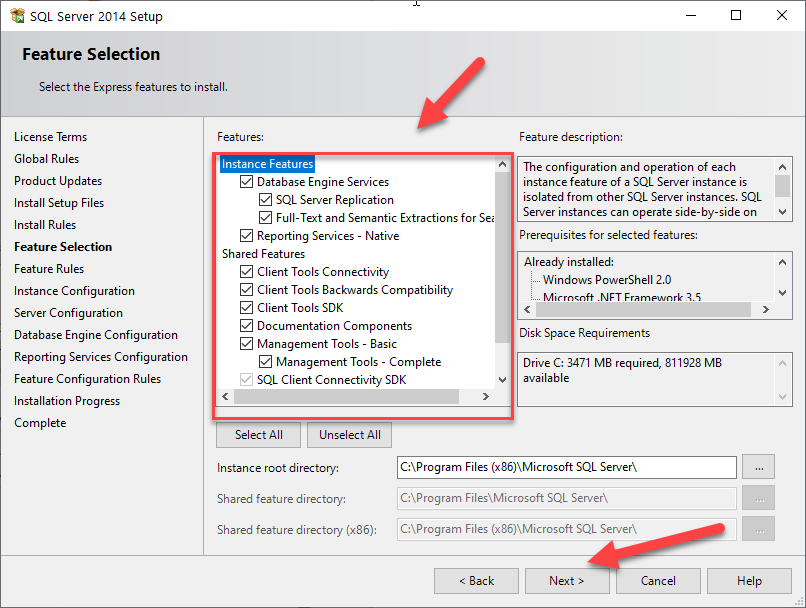
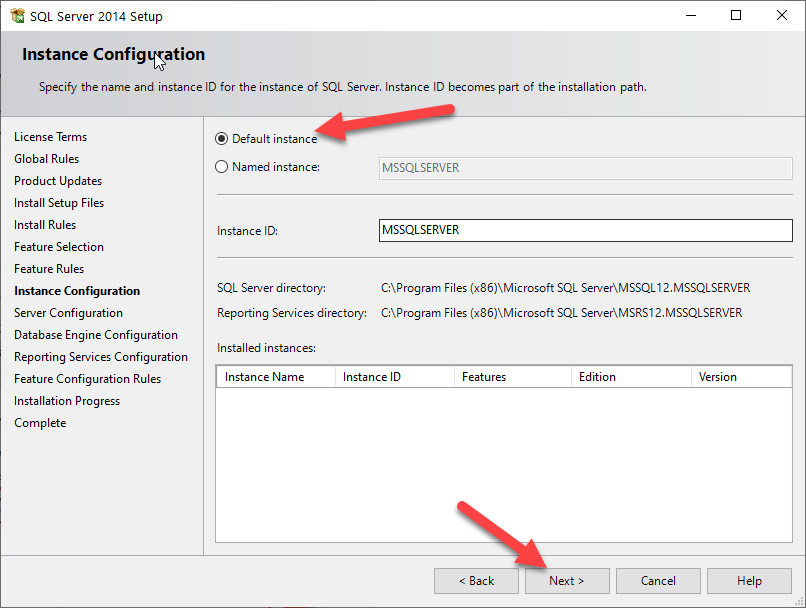
Select “Default Instance” and then click “Next”
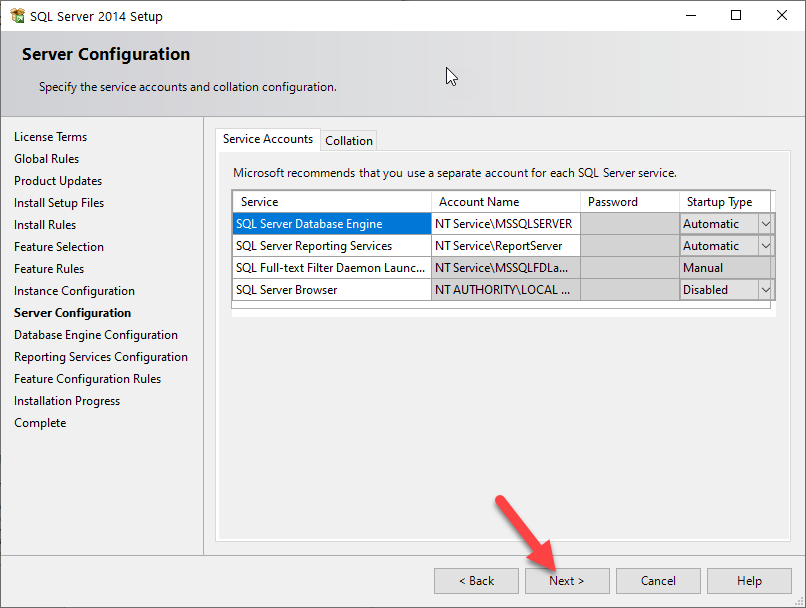
Select the service startup as below.
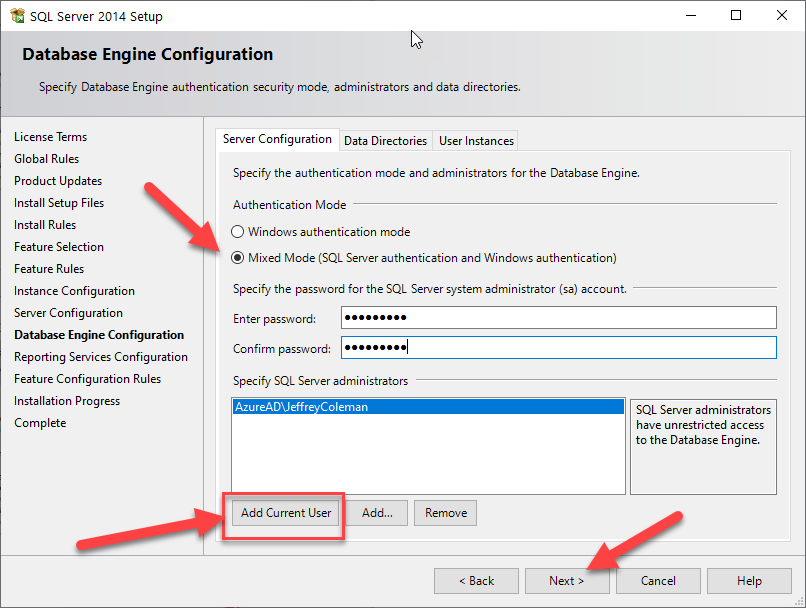
The Database Engine Configuration is very important, select the “Mixed Mode”. Where it asks for a Password, enter the word “masterkey”, then click the “Add Current User”. You do not need to change the “Data Directories” or the “File Stream”. Click on “Next”
Leave the Reporting Services Configuration as “Install and configure” and click on “Next”
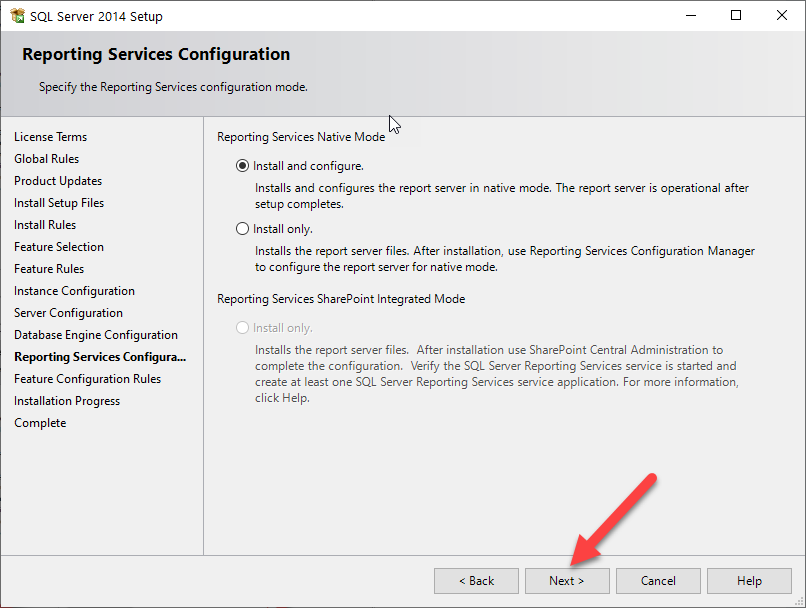
Click on “Next” and SQL will start installing.
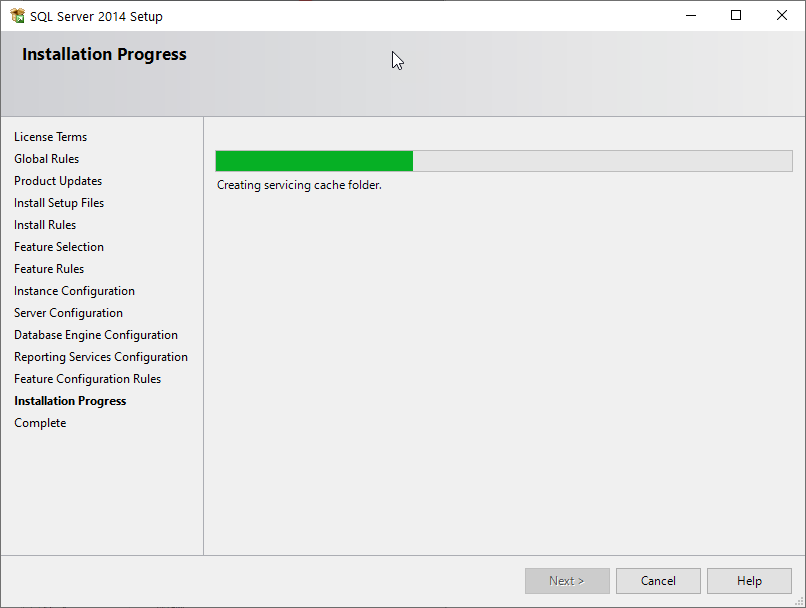
Click on “Close”
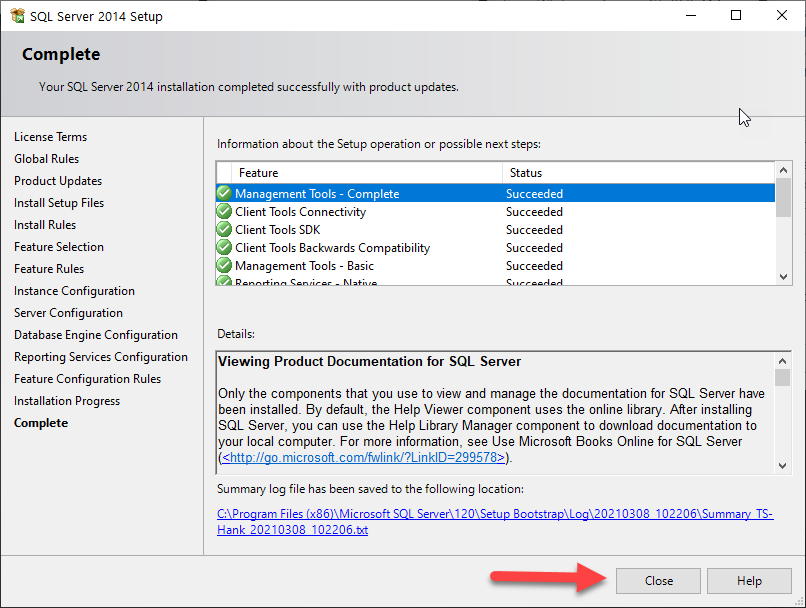
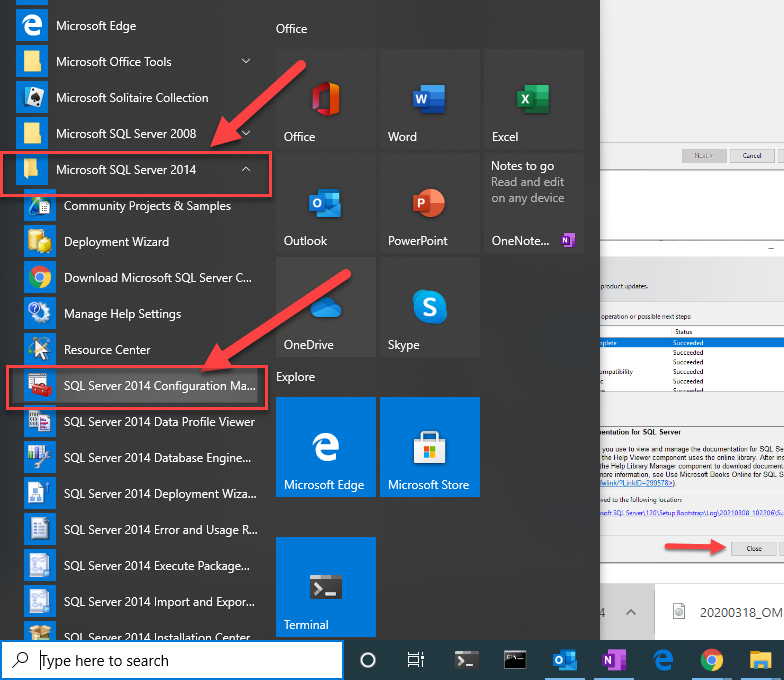
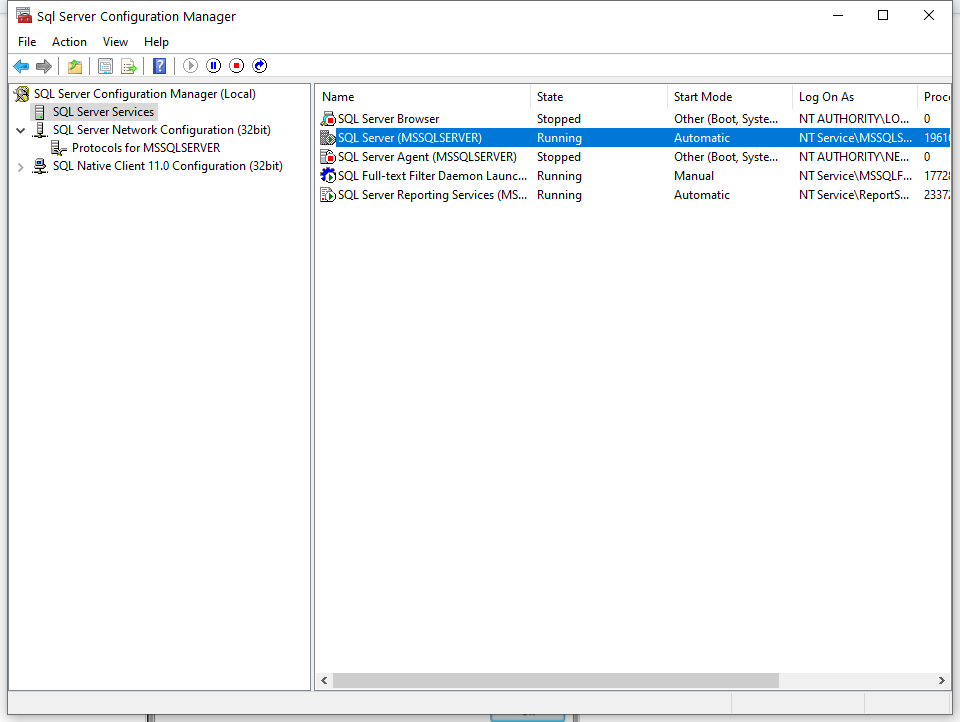
Open the “SQL Configuration Manager” from (Start > Programs > Microsoft SQL Server 2012 > Configuration Tools). Open/Run “SQL Server Configuration Manager” as administrator.
Click “Protocols for MSSQLSERVER”.
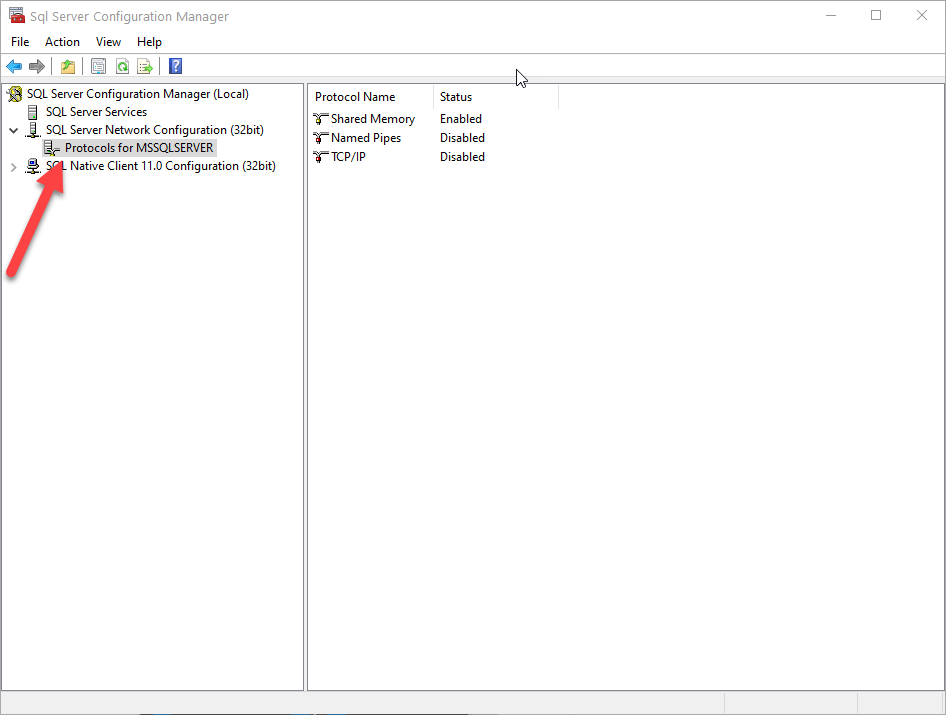
Right click the “TCP/IP” and click “Properties”, Set the “Enabled” field to “Yes”.
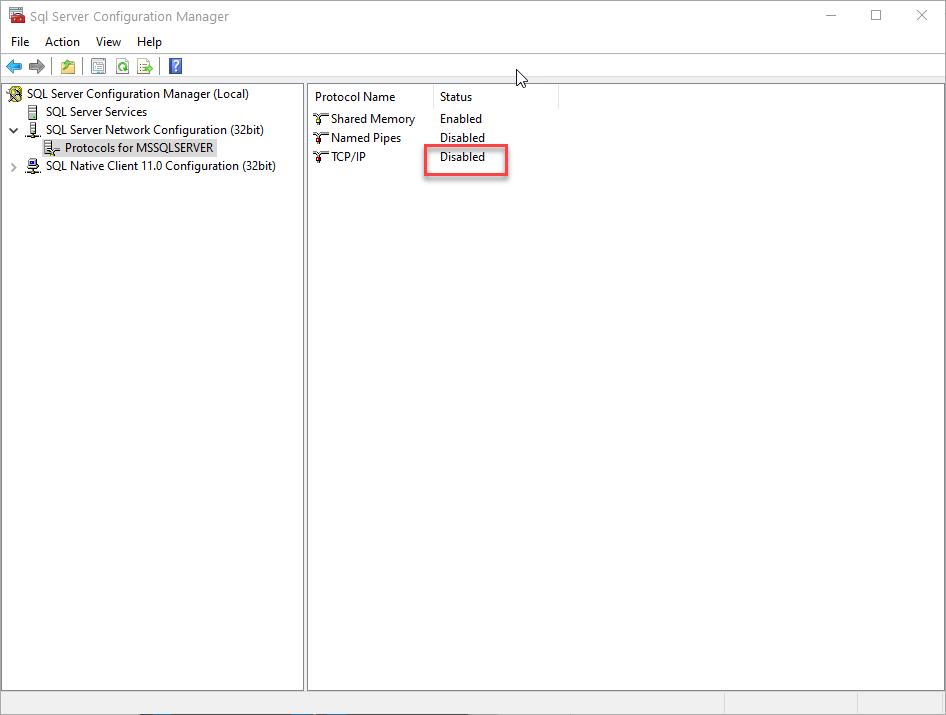
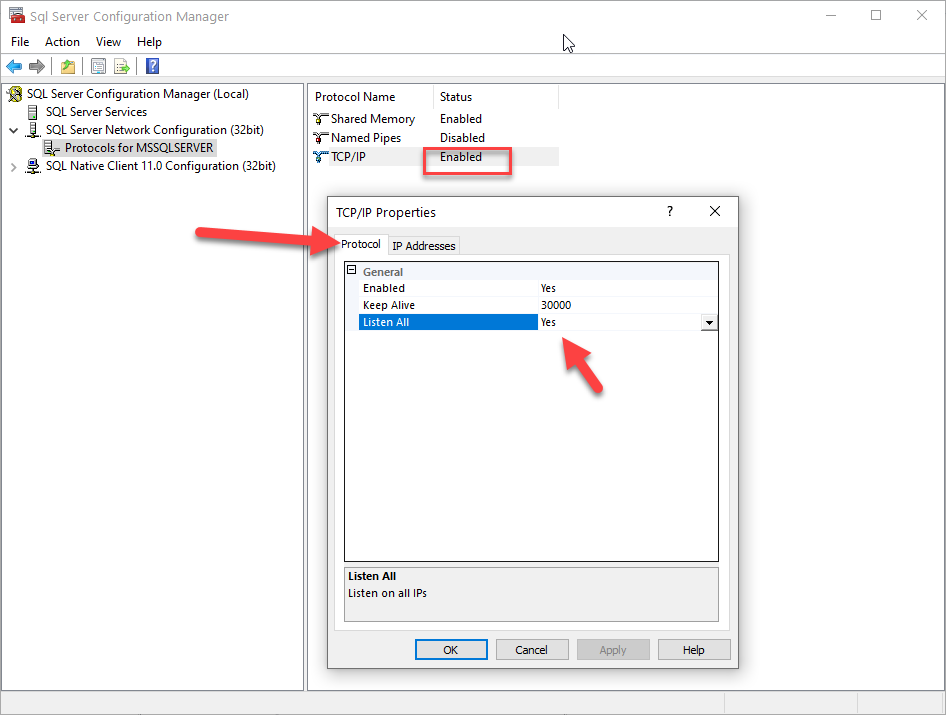
Click the “IP Addresses” tab.
Set the “Enabled” to “Yes”. “IP Address” to your local IP Address, and set the TCP Port to “1433”
Under “IP All” set the TCP Port to “1433”
If you have multiple Network Cards (NIC’s) you may have more IP settings to configure. Rule of thumb is to set the TCP Port to 1433. Click “Apply”.

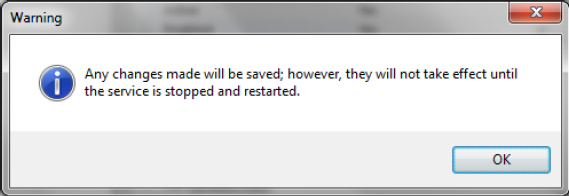
Click the “SQL Server Services”. Right click the SQL Server/ SQLEXPRESS and select “Restart”
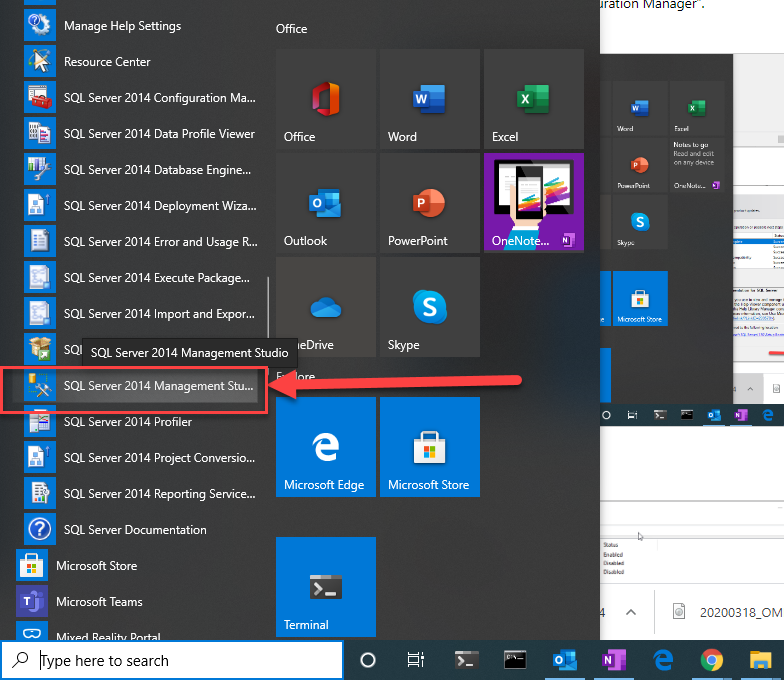
Open the SQL Server Management Studio. (Start > Programs > Microsoft SQL Server 2012).
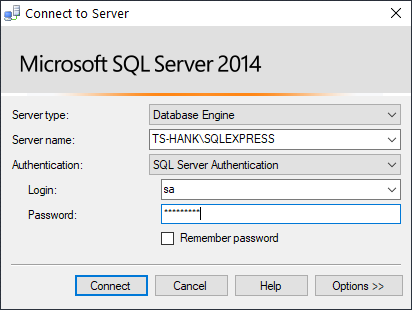
To log on to the Server, the “server type” must be “Database Engine”. The Server Name must refer to the server hostname .The Authentication must be set to “SQL Server Authentication”. The Login will be “sa” and the password must be “masterkey”. Click on “Connect”
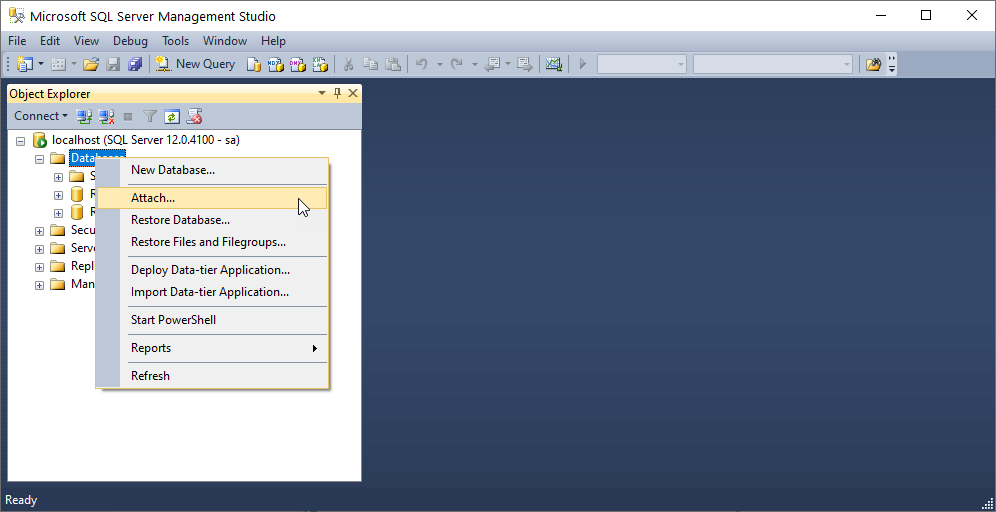
After Logging in successfully, we may now attach the database. Right click “Databases” select “Attach”.
NOTE: If OMNIA is not installed at this point, there will be no database to attach,
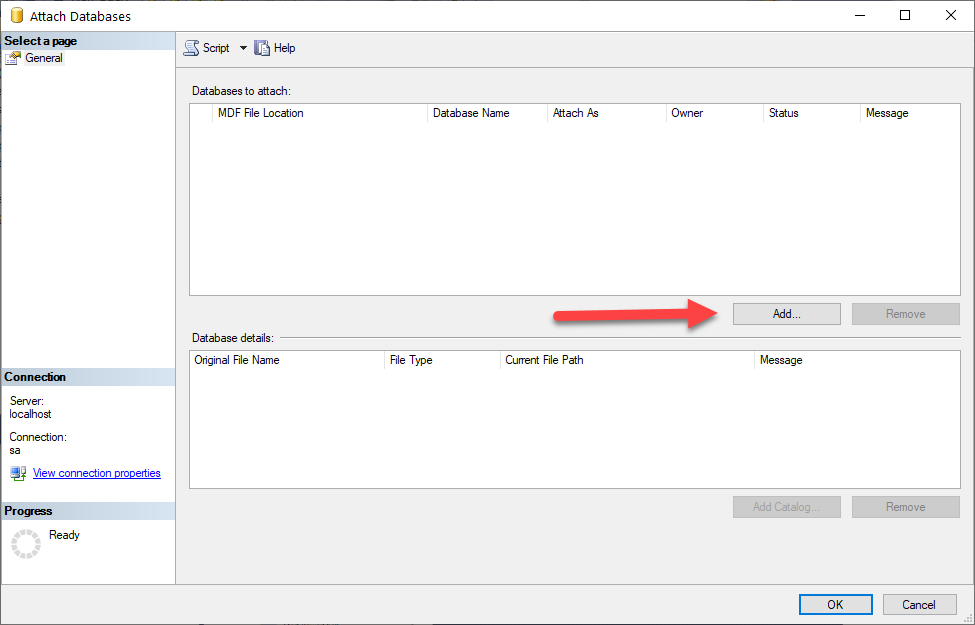
Browse to the OMNIA.MDF file (e.g. C:\OMNIA\database), select it an click “OK”
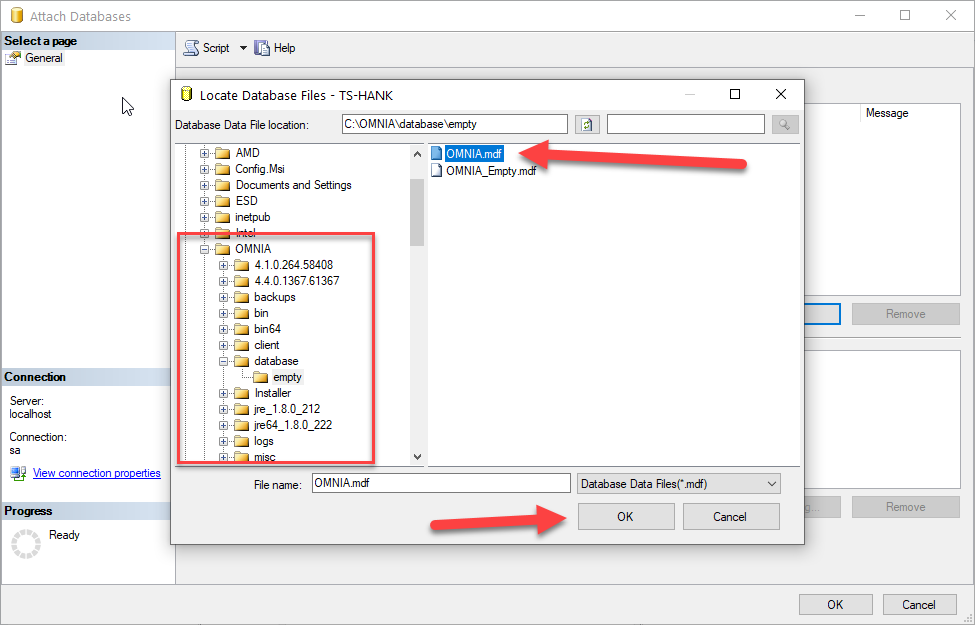
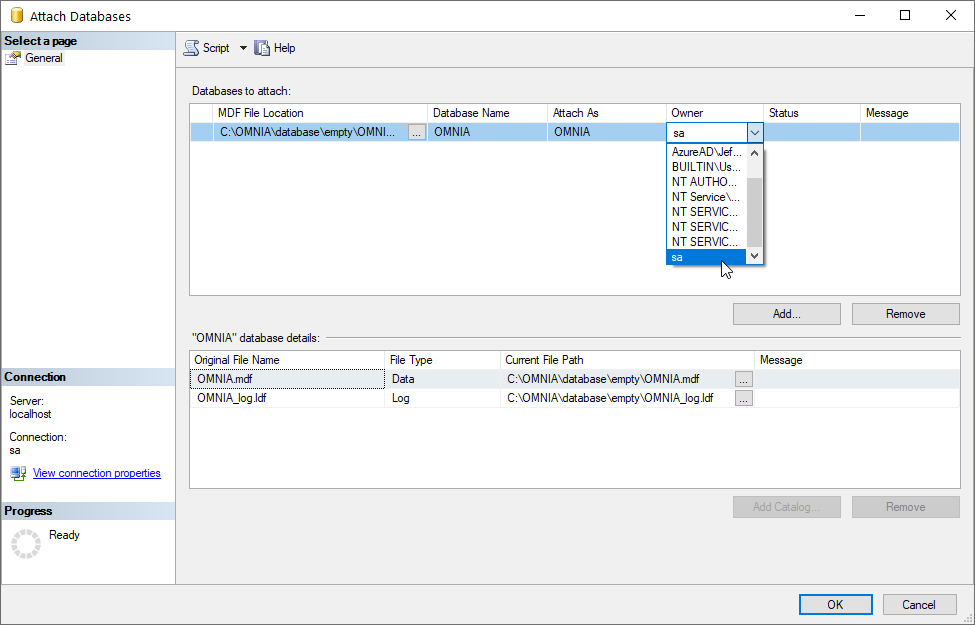
Review the settings according to the screenshot, click OK
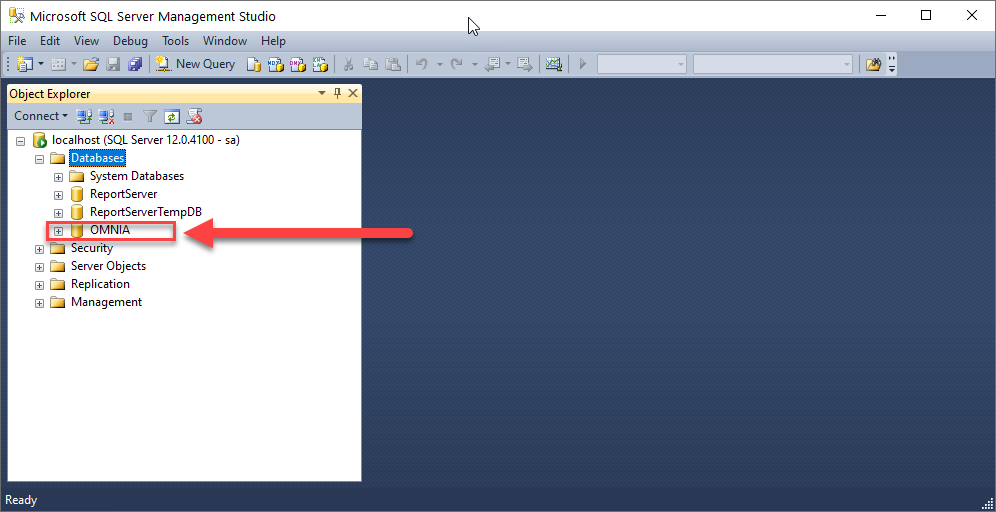
The Database will now appear in Microsoft SQL Management Studio
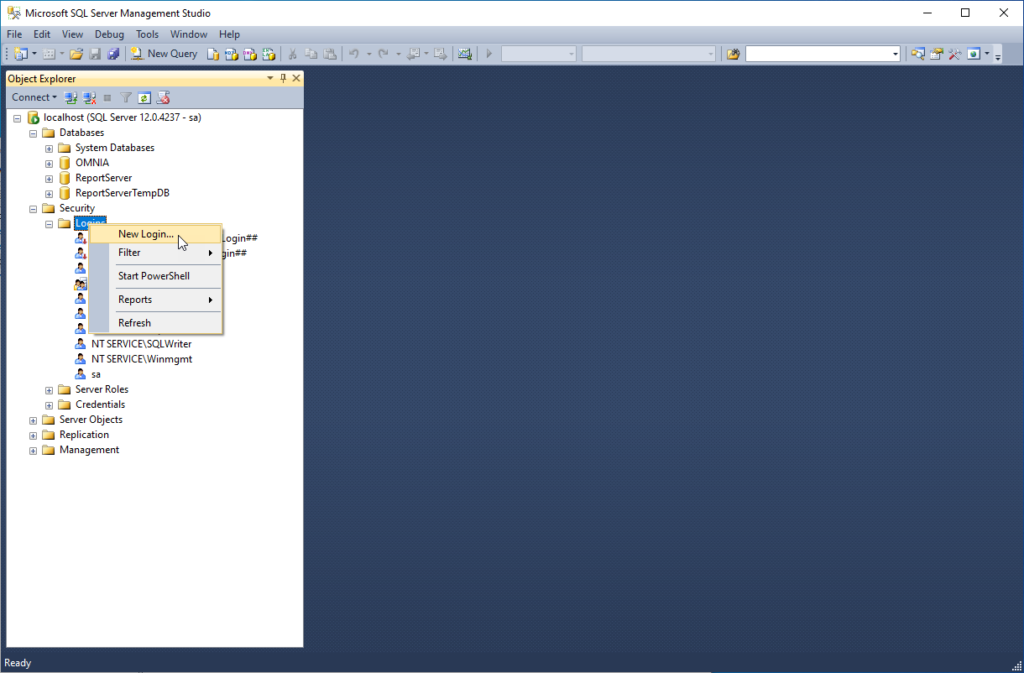
Make sure you have the “sysdba” user under “Security” of the OMNIA Database with the following settings: (If not add the sysdba user under Security ; Logins as a new login)
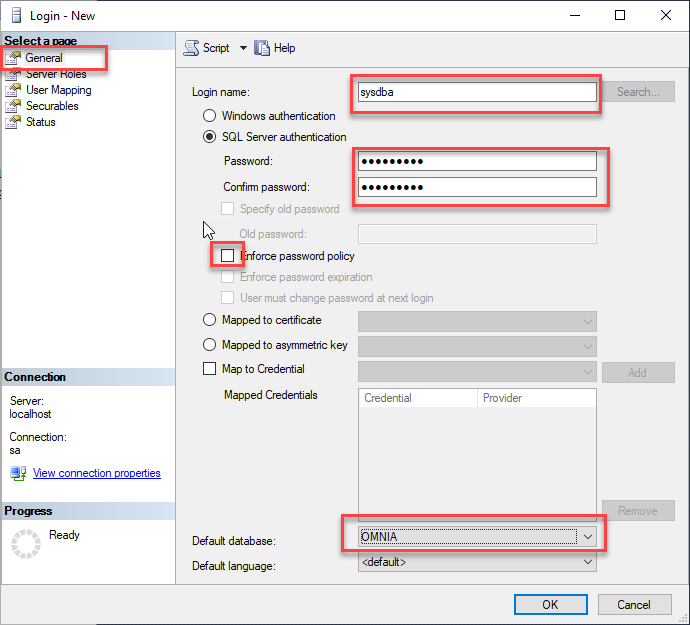
General
Type the login name as “sysdba”. Select “SQL Server authentication”. Type the Password as “masterkey”. Deselect the “Enforce password policy”. Set the “Default database” to “OMNIA” (do not click OK yet) .
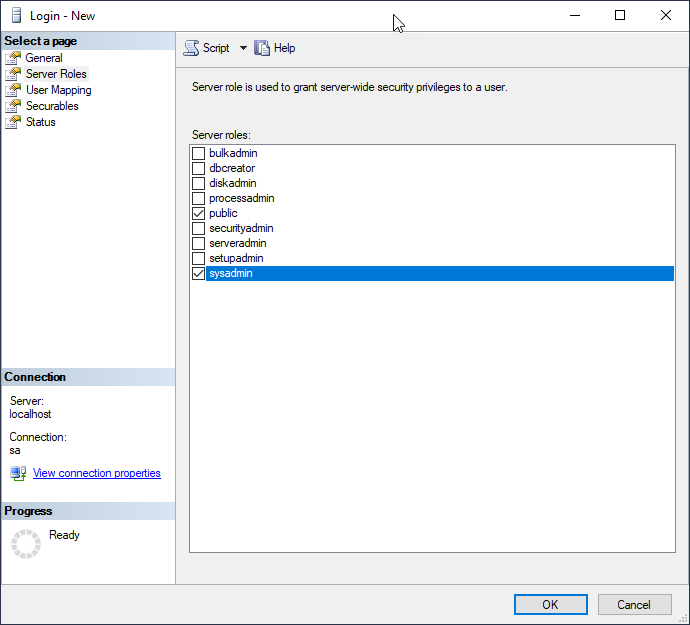
Server Roles
Select “Server Roles” on the Left and make sure the “sysadmin” is selected. (do not Click ok yet)
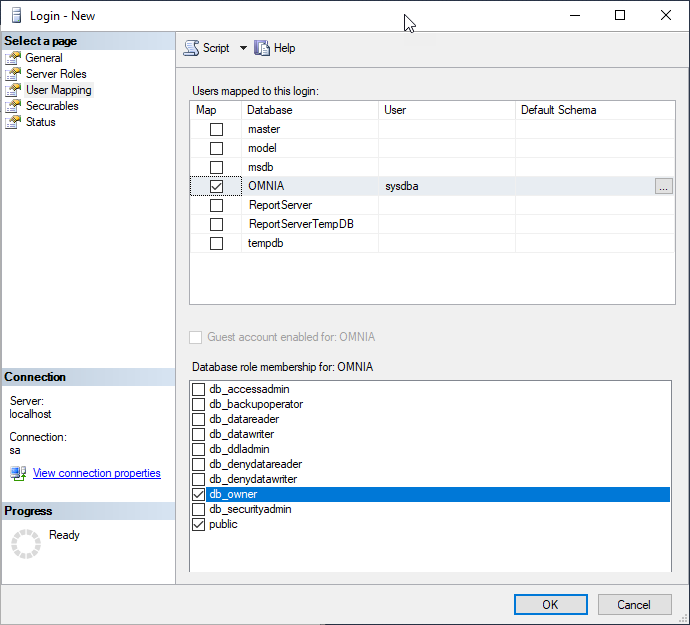
User Mapping
Click on “User Mapping”. Make sure OMNIA is selected, and that OMNIA is the “db_owner” and has “public” access. (do not click OK yet)
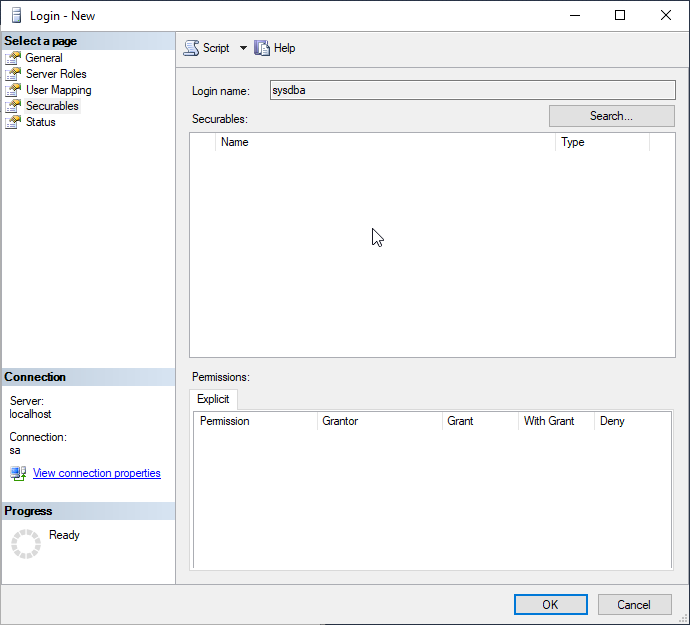
Securables
Set the “Securables” as follows (do not click OK yet) :
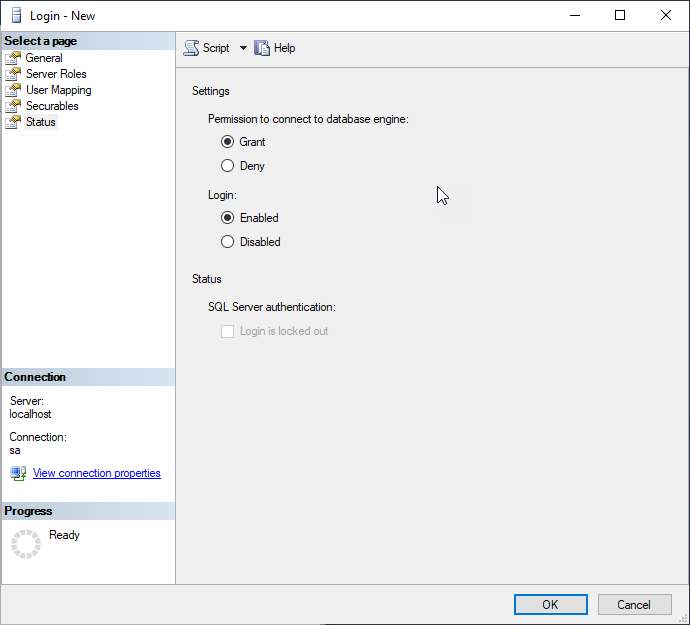
Status
Lastly, set the status as follows then you may click OK:
Need further assistance?