• Skip to primary navigation
  • Skip to main content
PMT Security Logo

PMT Security

Advanced Access Control

  • Home
  • About Us
    • Our Partners
    • Our Integrators
  • Solutions
    • Education
    • Retirement & Healthcare
    • Manufacturing
    • Government Facilities
    • Residential
    • Retail Businesses
    • Campgrounds & Outdoor Resorts
  • Products
    • Access Control
      • Control Features
      • Reporting & Monitoring
      • Control Module
      • Digital IO Module
      • Reader Module
      • Readers
    • Video Management
      • Integration
      • Analytics
      • Search & Export
    • Visitor Management
    • Intercom
    • Live Guard Video Monitoring
    • Housings & Pedestals
  • Support
    • Knowledgebase
    • Download Center
    • License Request
    • RMA Request Form
  • Blog
  • Contact Us

Security Best Practices & Support

Navigating IPTool 3

Navigating IPTool 3

How to navigate, search, change IP and Open camera using the IPTool 3

Make sure you have IPTOOL3 installed on a computer and connected to the same network as your IP cameras.

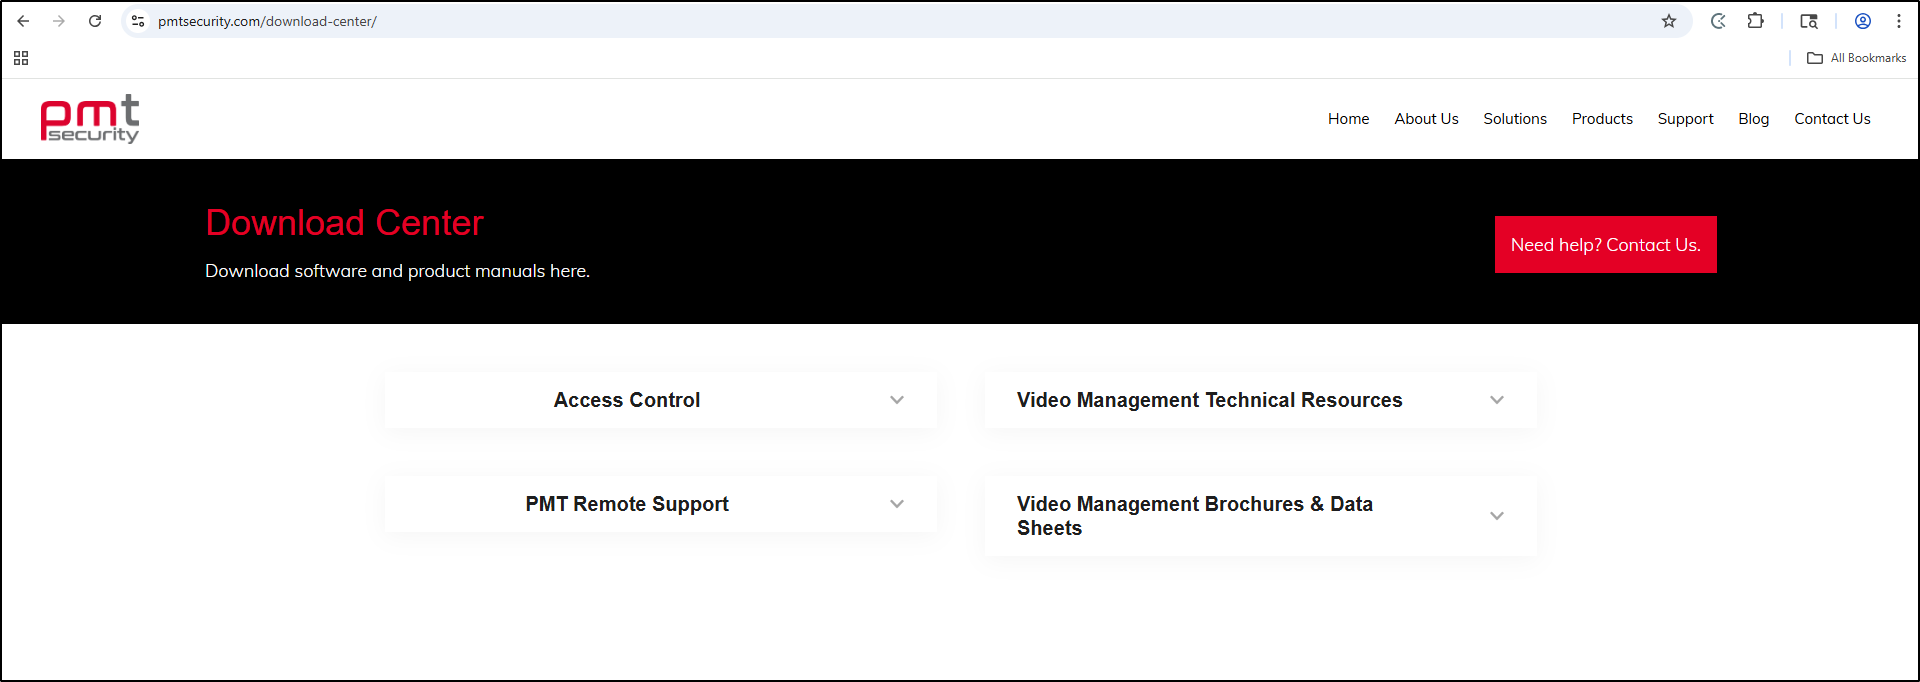
1. Installation: https://pmtsecurity.com/download-center/

     a. Select Video Management Technical Resources arrow.

1-Jun-12-2025-03-40-41-5211-PM

     b. Select Cathexis VMS

2-Jun-12-2025-03-40-41-5202-PM

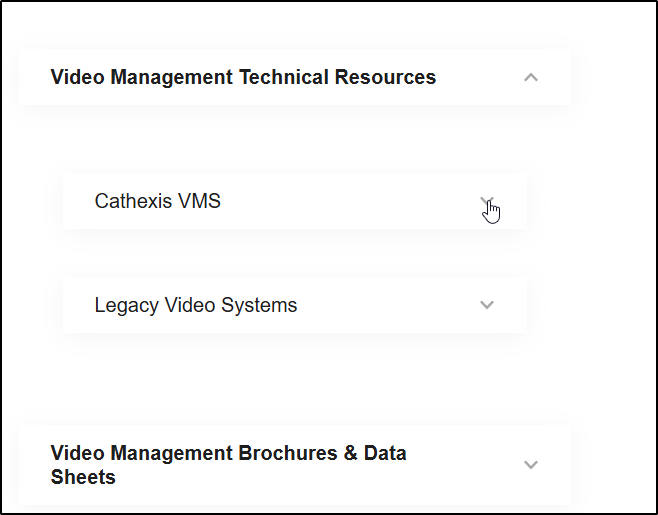
     c. Select the IPTOOL3

3-Jun-12-2025-03-40-41-5211-PM

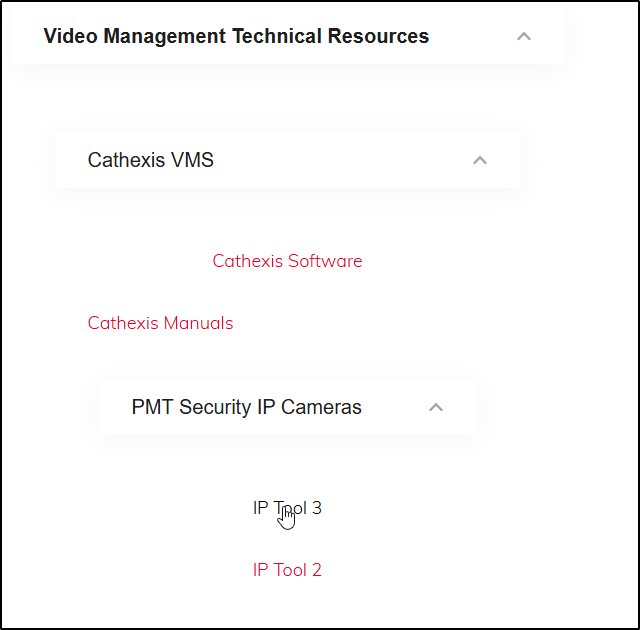
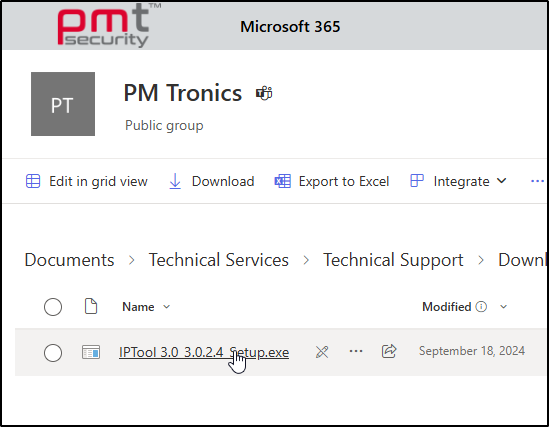
     d. Select the .exe Setup and download

4-Jun-12-2025-03-40-41-5204-PM

2. Network Scan:

Run IPTOOL3 and let it scan your network to detect any IP cameras.

     a. Open IPTool by double clicking or right click and select Open.

5-Jun-12-2025-03-40-41-5202-PM

     b. Once open you can regulate how often the network search is conducted. 

6-Jun-12-2025-03-40-41-5234-PM

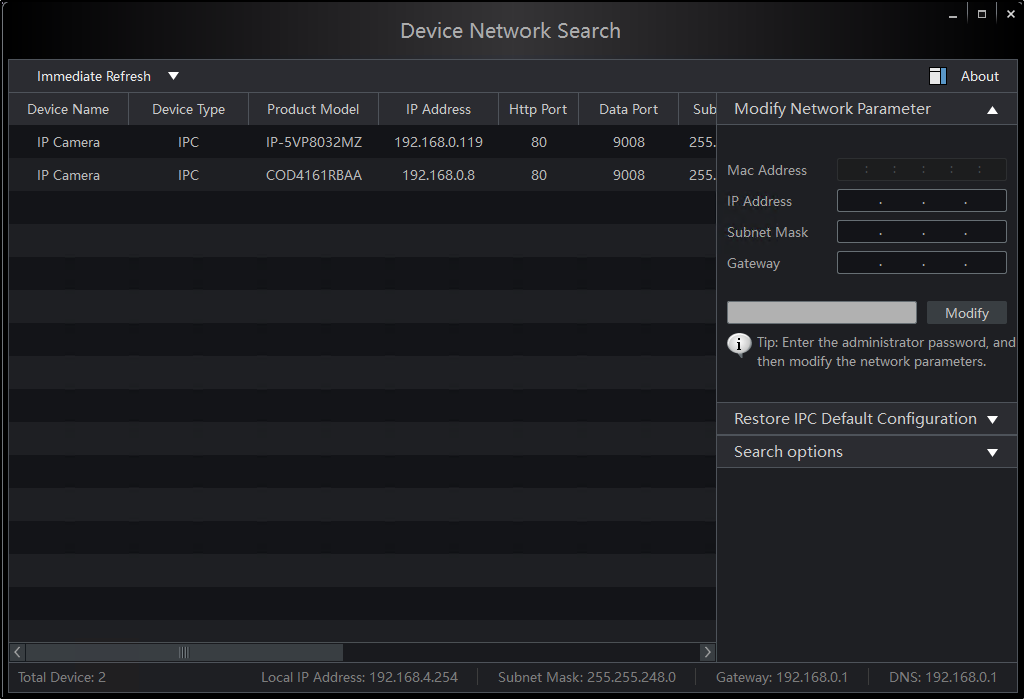
     c. Select the down arrow to adjust the Refresh rate.

7-Jun-12-2025-03-50-52-8897-PM

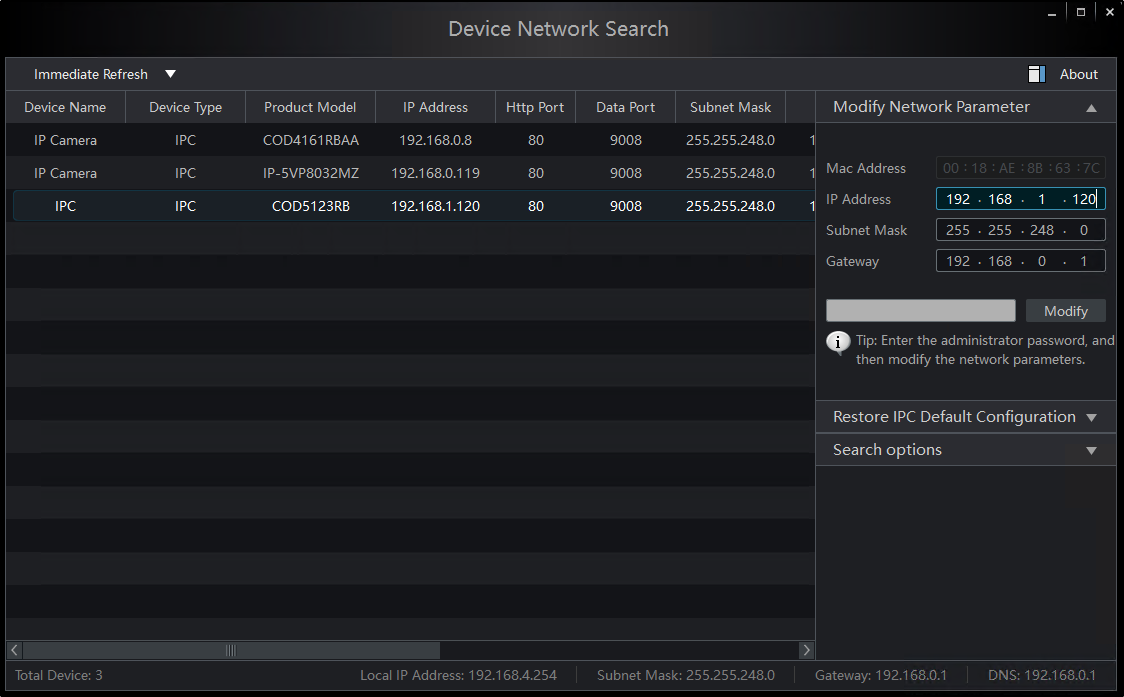
3. Camera Selection:

Once the cameras are detected, you can select the specific camera you want to work with.

     a. Select camera

8-Jun-12-2025-04-07-10-0302-PM

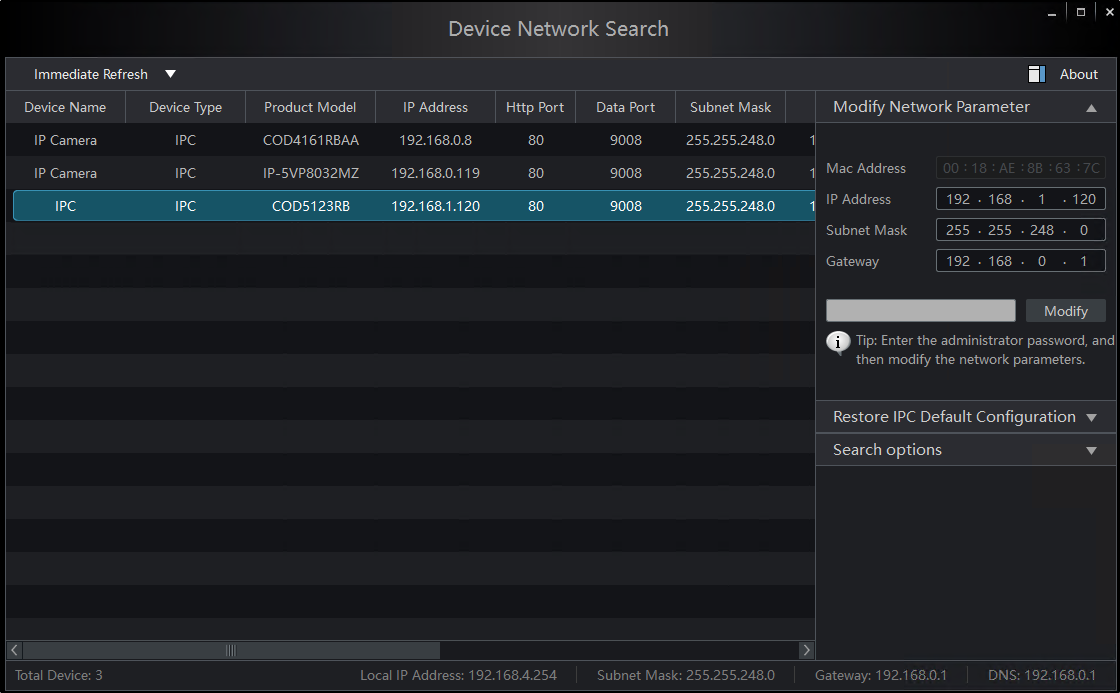
     b. To change the IP Address, Subnet Mask, and Gateway. In the Modify Network Parameter section select each box you want to make changes to.

10-Jun-12-2025-05-11-06-5704-PM

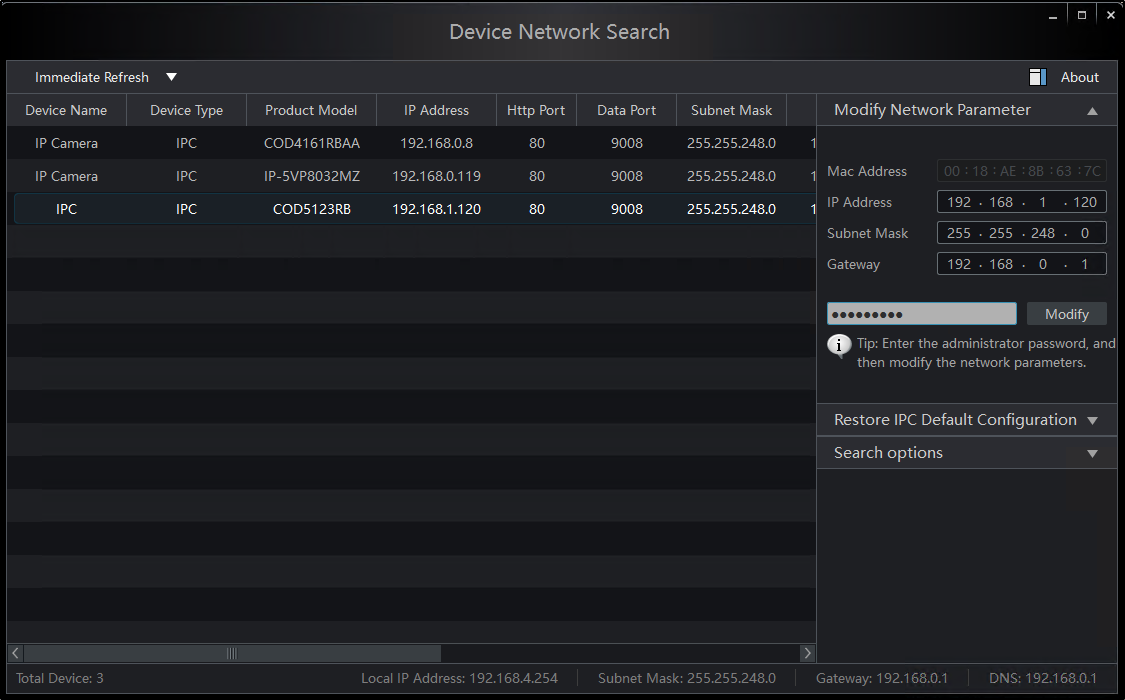
     c. Once you’ve made the necessary changes. Select the grey box and enter the password to your camera then click Modify. 

Default IP for PMT Security Cameras: 192.168.226.201

Default Password for PMT Security Cameras: 123456

11-4

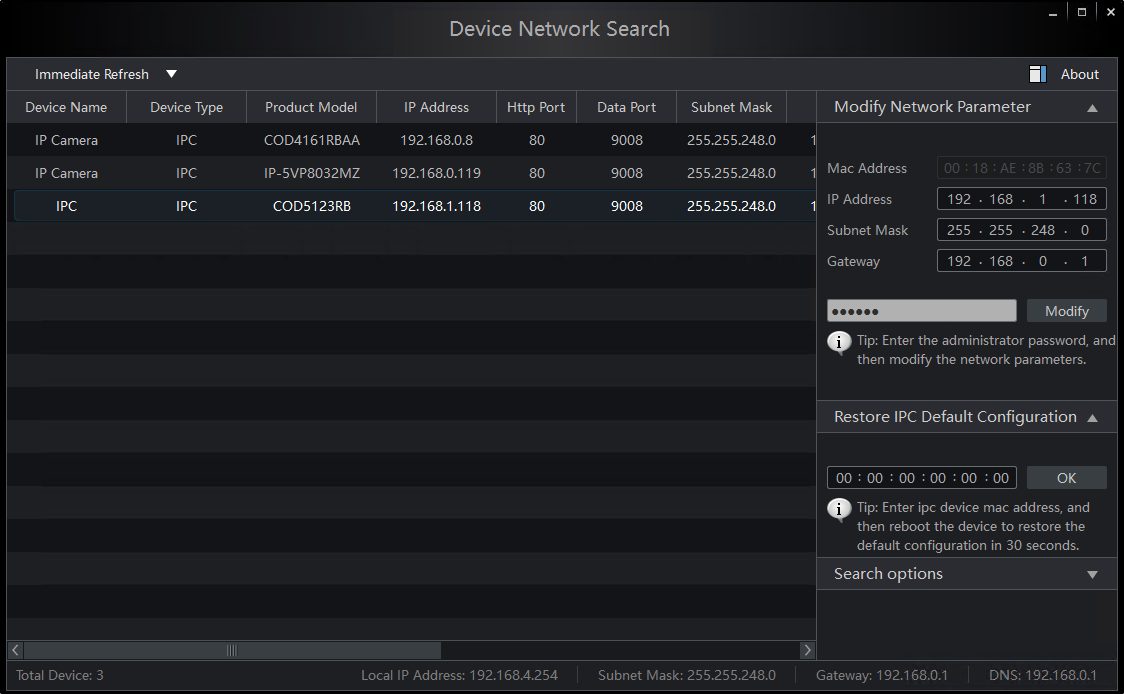
     d. To Restore IPC Default Configuration enter IPC Device mac address then reboot the device within 30 seconds.

14-1

4. Configuration Path:

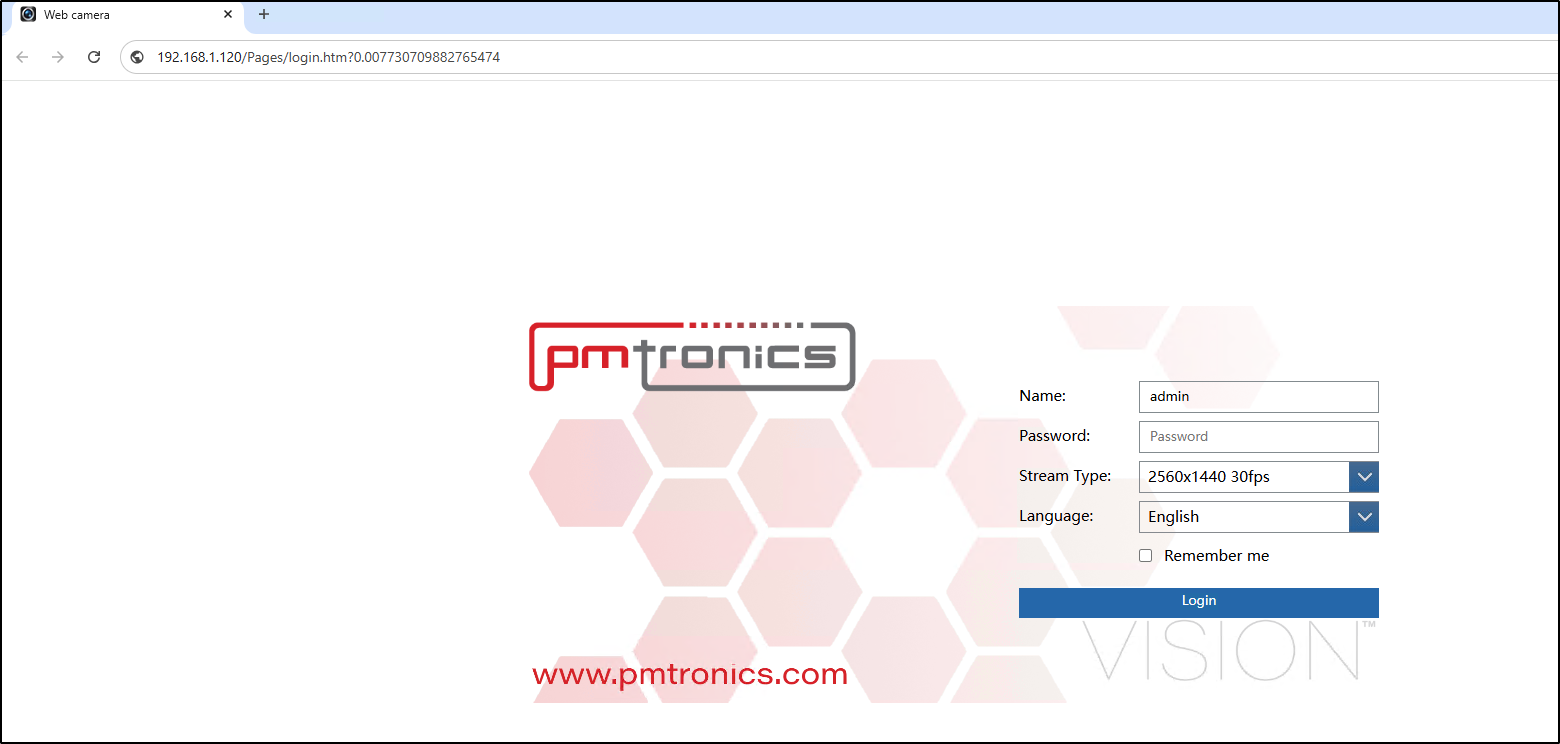
IPTOOL3 provides path to IPC URL.

     a. Double click the Camera

8-Jun-12-2025-04-07-10-0302-PM

     b. It will open in your default Web-Browser. From here you will be able to log into the camera to continue camera configuration before installation in the Video Management System.
9-Jun-12-2025-05-29-11-4691-PM

Submit a Support Ticket

FAQ

General

Technical Bulletins

Access Control

AmanoNet

Nexxus220

Omnia

Omnia Lite

PM Tronics Hardware

Amano Readers and Credentials

Legacy Hardware

Partner Products

Partner Products

Video Management Systems

Cathexis Video (Amano Vision)

AmanoDVMS

Vision

OMNIA DATABASE BACKUP USING SQL 2019

OMNIA Database Backup SQL 2019

This process involves making a backup of the OMNIA Database using Sql Server Management Studio 2019.

OMNIA Database Backup

For SQL Server Management Studio 2019

OMNIA Database Backup

It is essential that regular backups are made and kept on removable media, or on a networked drive.

Storing backups on the local disk will not prevent data loss if the hard drive fails.

To Backup your OMNIA Database:


In the windows search bar. Type SQL Server Management Studio

 Open SQL Server Management Studio
Login using your Login Details

  1. Click Connect
  2. Select Windows Authentication
        Other Possible Logins:
                   User = sysdba   Password = masterkey
                   User = sa           Password = M@sterkey1
  3. Select Optional for Encryption
  4. Select Connect


Expand the Database Folder by clicking on the +
Right Click on OMNIA > Tasks> Back Up…

OMNIA_Tasks_Backups

Click on the Add…

Add_Destination

Select the (…) option.

Locate:     [Drive:] \OMNIA\database\Backups

OR

The location you want to make backups to

Select Destination
Thomas_backup

Enter a name for your backup with a suffix off  .Bak
Select Ok

bak

Select OK

bak

Select your destination and Click OK

Final

Once the backup is successful you will see a backup completed a message.

Your Backup of the OMNIA Database is now Complete.

Submit a Support Ticket

FAQ

General

Technical Bulletins

Access Control

AmanoNet

Nexxus220

Omnia

Omnia Lite

PM Tronics Hardware

Amano Readers and Credentials

Legacy Hardware

Partner Products

Partner Products

Video Management Systems

Cathexis Video (Amano Vision)

AmanoDVMS

Vision

Nexus220 Notifications Configuration/Email Configuration

Nexus220 Notifications Configuration/Email Configuration

How to configure SMTP2GO for use in Nexus220

Nexus220 uses SSL security protocol for email notifications. Most email servers require TLS security protocol.
SMTP2GO will allow SSL security connections.

Go to https://app.smtp2go.com/, Select create free account.

Select the Free Plan, Enter a Name and Create a Password

use an email address for the account,

Confirm your email address and Activate your account.

After you Select Activate Account,

The SMTP 2 Go website will open. You will need to add a Verified Sender.

Select Add a Verified Sender

Select Add a Single User

Add your own email address and select Send verification Email.

Once the Sender Email is Verified, Create an SMTP Username

Go to Sending/SMTP Users and select continue

Select Add SMTP User

Create a Username and Password for the SMTP User.

This username and password will be used in Nexus220.

In the Nexus220 Configuration Page, Enter the Information

Select Add a Single User

The SMTP to go set up is complete

Need further assistance?

Submit a Support Ticket

Submit a Support Ticket

FAQ

General

Technical Bulletins

Access Control

AmanoNet

Nexxus220

Omnia

Omnia Lite

PM Tronics Hardware

Amano Readers and Credentials

Legacy Hardware

Partner Products

Partner Products

Video Management Systems

Cathexis Video (Amano Vision)

AmanoDVMS

Vision

TCP and UDP ports for ImproNet/AmanoNet

TCP and UDP ports for ImproNet/AmanoNet

Ports that AmanoNet uses to Communicate Properly

Ports in AmanoNet are used for various purposes and protocols. Here is a list of TCP and UDP ports along with their corresponding functionalities:

TCP Ports:

– Port 80: Used for HTTP Web Reports.

– Port 443: Used for SSL Web Reports.

– Port 1433: Used for MS SQL.

– Port 3050: Used for Firebird.

– Port 10008: Used for All IP Terminals.

– Port 10500: Used for Discovery.

– Port 11010: Used for Morpho.

– Port 26661: Used for Alarm Viewer.

– Port 26663: Used for Transaction Viewer.

– Port 26665: Used for Messaging Port.

– Port 26667: Used for Door Status Port.

– Port 26668: Used for Engine Status Port.

– Port 26669: Used for Host Validation Port.

– Port 26680: Used for Security Server Port.

UDP Ports:

– Port 10002: Used for EC2 Controller.

– Port 10008: Used for IP Terminals.

– Port 10500: Used for Discovery.

These ports play a crucial role in facilitating communication and data transfer within the AmanoNet system.

Need further assistance?

Submit a Support Ticket

Submit a Support Ticket

FAQ

General

Technical Bulletins

Access Control

AmanoNet

Nexxus220

Omnia

Omnia Lite

PM Tronics Hardware

Amano Readers and Credentials

Legacy Hardware

Partner Products

Partner Products

Video Management Systems

Cathexis Video (Amano Vision)

AmanoDVMS

Vision

Nexus220 Web Reports Using Microsoft Edge

Nexus220 Web Reports Using Microsoft Edge

Nexus220 Web Reports can be viewed using Microsoft Edge with Internet Explorer Mode Enabled

When selecting Web, then Web Home Page in Nexus220, Nexus220 will attempt to launch the Web Reports Home page with the default browser that is configure for the PC Nexus220 is installed on. The Nexus220 Web Home Page was designed to use Internet Explorer. With Internet Explorer not being supported by Microsoft, Microsoft has made Microsoft Edge Browser available with an Internet Explorer Compatibility Function, The Nexus220 Web Home Page will need to be opened and viewed in Microsoft Edge with IE compatibility mode enabled.

Below are the steps to accomplish this:

  1. Open Microsoft Edge.
  2. Click the Settings and More (ellipsis) button in the top-right corner.
  3. Select the Settings option.
  4. Click on Default browser.
  5. Under the “Internet Explorer compatibility” section, turn on the “Allow sites to be reloaded in Internet Explorer mode” toggle switch to enable IE Mode on Edge.
  6. Click the Restart button. Enable IE mode on Edge

If the URL for the Nexus220 Web Home Page does not open after enabling the settings, you can follow the steps below to resolve the issue.

Open website with IE Mode on Edge

To open an incompatible website with IE Mode on Edge, use these steps:

  1. Open Microsoft Edge.
  2. Click the Settings and More (ellipsis) button in the top-right corner.
  3. Click the “Reload in Internet Explorer mode” option. Reload in Internet Explorer mode
  4. (Optional) Right-click the tab and select the “Reload tab in Internet Explorer mode” option.

After you complete the steps, the website should reload in compatibility mode. The option won’t be available in the menu if the feature is not enabled.

If you want to exit IE Mode, use the same instructions, but in step 3, select the “Exit Internet Explorer mode” option.

Need further assistance?

Submit a Support Ticket

Submit a Support Ticket

FAQ

General

Technical Bulletins

Access Control

AmanoNet

Nexxus220

Omnia

Omnia Lite

PM Tronics Hardware

Amano Readers and Credentials

Legacy Hardware

Partner Products

Partner Products

Video Management Systems

Cathexis Video (Amano Vision)

AmanoDVMS

Vision

  • « Go to Previous Page
  • Page 1
  • Interim pages omitted …
  • Page 4
  • Page 5
  • Page 6
  • Page 7
  • Page 8
  • Interim pages omitted …
  • Page 23
  • Go to Next Page »
  • Facebook
  • LinkedIn
  • Twitter

PMT Security

Copyright © 2026 PMT Security, Inc. | All Rights Reserved