• Skip to primary navigation
  • Skip to main content
PMT Security Logo

PMT Security

Advanced Access Control

  • Home
  • About Us
    • Security and Trust
    • Our Partners
    • Our Integrators
  • Solutions
    • Education
    • Retirement & Healthcare
    • Manufacturing
    • Government Facilities
    • Residential
    • Retail Businesses
    • Campgrounds & Outdoor Resorts
  • Products
    • Access Control
      • Control Features
      • Reporting & Monitoring
      • Control Module
      • Digital IO Module
      • Reader Module
      • Readers
    • Video Management
      • Integration
      • Analytics
      • Search & Export
    • Visitor Management
    • Intercom
    • Live Guard Video Monitoring
    • Housings & Pedestals
  • Support
    • Knowledgebase
    • Download Center
    • License Request
    • RMA Request Form
  • Blog
  • Contact Us

Amano Vision

Installing Cathexis Carbon and Adding a new Account

Installing Cathexis Carbon and Adding a new Account

How to Install Cathexis and Add a new Account

Installing Cathexis Carbon and Adding a new Account

Installing Cathexis Carbon

Download Cathexis Carbon from the DOWNLOAD CENTER at PMTSecurity

Read the information.

Click Next.


Read the agreement. Select the option to accept. 

Click Next.


Select the folder into which CathexisVision Carbon will be installed.

Click Next.


Select the Start Menu folder where the Carbon
shortcuts will be placed.
Click Next.


Review the installation settings.
Click Install.


When installation is complete, click Finish.

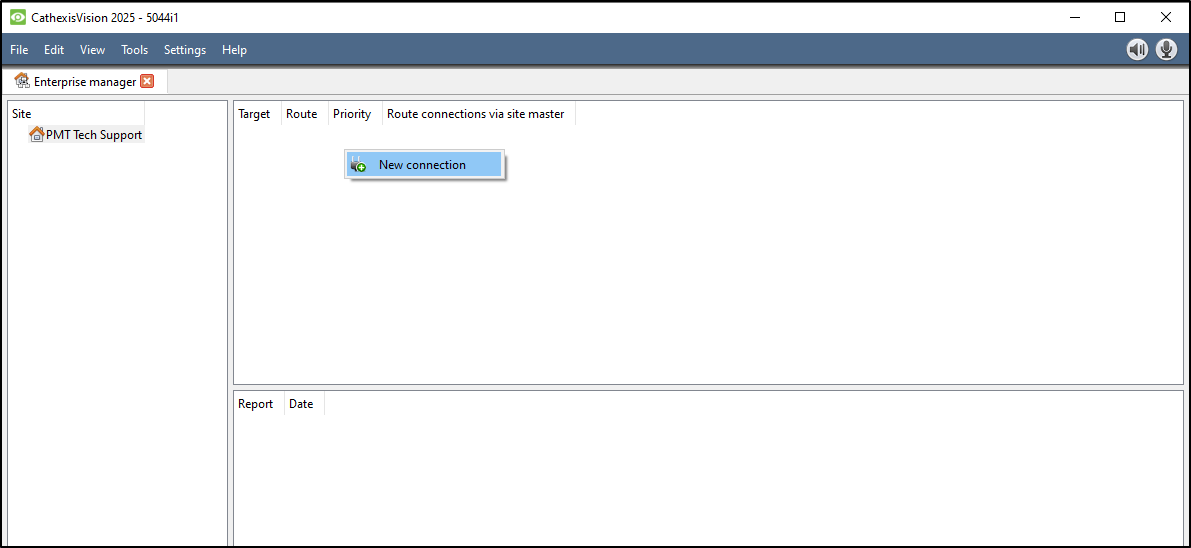
Adding a new Account
 Open Carbon by double clicking the Desktop Icon
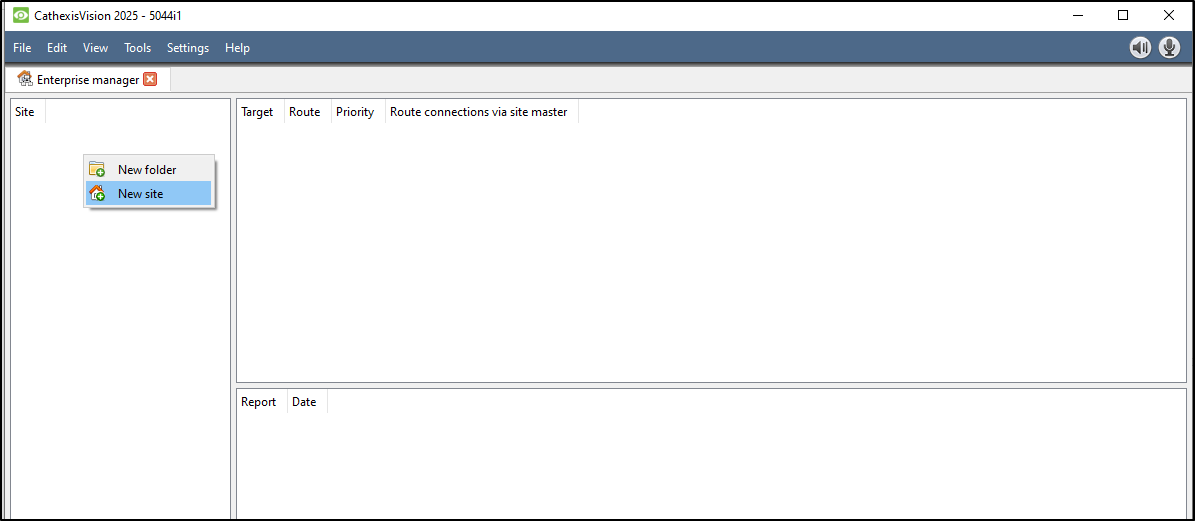
Choose Enterprise/Multi-Site or Site.


There are three types of connection Standard, Discovery, and Port Forward. (Contact Admin for correct type)

Adding a Site: Standard Connection
Type the site Name and Address supplied by the
administrator.
(Address: This is the IP address of the master unit.)
Select the Standard connection type from the drop-down
menu.
Click SAVE (or OK, depending on whether this is an initial
or subsequent login).


 Add a Site: Discovery Connection
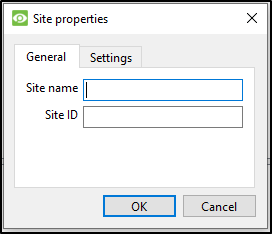
Enter the site Name.
Click the Connection drop-down menu to see options.
Click Discovery. The bottom row will now say “Site ID”.
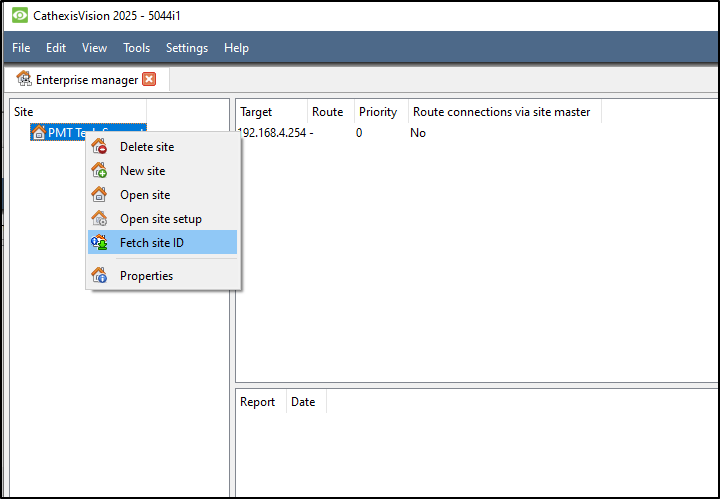
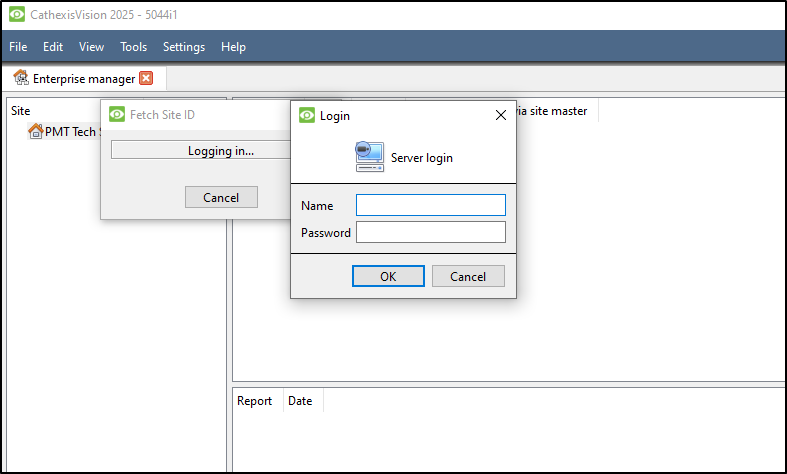
Click the field where the text reads “Get site ID”. A new
dialogue will open (“Setup site discovery”).


Enter the Site address, Login, and Password provided by
the administrator.
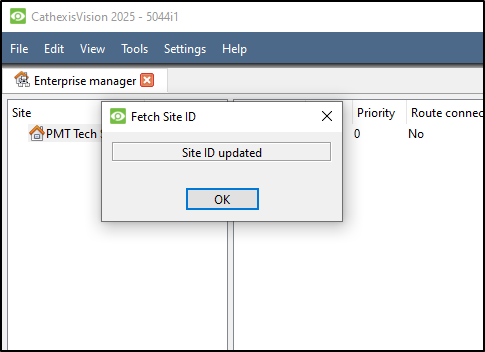
Click Next. The Site name and Site ID will be displayed.


The configured site information will be displayed.
Click OK.


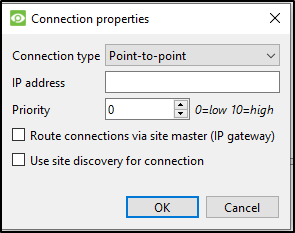
Add a Site: Port Forward Connection
Select Port forward from the drop-down list.
Enter the name in the field.
Enter the address of the site master unit.
Click OK.

Need further assistance?

Submit a Support Ticket

Submit a Support Ticket

FAQ

General

Technical Bulletins

Access Control

AmanoNet

Nexxus220

Omnia

Omnia Lite

PM Tronics Hardware

Amano Readers and Credentials

Legacy Hardware

Partner Products

Partner Products

Video Management Systems

Cathexis Video (Amano Vision)

AmanoDVMS

Vision

Adding Cameras into Cathexis

Adding Cameras into Cathexis

Adding Cameras into Cathexis, creating Database, setting motion recording, analytics, and schedules

Setting up your Cameras

-Open application for CathexisVision

(1-1)

-Login in using:
Name: admin
Password: admin

Right Click on the tab Open tab>Setup
or select Site>Open Tab>Setup

(1-2)

Look for the Icon (1-3)


(1-3)


Setting up your Database
Select Database from the tree. Select New


(2-1)

Select New

(2-2)

Choose Size and Select OK


(2-3)

Select OK

(2-4)

Setting up Cameras 
In the drop tree select Cameras

(3-1)

Right Click on the right side or select new at the bottom of the page.

(3-2)

Scan for the cameras IP


(3-3)

Select which camera you would like to use.

(3-4)

Select the driver that your specific camera uses.

(3-5)

Enter the cameras Login and Password. Select Next >

(3-6)

Name your camera. Select Next >

(3-7)

Select 2 Unused (unicast) to create a second feed for analytics. Then select Yes to enable.

(13-8)

Select Next >

(3-9)

Choose Yes or No and select Next >

(3-10)

Select Enable PTZ if you have a PTZ camera. Select Next >

(3-11)

CAMERA CONFIGURATION

(3-12)

Scheduled Recording

(3-13)

Motion Recording

(3-14)

Analytics Recording

(3-15)

Select Finish

(3-16)

Video Analytics 

Select Video analytics from tree. Select New

(4-1)

New video analytics select Camera, Type, and Algorithm.


(4-2)

Create Zones, Advanced settings, Day/Night, and Triggers. Click OK.

(4-3)

SCHEDULES
Select New

(5-1)

Highlight the day and times you would like to record.

Please call 727-786-1900 if you have any questions on this procedure.

Need further assistance?

Submit a Support Ticket

Submit a Support Ticket

FAQ

General

Technical Bulletins

Access Control

AmanoNet

Nexxus220

Omnia

Omnia Lite

PM Tronics Hardware

Amano Readers and Credentials

Legacy Hardware

Partner Products

Partner Products

Video Management Systems

Cathexis Video (Amano Vision)

AmanoDVMS

Vision

Quick Start Guide for Cathexis Vision Version 2025

Cathexis Quick Start Guide

Quick Start Guide for Cathexis Vision Version 2025

Cathexis Quick Start Guide

  1. Log In
  • Username: admin                                    
  • Password: admin

2. Licensing

        A. Trial License

  • Automatically applied: 2 IP cameras, 48-hour review limit.

    B. Full License Activation
  • Online: Use product key via Tools > Local server licenses.
  • Offline: Generate .rqst file → email to support → upload .pack file.
         If the unit from which the user is performing the licensing does not have internet connection, a .pack file needs to be uploaded. A .pack file is a file that contains all the licensing information for a unit. Getting a .pack file requires 3 steps, outlined below, and covered in more detail in the following sections.
    →    Retrieve a .rqst (request) file from the unit being licensed.
    →    Email the .rqst to support@cathexisvideo.com.
    →    Upload the .pack file once is has been sent.
         To upload the .pack file go to: Tools / Local server licenses / Upload a license .pack file from this server
    →    Select the .pack file from the dialogue that appears.
    →    Click Next.
    The server will now be licensed. For further assistance, contact support@cathexisvideo.com.

3. Create & Connect to a Site

  • Open File> Enterprise Manager:
  • Add Site Name by right clicking in Site, Selecting New Site and Giving the Site a Name, disregarding entering a Site ID
       
       
  • Add Connection (IP of Master NVR) by right clicking in |Target| Route| Priority| Route connection via site master| window and selecting New connection. Use Point-to-Point as Connection Type and Enter the IP address of the Master Server 
  • Fetch Site ID
    Right Click the Site Name and Select Fetch site ID


    Enter User Name and Password 


4. Add & Configure Cameras

  • Go to File> Open site> (Select site you made)
  • Go to Site> Open tab> Setup > Configure Servers > Cameras
  • Use Select new

5. User Management

  • Go to Setup > Users
  • Add users with access levels (1–30)
  • Optional: Enable LDAP integration

6. Recording Setup
        A. Scheduled Recording

  • Setup > Configure Servers > Scheduled Recordings
  • Define schedule, database, framerate
    B. Motion-Based Recording
  • Setup > Configure Servers > Motion Recordings
  • Configure scene type, sensitivity, masks

7. Video Analytics

  • Access via Setup > Configure Servers > Video Analytics
  • Add analytics per camera:
    • Basic, Intermediate, Advanced
    • Object detection, queue length, mask detection, etc.
  • Configure zones, triggers, day/night settings

8. Events & Actions

  • Go to Setup > Configure Servers > Events

Need further assistance?

Submit a Support Ticket

Submit a Support Ticket

FAQ

General

Technical Bulletins

Access Control

AmanoNet

Nexxus220

Omnia

Omnia Lite

PM Tronics Hardware

Amano Readers and Credentials

Legacy Hardware

Partner Products

Partner Products

Video Management Systems

Cathexis Video (Amano Vision)

AmanoDVMS

Vision

Cathexis Video AV (AntiVirus Exceptions)

Cathexis Video AV (AntiVirus Exceptions)

If you are running an Antivirus program on the Cathexis or AmanoVision recorder, make sure to exclude the following from the real-time scanner.

CathexisVideo

Files

C:\Program Files\Cathexis Server\* (entire folder)

Processes

C:\Program Files\Cathexis Server\nvr_integration.exe

C:\Program Files\Cathexis Server\nvr_fsdb.exe

AmanoVision 

Files

C:\Program Files\AmanoVISION Server\* (entire folder)

Processes

C:\Program Files\AmanoVISION Server\nvr_integration.exe

C:\Program Files\AmanoVISION Server\nvr_fsdb.exe

The built-in installer only adds exceptions for Microsoft Windows Defender.  You must manually add third party scanners on your own. 

Need further assistance?

Submit a Support Ticket

Submit a Support Ticket

FAQ

General

Technical Bulletins

Access Control

AmanoNet

Nexxus220

Omnia

Omnia Lite

PM Tronics Hardware

Amano Readers and Credentials

Legacy Hardware

Partner Products

Partner Products

Video Management Systems

Cathexis Video (Amano Vision)

AmanoDVMS

Vision

  • Facebook
  • LinkedIn
  • Twitter

PMT Security

Copyright © 2026 PMT Security, Inc. | All Rights Reserved

  • Privacy Policy
  • Terms of Use
  • Cookie Policy
  • Accessibility
  • Contact Us