How to Set the IP Address of a PMT Security Device by Directly Connecting With a Laptop
When a PMT Security controller cannot be discovered on the network, the issue is often related to an unknown or misconfigured IP address. This situation commonly occurs during initial installation, device replacement, or when equipment is moved between sites.
This guide is written for technicians and system integrators who need a reliable, field-tested method to assign an IP address by directly connecting a controller to a laptop. The steps below reflect standard PMT Security deployment practices and ensure the device can be safely configured and returned to the network without disrupting system communication.
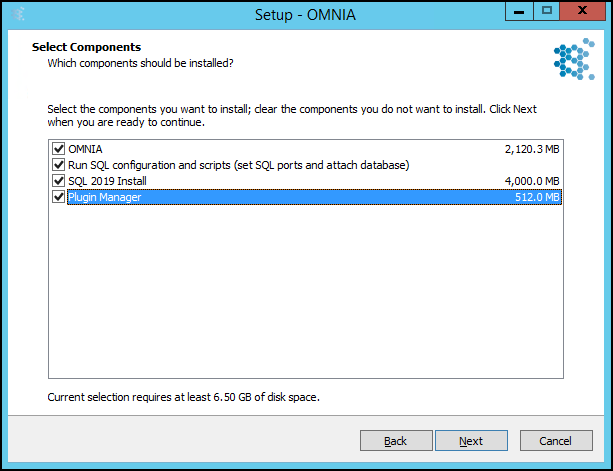
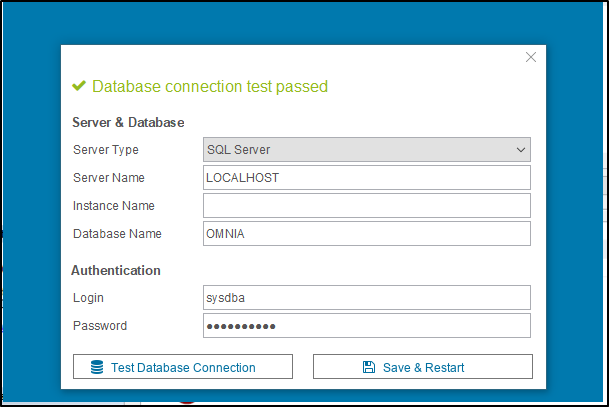
The OMNIA Discovery Tool is required to perform this task. It is included in the OMNIA software suite after installation.
If OMNIA is not yet installed on your laptop, visit our download center and access OMNIA.exe, and install it. After installation, an OMNIA folder will be located on your C: drive.
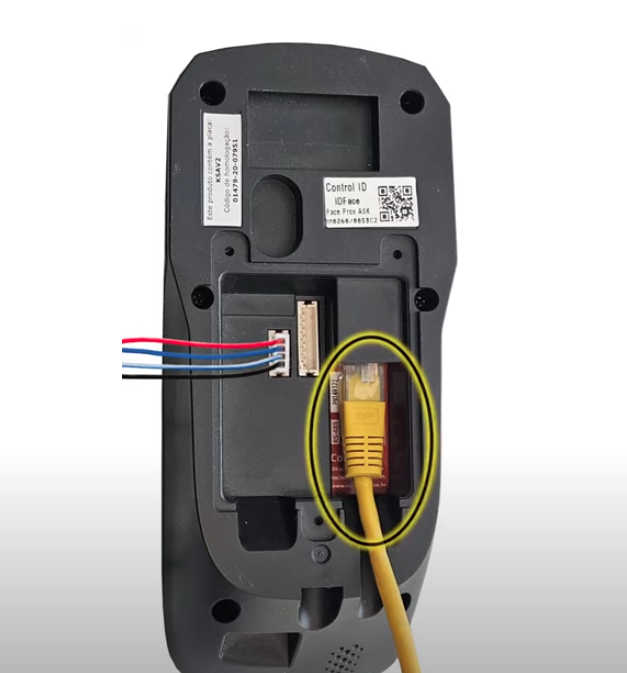
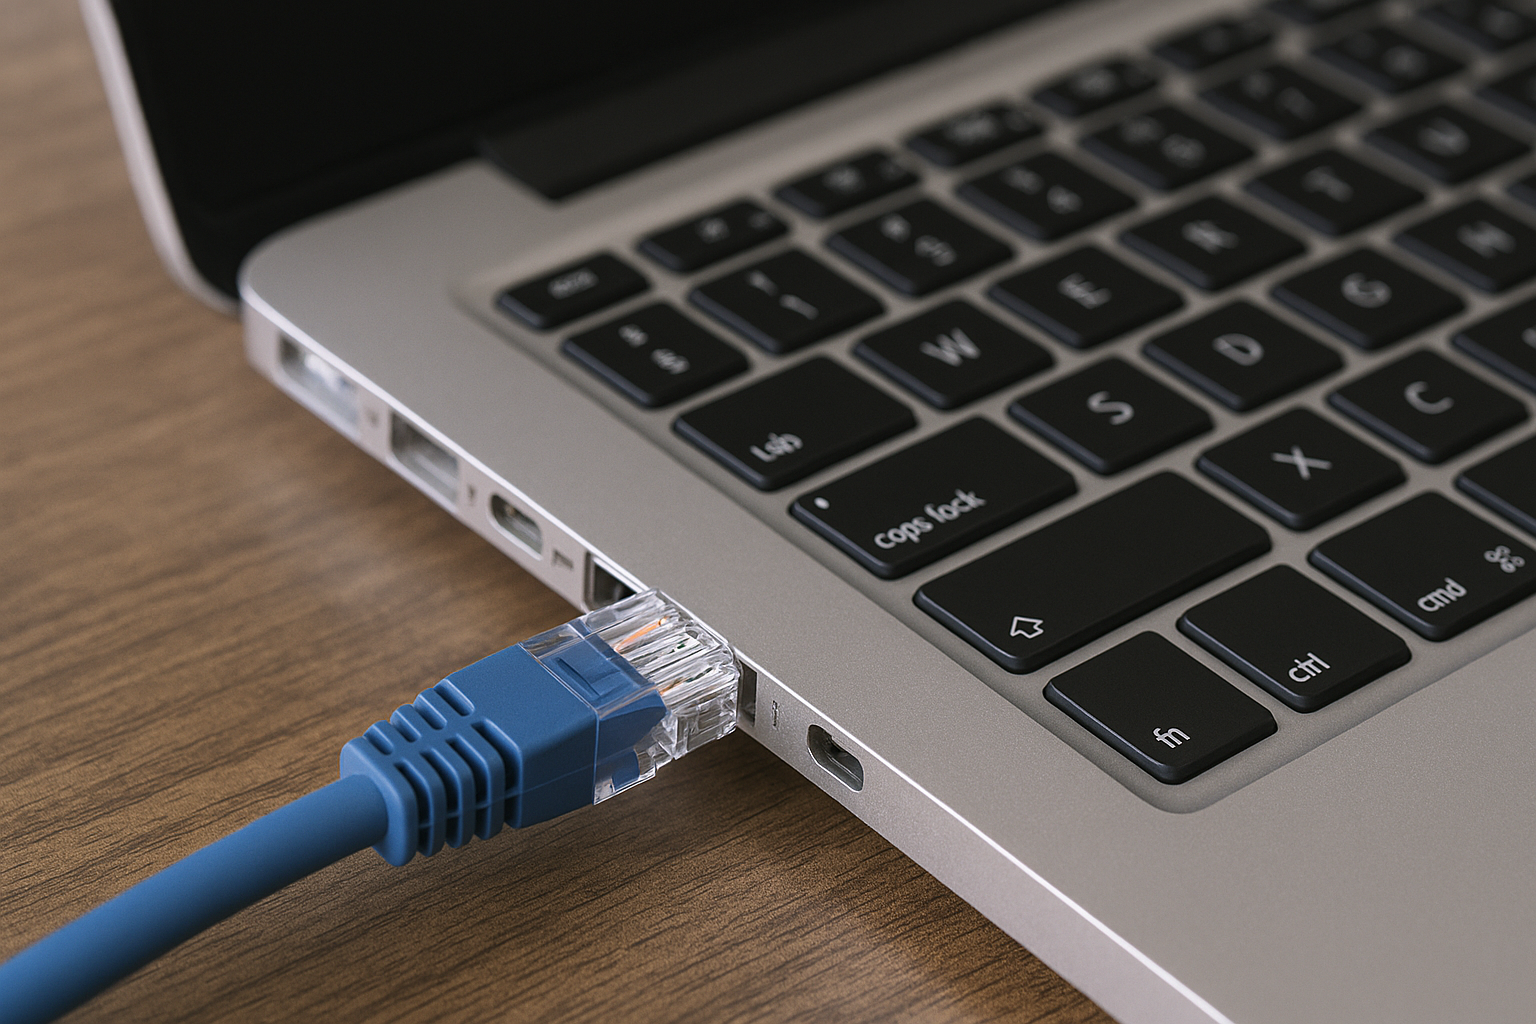
Step 1 — Connect the Device to Your Laptop
- Use an Ethernet cable to connect the access controller directly to your laptop or PC via its Ethernet port.
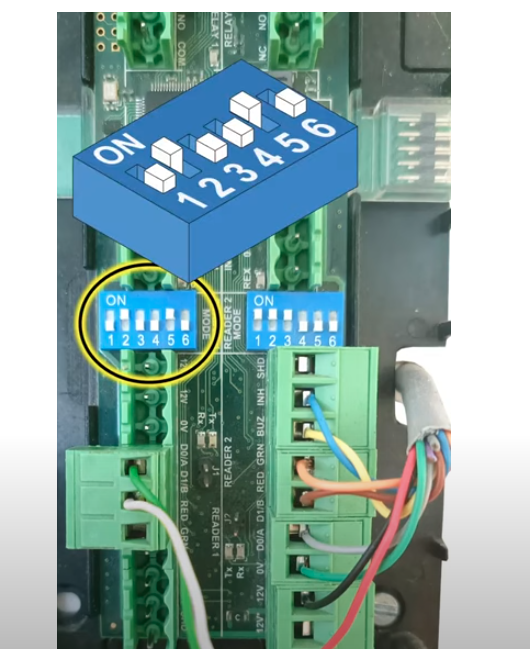
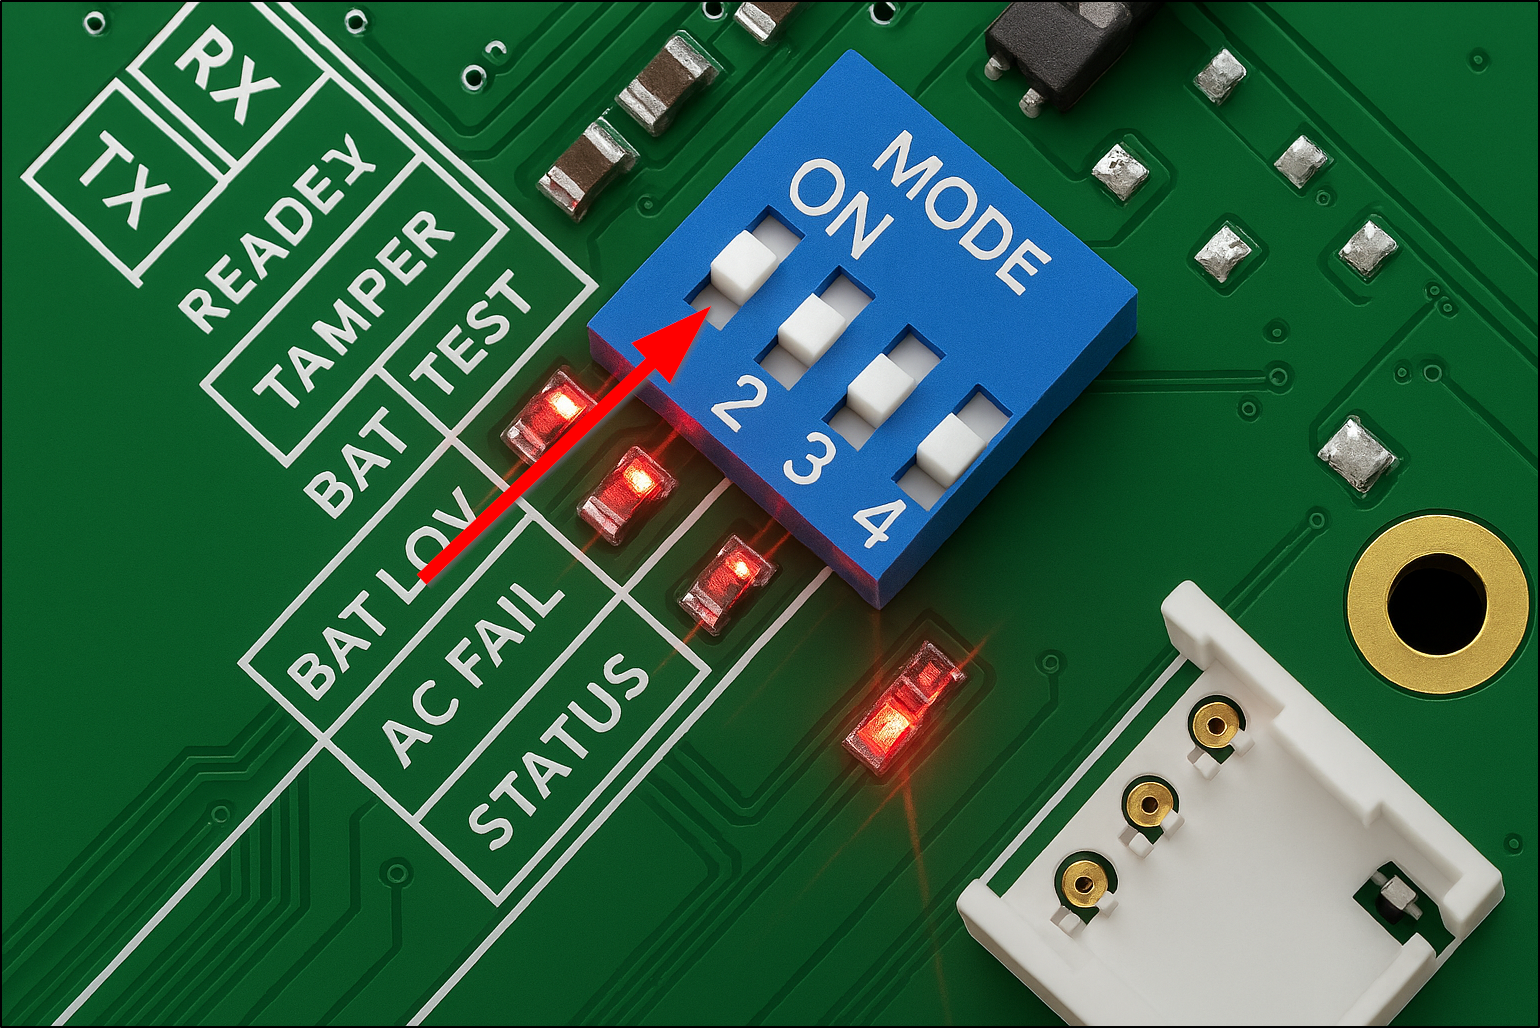
Step 2 — Restore the Controller to Factory Defaults
If the controller’s IP address cannot be found:
- Change Dip switch one to ON, then power cycle the device.
- Keep Dip switch one ON for at least 45 seconds.
- Set dip switch one back to OFF.
After this process, the controller will revert to the default IP address of 192.168.100.1.
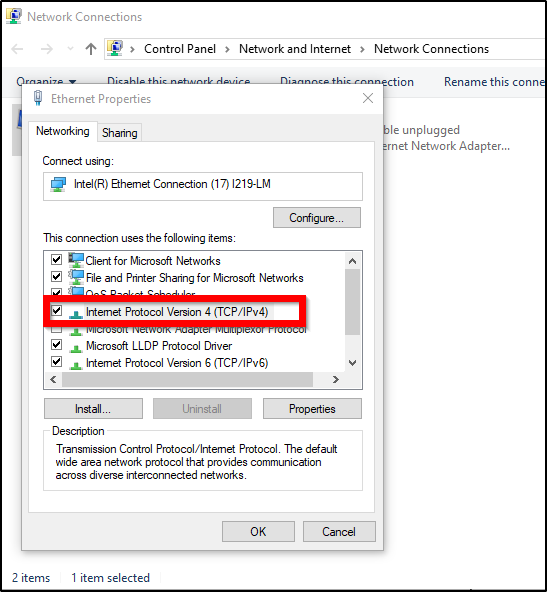
Configure Your Laptop’s Network Settings
If Your Laptop Is Using Automatic IP
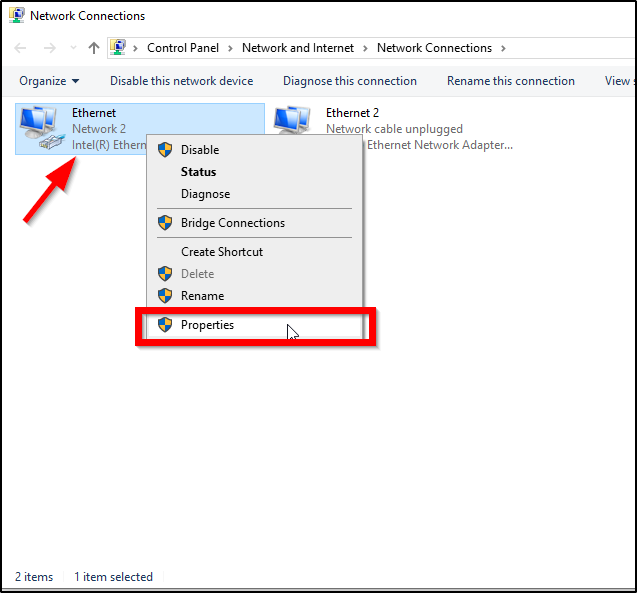
- Open View Network Connections from the Windows search bar.
- Right-click the Ethernet network adapter and select Properties.
- Double-click Internet Protocol Version 4 (TCP/IPv4).
- Choose Use the following IP address.
- Enter an IP address on the same subnet as the device’s default IP (e.g., 192.168.100.x, but not .1).
- Set the subnet mask to 255.255.255.0.
- Enter 192.168.100.1 as the default gateway.
- DNS server can be any valid DNS — for example, 8.8.8.8 and 8.8.4.4.
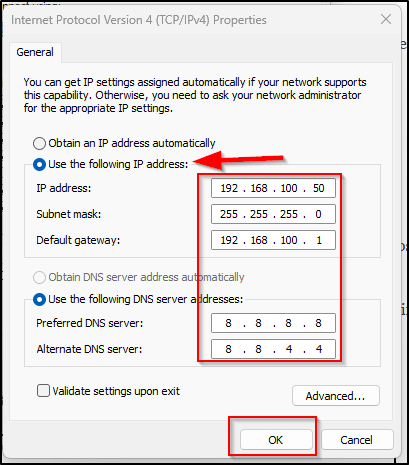
This configuration will not interfere with device communication.
You can confirm your laptop’s settings by opening Command Prompt and typing ipconfig.
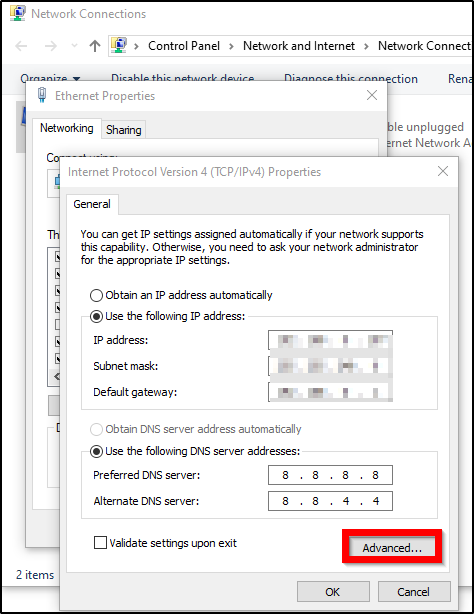
If Your Laptop Already Uses a Static IP
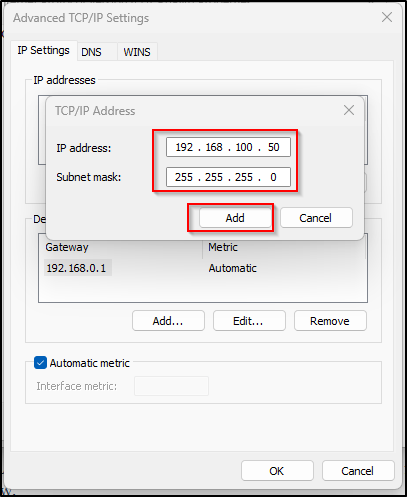
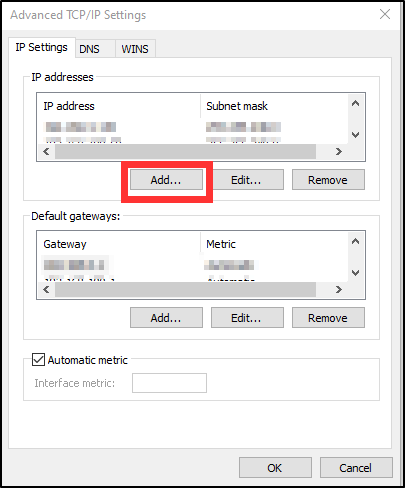
- In the IPv4 Properties window, select Advanced….
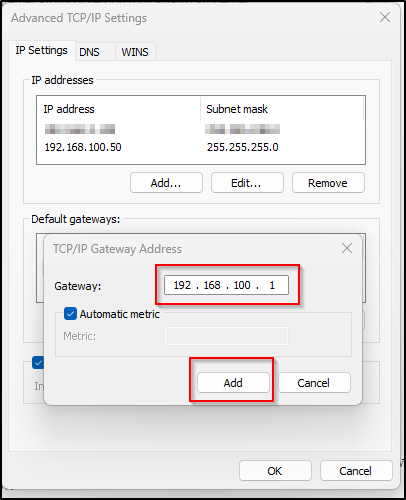
- Under the IP addresses section, click Add….
- Add an IP address in the 192.168.100.x range (again, not .1).
- Set the subnet mask to 255.255.255.0.
- Use 192.168.100.1 as the gateway address.
Close both windows once the new address has been added.
If Your Laptop Already Uses a Static IP
- In the IPv4 Properties window, select Advanced….
- Under the IP addresses section, click Add….
- Add an IP address in the 192.168.100.x range (again, not .1).
- Set the subnet mask to 255.255.255.0.
- Use 192.168.100.1 as the gateway address.
Close both windows once the new address has been added.
Use the OMNIA Discovery Tool
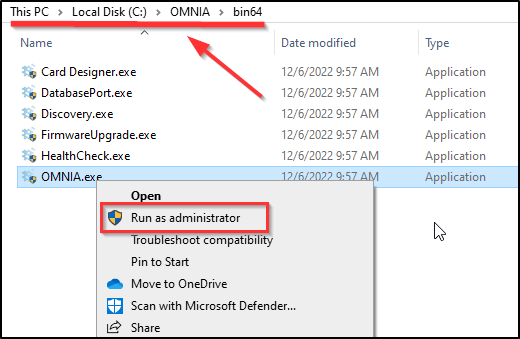
- Navigate to: C:\OMNIA\bin64
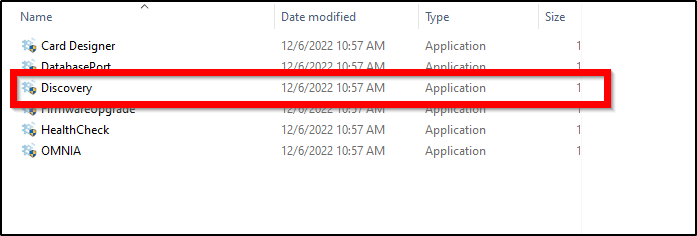
- Open the Discovery Tool.
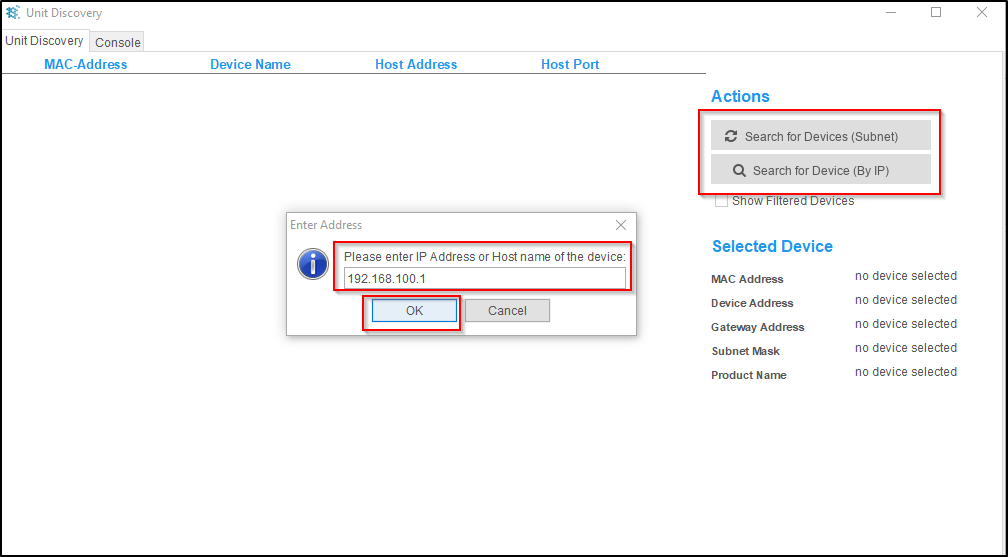
- Choose either:
- Search for Devices (Subnet) — automatically scans the network, or
- Search for Device (By IP) — enter 192.168.100.1 (the default) and click OK.
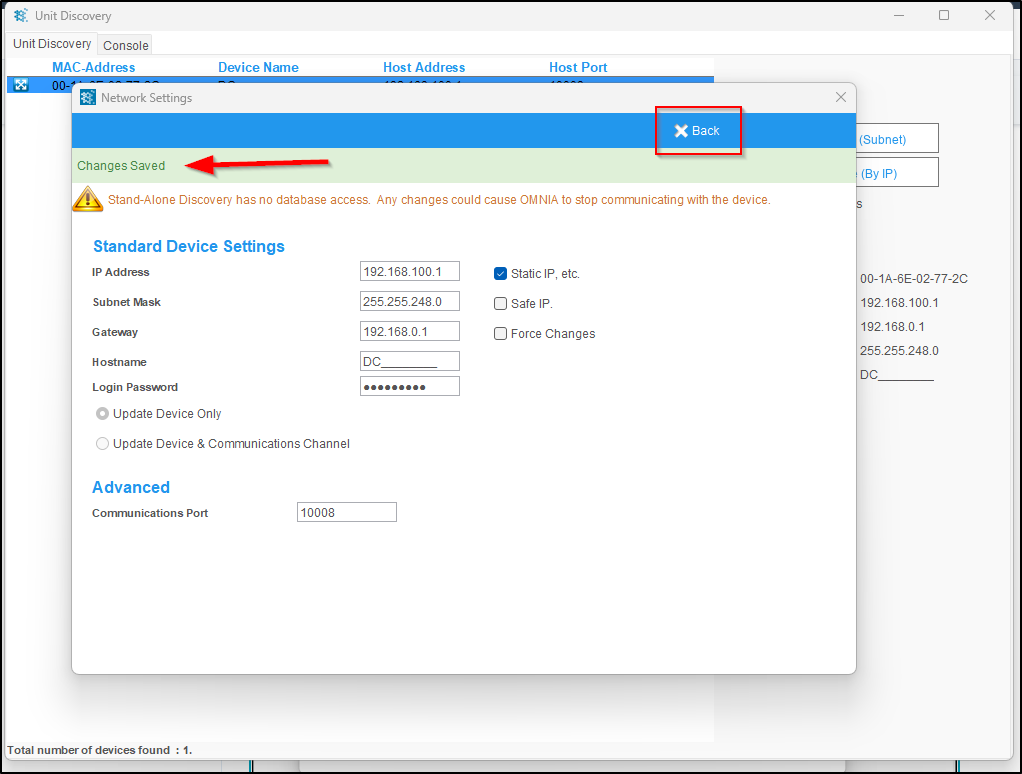
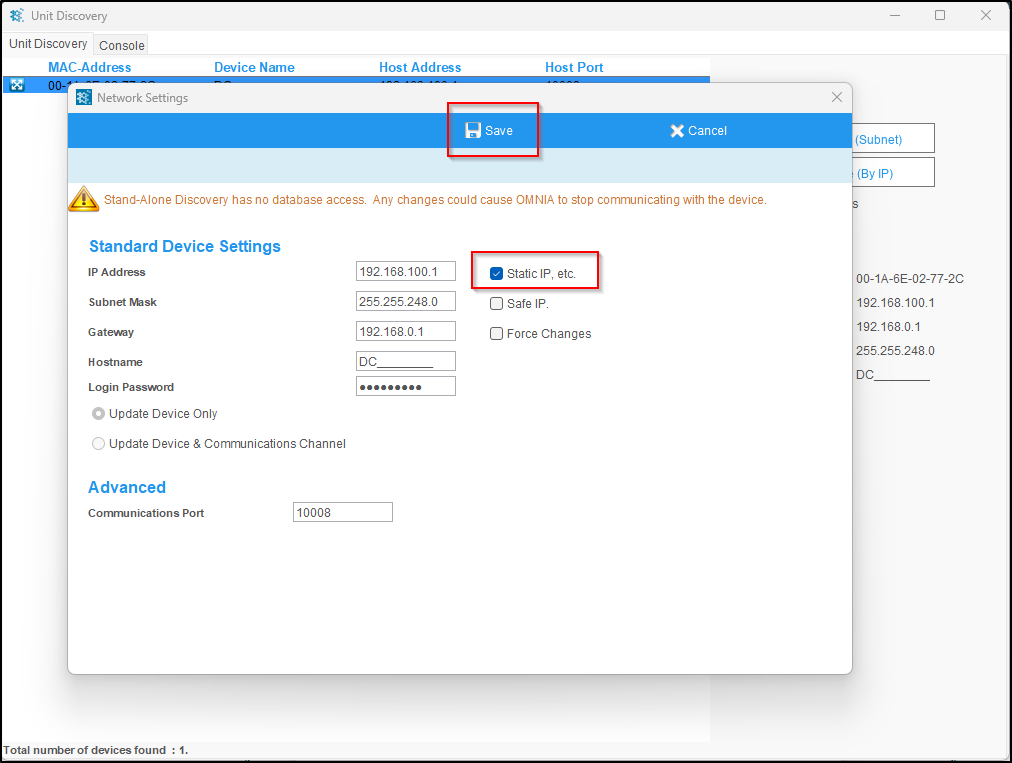
- When the device appears in the results, double-click it to open its network settings.
- Set the following:
- Static IP
- Desired IP Address
- Subnet Mask
- Gateway
- Click Save — you will see a confirmation message.

Important Notes
- Do not select Safe IP — this setting limits communication only to the laptop and prevents network access.
- Enter the correct subnet mask and gateway — incorrect values can prevent the device from communicating properly once it is placed back on the network.
What’s Next?
Once the device’s IP configuration has been saved:
- Proceed with system integration or software setup
- Install the device on your network
Frequently Asked Questions (FAQs)
If the device has an unknown, incorrect, or unreachable IP address, it may not respond to network discovery tools. In these cases, a direct laptop connection is required to manually assign a valid IP address.
Yes. The OMNIA Discovery Tool is included with the OMNIA software installation and is required to locate the device and update its network settings.
Safe IP restricts communication to the local laptop only. This setting should not be used when configuring a device for normal network operation.
After restoring the controller to factory defaults using dip switch 1, the device will use the default IP address 192.168.100.1..
Use masterkey when prompted in the OMNIA Discovery Tool.
Your laptop must be set to an IP address on the same subnet as the controller, such as 192.168.100.x (excluding .1), with a subnet mask of 255.255.255.0.
Need further assistance?