• Skip to primary navigation
  • Skip to main content
PMT Security Logo

PMT Security

Advanced Access Control

  • Home
  • About Us
    • Security and Trust
    • Our Partners
    • Our Integrators
  • Solutions
    • Education
    • Retirement & Healthcare
    • Manufacturing
    • Government Facilities
    • Residential
    • Retail Businesses
    • Campgrounds & Outdoor Resorts
  • Products
    • Access Control
      • Control Features
      • Reporting & Monitoring
      • Control Module
      • Digital IO Module
      • Reader Module
      • Readers
    • Video Management
    • Visitor Management
    • Intercom
    • Live Guard Video Monitoring
    • Housings & Pedestals
  • Support
    • Knowledgebase
    • Download Center
    • License Request
    • RMA Request Form
  • Blog
  • Contact Us

OMNIA

How to request a license when upgrading OMNIA.

How to request a license when upgrading OMNIA.

This is the process to request an OMNIA Version 5 and higher license when upgrading.

How to request a license when upgrading OMNIA.


-Licensing Tool
Install the OMNIA Licensing Tool at PMTsecurity.com 
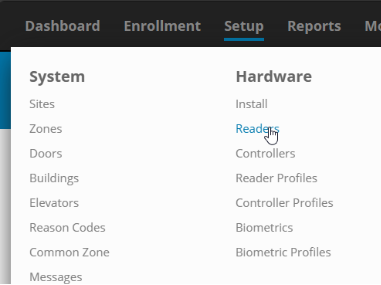
Click: Support

Click: Download Center

Select: Access Control

Select: OMNIA

Select: OMNIA Software

Select: OMNIA License Tool

Right click on the .exe file and Select: Download

Right Click and download as Administrator 

Select: Next

Select: “I accept the agreement” then click: Next

Select: Next

Select: Install


You will see the download as shown below.

Select: Finish

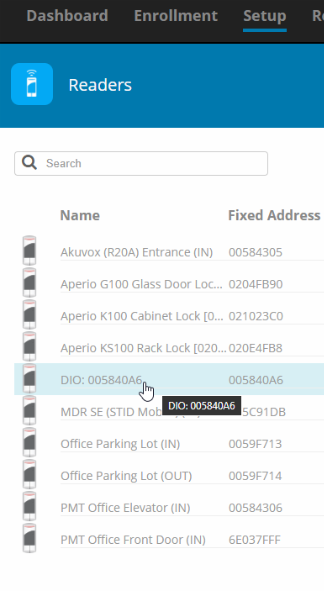
Once the Licensing Tool has finished downloading Open File Explorer. 

Open: This PC ► Windows (C:) ►OMNIA ►License Tool Then Select the Application Licensing Tool

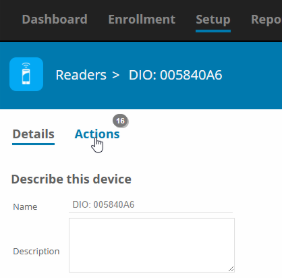
Confirm your database credentials.

Select: Continue

Select: Next

The license you are requesting will be associated with the server you make the request from.

Select OK


Select: Next

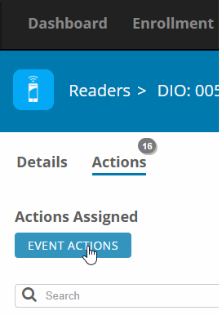
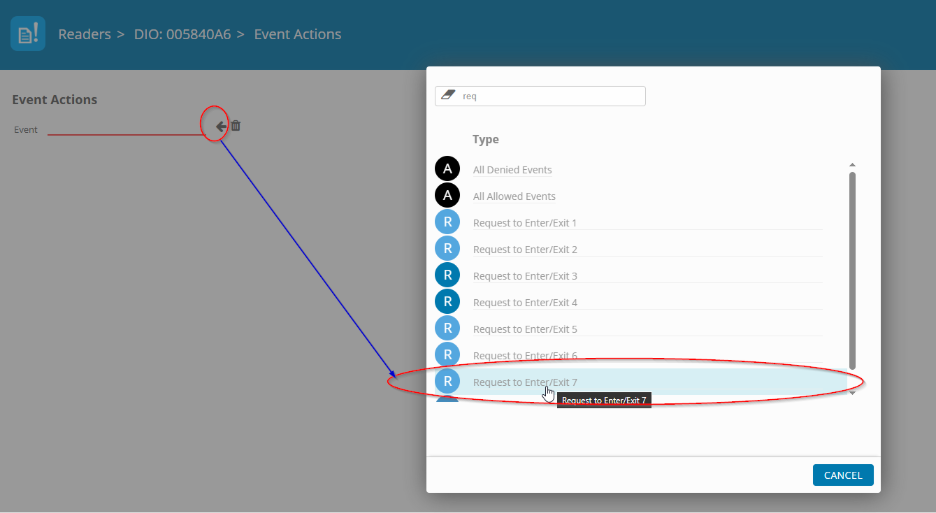
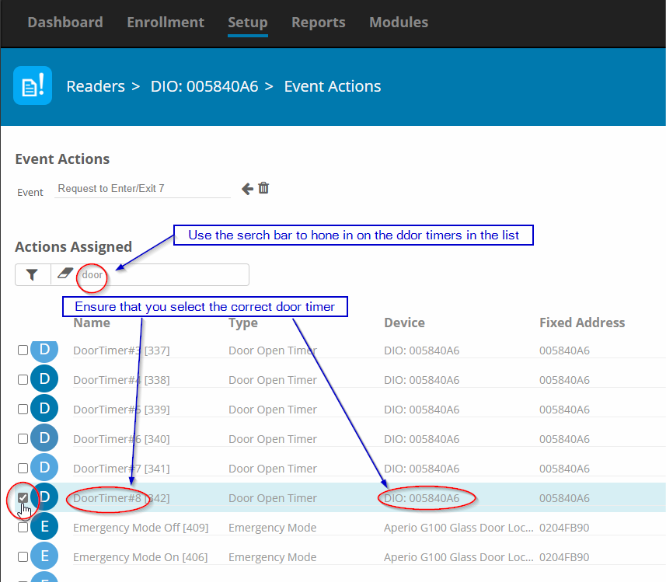
If you have Unlicensed Devices, they will appear in this section. 
Select: Next

Select: Request License


Take note of the recommended software as shown below. Example- (APU935)
Select: Apply

-Get Machine ID

Go to the download center at PMTSecurity.com.


Select: Access Control by clicking the down arrow. 


Select: OMNIA.


Select: OMNIA Utilities


Look for OMNIA License Utility (All Versions)


Download and Extract the GetMachine_ID UUID – NO_WMIC.zip


After downloading the zip folder. Right click and select Extract All… Remember the saved location of the extraction. 
 

Open the Extracted Folder


Select: get_machine_id


Once you run the file. It will show you the UUID and Machine_id. 


This will also create file that you attach to the license request. 


-OMNIA License Request Form

Complete the form that is show below. 


Example for the First four lines. 


Example for the next four lines.


Click the down arrow. A list of availableible licenses will populate.


From the list, look back to the Licensing tool to see what was recommended.

From the Machine ID install and running the .exe upload the machine_id file. 

Choose File and select the machine_id to upload. 

Fill out any secondary information and Click Submit.

Need further assistance?

Submit a Support Ticket

Submit a Support Ticket

FAQ

General

Technical Bulletins

Access Control

AmanoNet

Nexxus220

Omnia

Omnia Lite

PM Tronics Hardware

Amano Readers and Credentials

Legacy Hardware

Partner Products

Partner Products

Video Management Systems

Cathexis Video (Amano Vision)

AmanoDVMS

Vision

OMNIA CSV Imports 

OMNIA CSV Imports 

How to import Tagholders into OMNIA with a .CSV file

OMNIA CSV Imports 

The OMNIA application provides a simple CSV import utility that can be used to import tagholders, vehicles and visitors. 

  1. Create a CSV file with headers and required data. A list of fields available for import can be seen in the table below. 
  2. The minimum needed data to import is First Name, Last Name, and ID Number 
Birthday Fax (H) Postal Address (W) 
Company Fax (W) Second Name 
Department First Name Street Address (H) 
Device Serial No Gender Street Address (W 
Driver’s License No ID Number Suffix 
Email (H) Last Name Title 
Email (W) Mobile Number Vehicle Color 
Email Address Name of person visiting  
Employee No Position  
Employer Postal Address (H) 
 

CSV Document should resemble this: 

  1. Go to the OMNIA Server Application and select the TOOLS tab: 

Click the ‘Browse’ button and browse to your saved CSV file and select the file: 

The Browse box should now show the path to your CSV file. 

  1. Move down to Step 2: Column Mapping, before doing anything else, create a New Profile Name. In the left of the table, you will see the column headers from you CSV file, we now need to map those to fields in the database that we want to populate with the import. 

Map the source to destination by clicking on the red DESTINATION rows on the right, these are drop-downs that you can use to map your CSV source to the correct field in the database, save the profile by clicking the save button: 

The saved profiles will be available for subsequent imports using the same .CSV file.

  1. Move down to Step 3: Process File, press the Process button  

Review the summary at the bottom to confirm that the import was successful: 

  1. Errors or failures are usually caused by the use of special characters, extra spaces before or after records, lines between records or mismatches between source and destination mapping. 

Need further assistance?

Submit a Support Ticket

Submit a Support Ticket

FAQ

General

Technical Bulletins

Access Control

AmanoNet

Nexxus220

Omnia

Omnia Lite

PM Tronics Hardware

Amano Readers and Credentials

Legacy Hardware

Partner Products

Partner Products

Video Management Systems

Cathexis Video (Amano Vision)

AmanoDVMS

Vision

Basic Setup Guide:  Akuvox

Akuvox R20A Doorphone and C315 Indoor monitor 

Basic Setup Guide:  Akuvox

Akuvox R20A Doorphone and C315 Indoor monitor 

How to Configure the Akuvox R20A and C315 Indoor Monitor

Basic Setup Guide:  

Akuvox R20A Doorphone and C315 Indoor monitor 

Akuvox R20A Doorphone 

  1. Connect the unit to the network, using a web-browser, browse the R20A device homepage by typing the IP address into the browser address bar, you will be required to log in.  

Default credentials are user: admin, password: admin 

  1. On first login, you will be required to change the default password. 

The password must be at least eight characters long containing one uppercase letter, one lowercase letter, and one digit.  

ENSURE THAT YOU RECORD THE NEW PASSWORD. 

  1. Browse to NETWORK \ BASIC and set the unit to use a STATIC IP, fill in the IP information as required or as provided by the customer. 
  1. Set your timezone: Go to PHONE \ TIME \ LANG and set the timezone. 

Akuvox C315 Indoor monitor 

  1. On power-up, select ‘ETHERNET’ or ‘WIRELESS’ depending on your needs and run through the setup wizard. Be sure to uncheck the ‘DHCP’ box. Choose a theme and tap ‘DONE’ 
  1. Connect the unit to the network, using a web-browser, browse the monitor homepage by typing the IP address into the browser address bar, you will be required to log in.  

Default credentials are user: admin, password: admin 

  1. Browse to SECURITY \ BASIC and change the admin password. 

The password must be at least eight characters long containing one uppercase letter, one lowercase letter and one digit.  

ENSURE THAT YOU RECORD THE NEW PASSWORD. 

Connecting the doorphone and monitor 

  1. Log into the doorphone web interface, browse to INTERCOM \ BASIC and under the first box in the GROUP CALL NUMBER(LOCAL) insert the IP address of the monitor, click SUBMIT to save changes. 
  1. Log into the monitor web interface, browse to CONTACTS \ LOCAL CONTACTS and under CONTACT SETTINGS add a name for the doorphone under NAME, in the NUMBER 1 box, insert the IP address of the doorphone, click ADD. 
  1. Set your timezone: Go to PHONE \ TIME \ LANG and set the timezone. 

Other Things to do… 

  1. Send the doorphone video stream to your Cathexis VMS system: 
  1. In a web browser open the doorphone web interface and browse to INTERCOM \ RTSP, set a username and password and ensure RTSP is checked at the top. 
  1. Log into a setup tab in Cathexis and add the RTSP stream as a camera feed. 
  1. Use the doorphone built-in card reader as a reader in your OMNIA system 
  1. Follow the wiring guide provided in the box with the doorphone. 
  1. Browse to INTERCOM \ WIEGAND, set WIEGAND DISPLAY MODE to RAW, set WIEGAND CARD READER MODE to WIEGAND-26, set WIEGAND TRANSFER MODE to OUTPUT, click SUBMIT. 

Need further assistance?

Submit a Support Ticket

Submit a Support Ticket

FAQ

General

Technical Bulletins

Access Control

AmanoNet

Nexxus220

Omnia

Omnia Lite

PM Tronics Hardware

Amano Readers and Credentials

Legacy Hardware

Partner Products

Partner Products

Video Management Systems

Cathexis Video (Amano Vision)

AmanoDVMS

Vision

Setting I/O up with Request to Exit and Door timers 

Setting I/O up with Request to Exit and Door timers 

How to use Input/Output Hardware for Request to Exit and Door Open Sensor Timers

Setting I/O up with Request to Exit and Door timers 

First, we need to set up your REQUEST TO ENTER/EXIT (RTE) input on the I/O module. 

  1. Go to SETUP \ READER PROFILES: 
  1. Select the READER PROFILE that your I/O module resides in: 
  1. Go to INPUTS and click ADD INPUT: 
  1. Give the input a descriptive name and then click on the arrow at the bottom in order to select the type of input that you want to set up, in this case we will select REQUEST TO ENTER/EXIT BUTTON-ASSIGNED TO ALL: 
  1. Select the associated input, in this case we will use input 7 to connect our RTE button to the I/O Mdule. 

Save. 

You can now see your Request to exit listed under Inputs: 

  1. Now, add your door sensor with the same procedure, but instead of ‘Request to Exit’ Select ‘Door Open Sensor – Assigned to all’ 
  1. Select the input that is going to have the door sensor connected to it: 

Remember to save: 

You can now see your door sensor listed under Inputs 

  1. Go to SETUP \ READERS 

Find your I/O module in the list and click on it: 

We are now going to associate the REQUEST TO ENTER/EXIT with a DOOR TIMER. 

  1. Go to ACTIONS 
  1. Click on EVENT ACTIONS: 
  1. In the new view, click on the arrow and then in the pop-up, select the RTE input that you previously set up. In this example we used INPUT 7 when we set up the RTE. 
  1. In the new view, find the DOOR TIMER that we want to associate with the REQUEST TO ENTER/EXIT that we previously set up. Because the list can be long, it is advised that you use the search bar to narrow the view: 

Click BACK to save: 

You have now successfully set up a RTE and associated it with a DOOR TIMER. 

Need further assistance?

Submit a Support Ticket

Submit a Support Ticket

FAQ

General

Technical Bulletins

Access Control

AmanoNet

Nexxus220

Omnia

Omnia Lite

PM Tronics Hardware

Amano Readers and Credentials

Legacy Hardware

Partner Products

Partner Products

Video Management Systems

Cathexis Video (Amano Vision)

AmanoDVMS

Vision

Adding a New Department in OMNIA

Adding a New Department in Omnia

Adding Different Departments

Adding a New Department in Omnia

Adding Different Departments.

To add a Department start by selecting Enrollment to open the dropdown menu.

pic 1

Under categories select Department.

pic 2

This is where you can see Departments that have already been created or to make a new one. 

pic 3

On the right of the page you will see a blue circle with a “plus” this is how you add another department. Select the Plus

pic 4

Enter the name of the Department you would like to add. For example, “I have entered IT Dept”.

pic 5

Once you have finished a green circle with a check mark will populate. To save select the check mark. If you are not ready to save select the red circle with a circle back icon.

pic 6

If you have made a save and are unsatisfied you can always delete it after.
pic 8

Need further assistance?

Submit a Support Ticket

Submit a Support Ticket

FAQ

General

Technical Bulletins

Access Control

AmanoNet

Nexxus220

Omnia

Omnia Lite

PM Tronics Hardware

Amano Readers and Credentials

Legacy Hardware

Partner Products

Partner Products

Video Management Systems

Cathexis Video (Amano Vision)

AmanoDVMS

Vision

  • Page 1
  • Page 2
  • Page 3
  • Interim pages omitted …
  • Page 13
  • Go to Next Page »
  • Facebook
  • LinkedIn
  • Twitter

PMT Security

Copyright © 2026 PMT Security, Inc. | All Rights Reserved

  • Privacy Policy
  • Terms of Use
  • Cookie Policy
  • Accessibility
  • Contact Us