How to Print Tags in OMNIA
Printing Tags in OMNIA
NOTE:
Install your printer to the PC, before installing the Plugin Manager
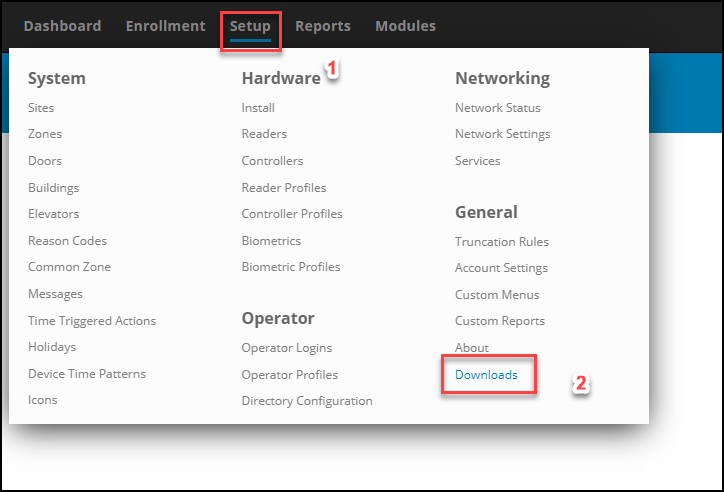
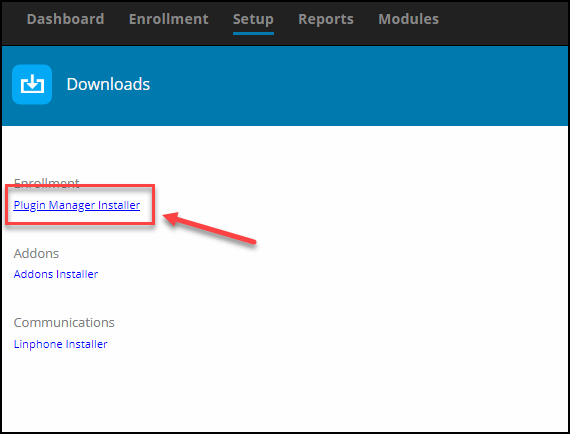
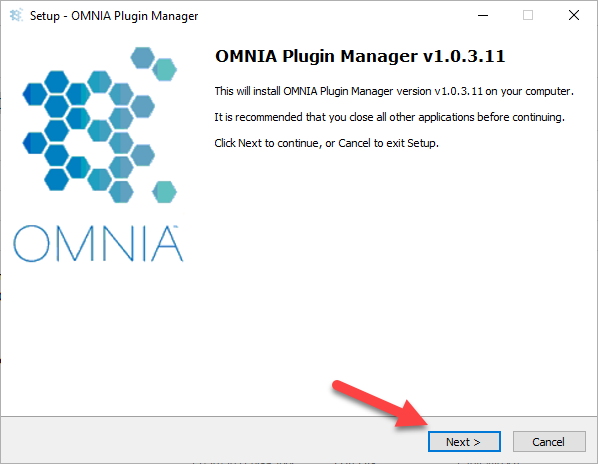
To print tags in OMNIA you must install the OMNIA Plugin Mgr, Update the Printer Persistence File, and Create a Tag Template
See Knowledgebase article titled, How to Install the OMNIA Plugin Mgr.
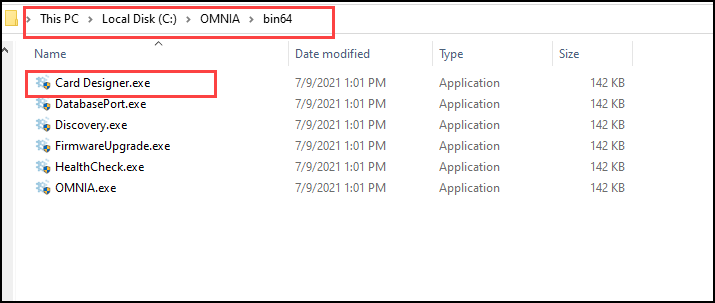
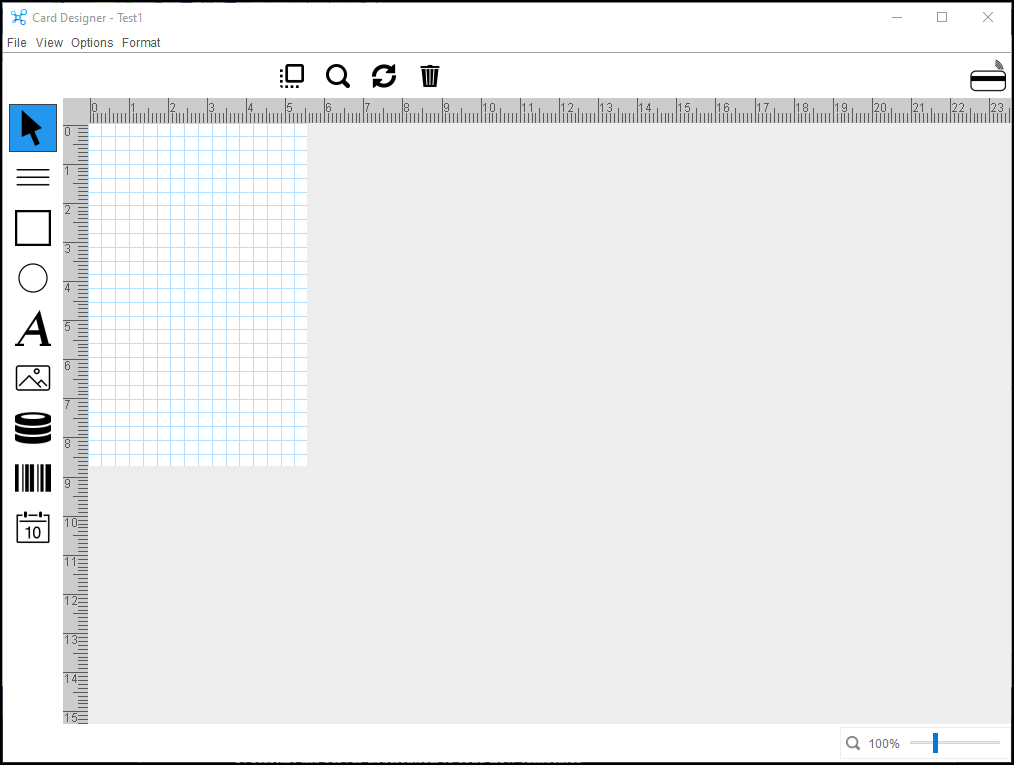
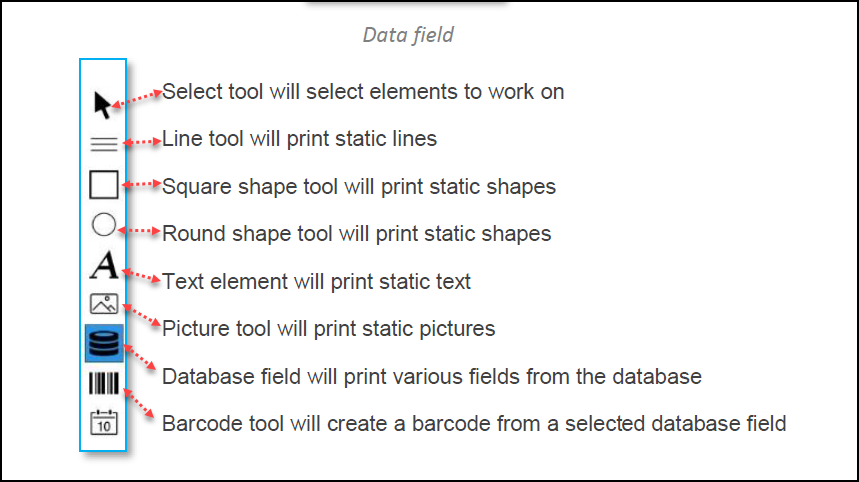
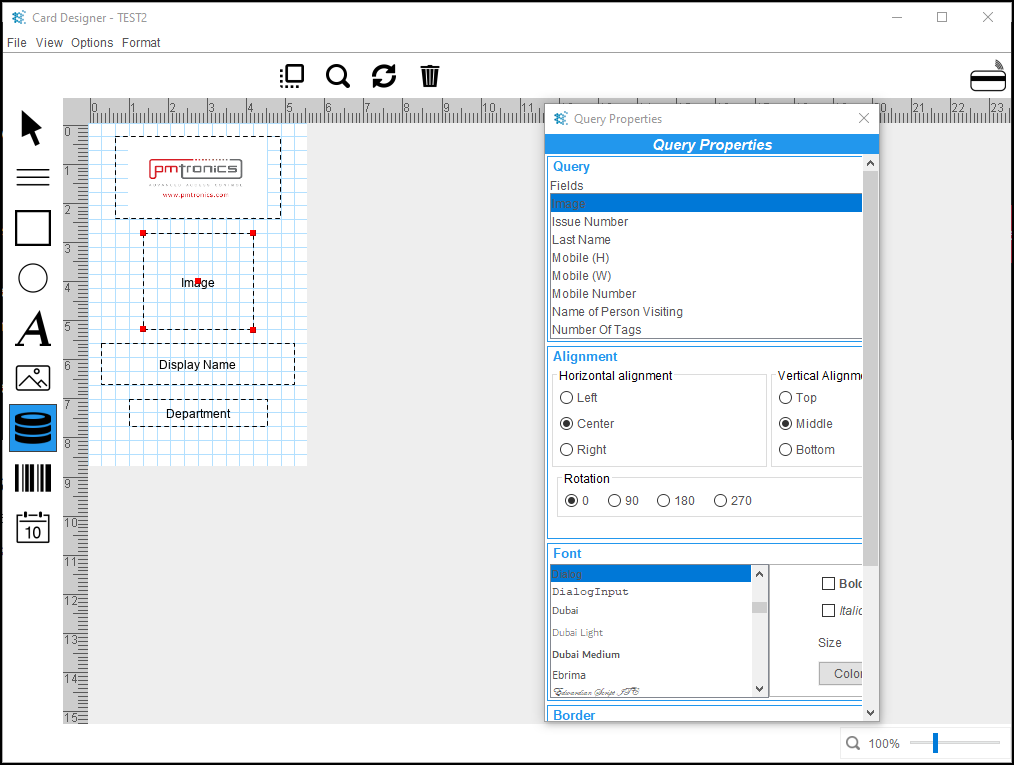
Seen Knowledgebase article, How to Use the OMNIA Card Designer.
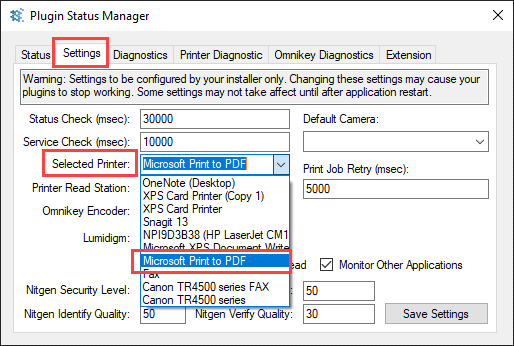
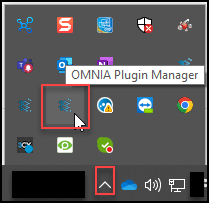
Select your printer in the Plugin Manager
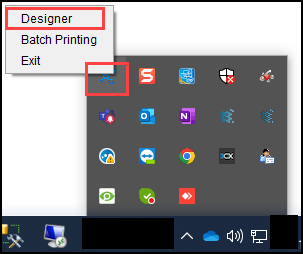
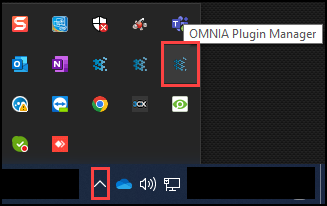
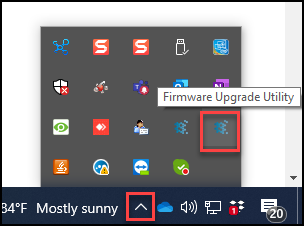
Right click the OMNIA Plugin Manager Icon, select Plugin Status
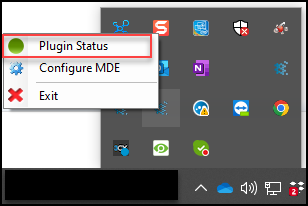
From the Settings Tab, use the dropdown to select your printer click save settings.

Log into the OMNIA URL , if currently logged in, log out then back in.
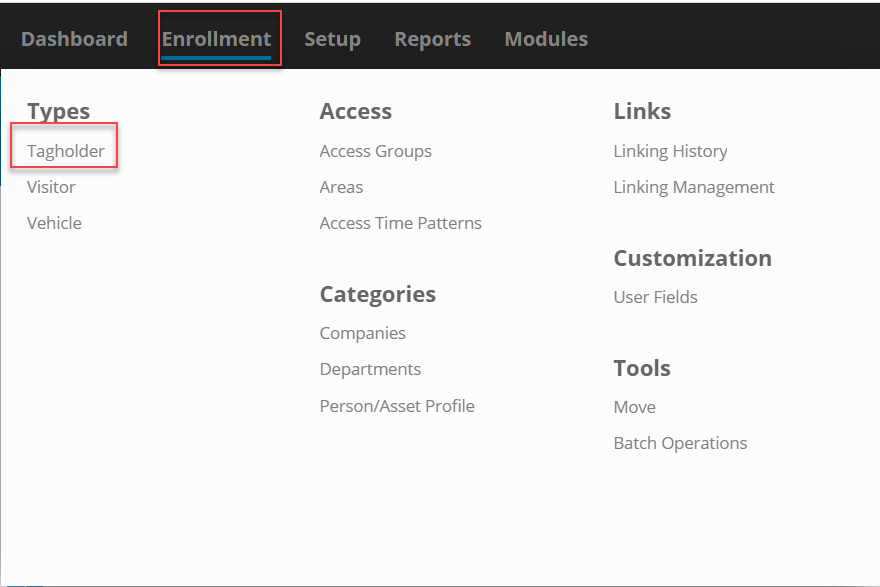
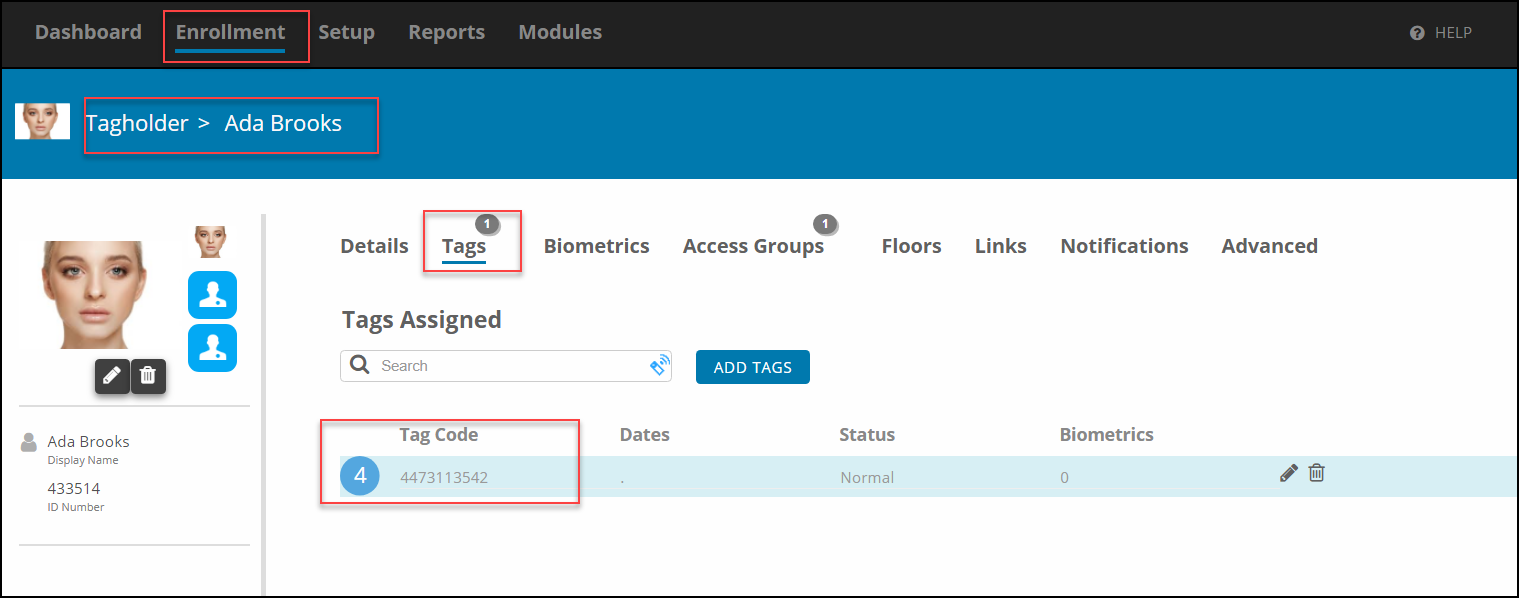
Go to Enrollment\Tagholder and select a Tagholder
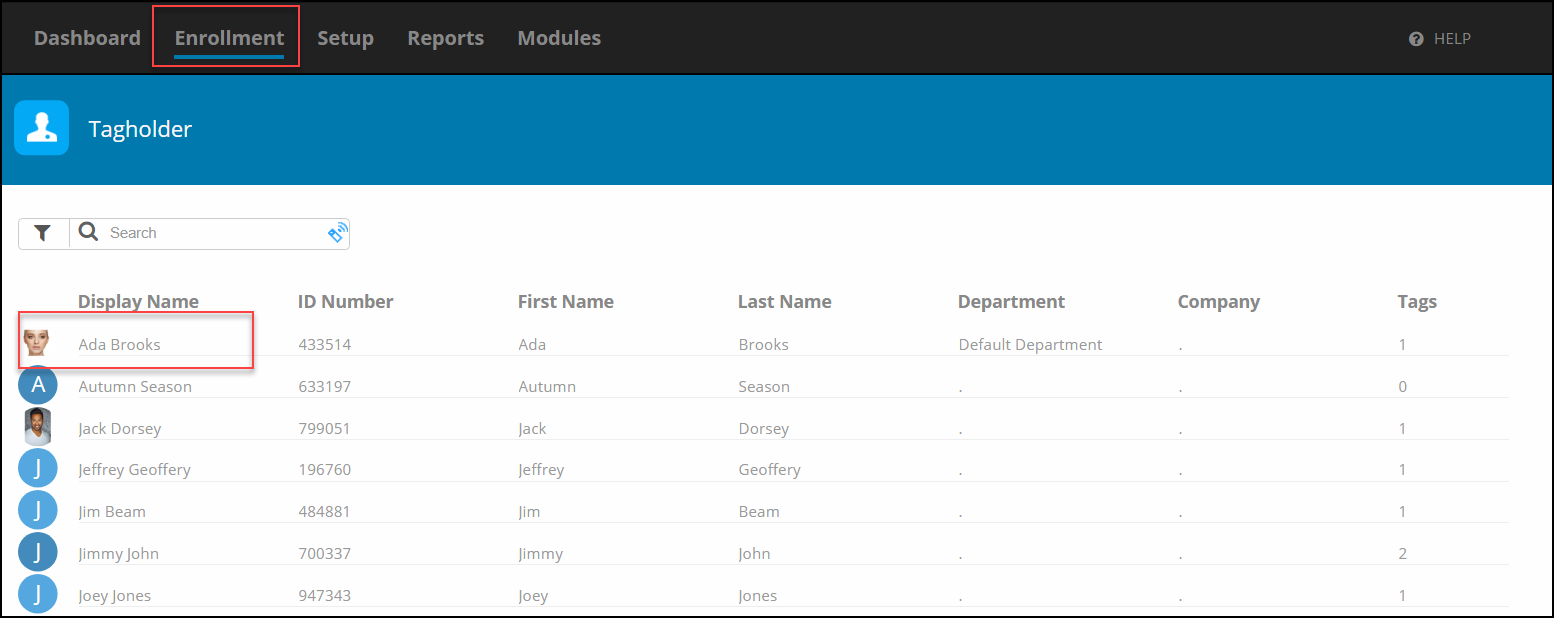
In the Tagholder Screen, Select Tags, then Select the Tag Code
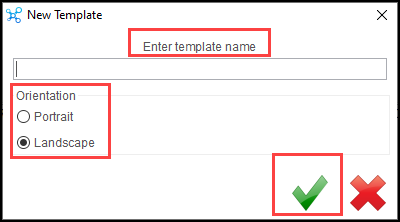
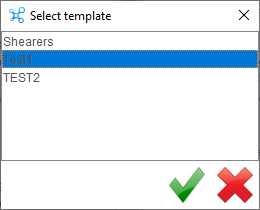
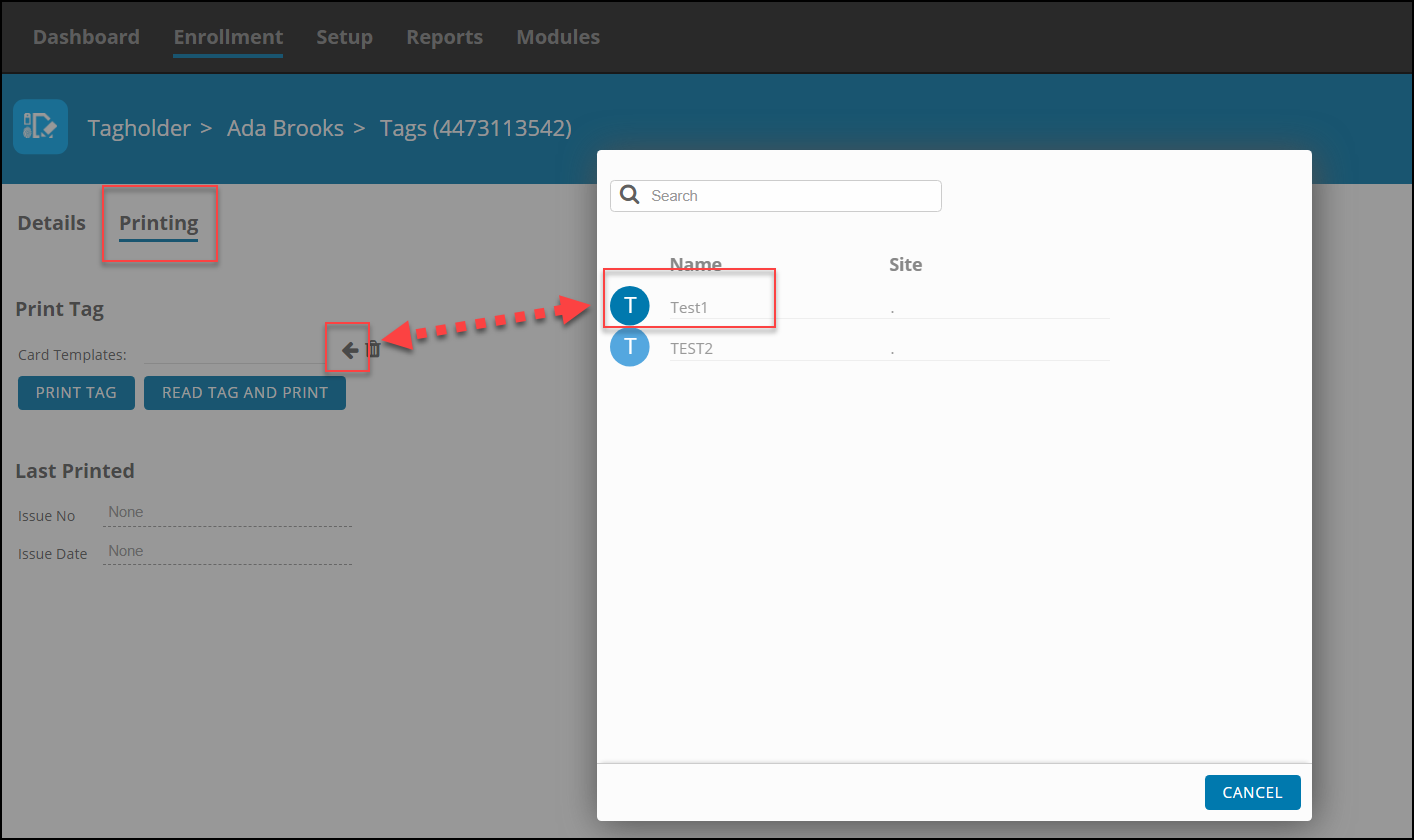
Select Printing, the Print Window will appear. Select your previously designed Card Template by using the arrow and selecting the desired template
After Selecting the Template, Select Print
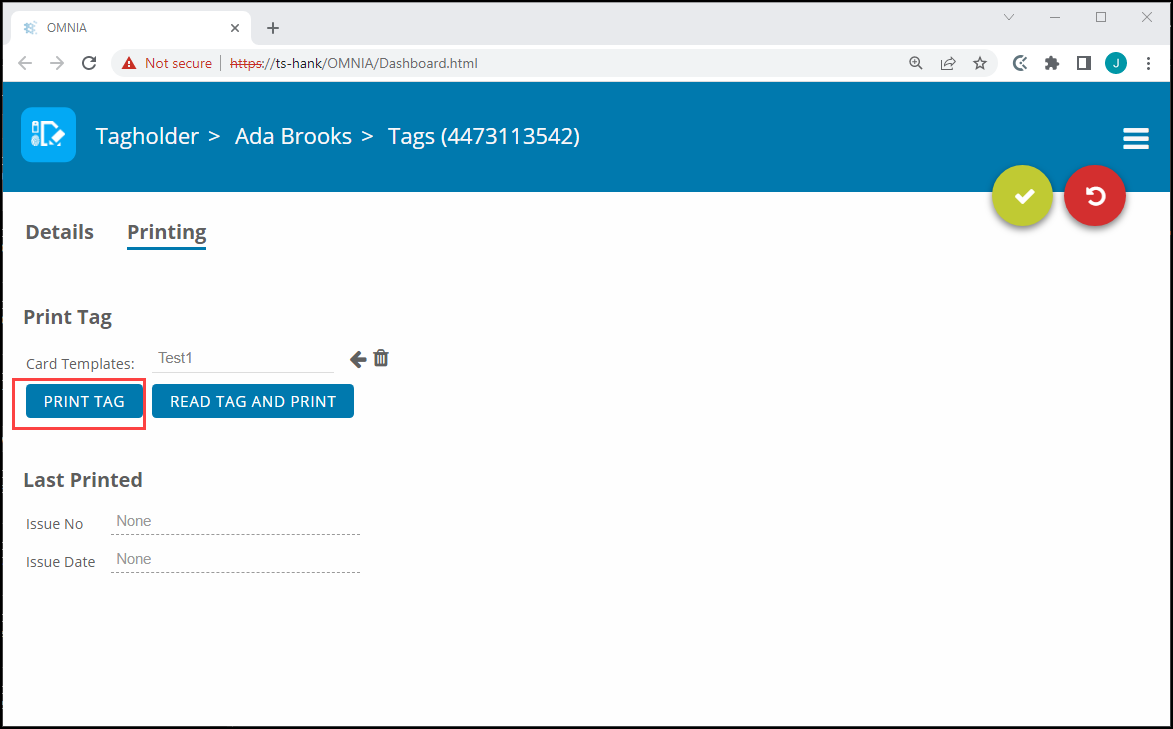
The print job will be sent to the Print Queue.
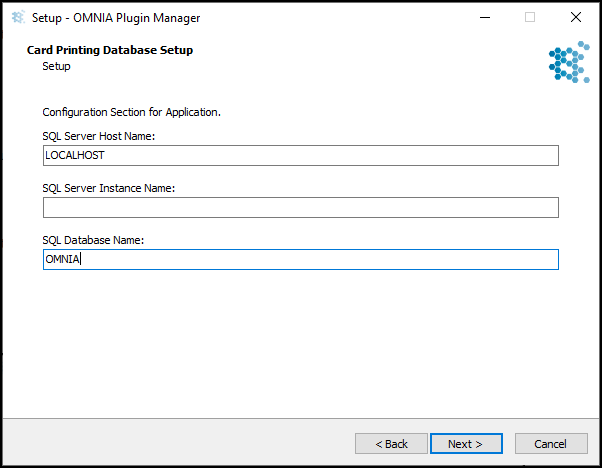
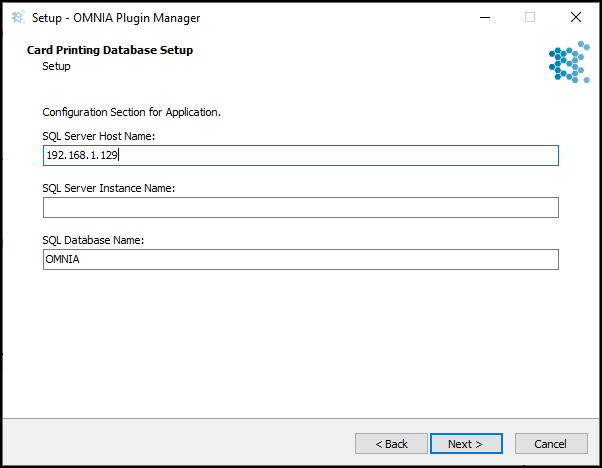
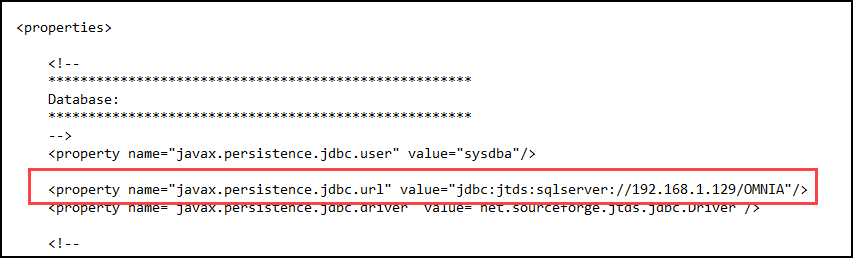
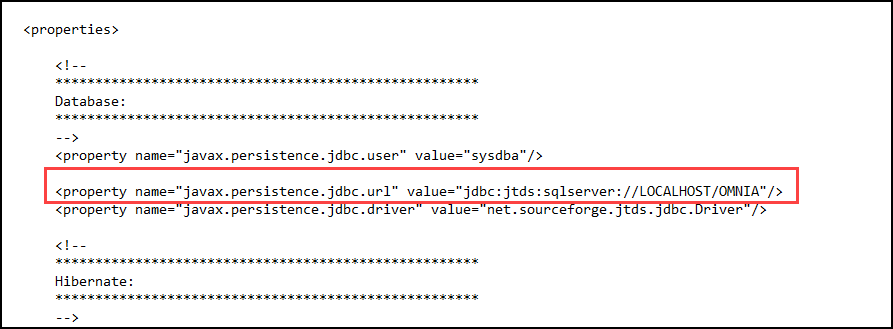
After the OMNIA Plugin Mgr has been installed, you may have to update the Printer Persistence.xml file.
Update the Printer Persistence.xml file located at:
C:\Program Files (x86)\OMNIA\OMNIA Plugin Manager\print\META-INF.
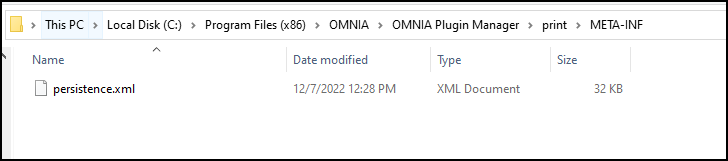
Open the file in Notepad to edit the path and the name of the Database.
Use the IP address of the Database or localhost if the Database resides on the PC you are wanting to print tags from.
Change the Database Name from Portal to OMNIA
NOTE: There are two (2) Locations on the Printing Persistence File that need to be updated.
Using IP of SQL Server
Using LOCALHOST
Need further assistance?