Replacing Nexus220 Controller with APC Controller and Wiegand Reader Module
Steps to replace a Nexus220 Controller with and APC Controller
With the Nexus220 Controller not being manufactured anymore, when a Nexus220 Controller becomes faulty it will need to be replaced with an APC Controller with a Wiegand Reader Module.
In this example we will be replacing the Nexus220 Controller with IP address of 192.168.1.110.
Information Needed from 220 Controller
- IP Address
- Controller Logical Address
- Controller Fixed Address
- Wiegand Reader Port Fixed Addresses
In the Nexus220 Software, go to the Controllers Tab, here you will find the IP address, Controller Logical Address (LA), and the Controllers Fixed Address
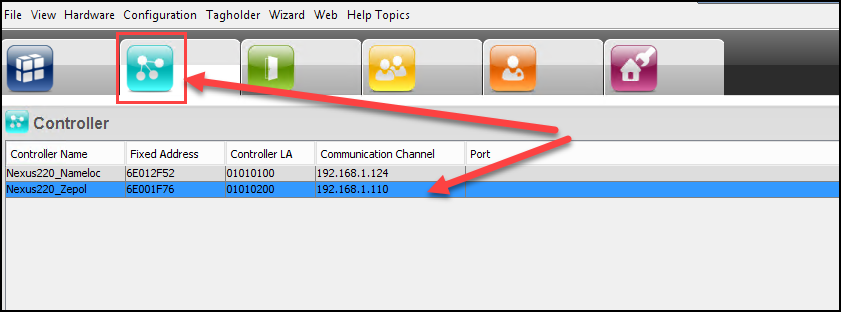
In this case we will be replacing the Nexus220 Controller with the name of Nexus220_Zepol, IP address of 192.168.1.110, Controller Logical Address of 02, and Fixed Address of 6E001F76
You will also need to know the Fixed Addresses of the Wiegand Reader Ports on the Nexus220 Controller.
NOTE: With the Controller having a Fixed Address of 6E001F76, Reader port 1 will have a Fixed Address of 6F001F76 and Reader Port 2 will have Fixed Address of 70001F76. We will need to know these Fixed Addresses for steps further into this replacement process.
We will be replacing the Nexus220 Controller with an APC Controller in 220 mode with an attached Wiegand Reader Module. We will need to know the Fixed Address of the APC Controller and the Fixed Addresses of Reader Port 1 and Reader Port 2 on the Wiegand Reader Module
The APC Controller DIPS should be 1 off, 2 off, 3 on, and 4 off. Make sure the APC controller powers up with the DIPS set.

APC Controller Fixed Address is 6E02772C, the attached Wiegand Reader Module Fixed Addresses are FA(1) 005936AD and FA(2) 005936AE.
NOTE: The New APC Controller MUST have the same IP address as the Nexus220 Controller for the controller swap to work.
Refer to Knowledge Base Article regarding setting IP Addresses on PMTronics Inc. Access Control Hardware:
Remove the Nexus220 controller from the Network. Place APC Controller on the network. Find the APC Controller with the Nexus220 Discovery Tool. Set the IP address of the APC Controller to the same IP address, Subnet Mask, and Gateway currently assigned to the Nexus220 Controller.
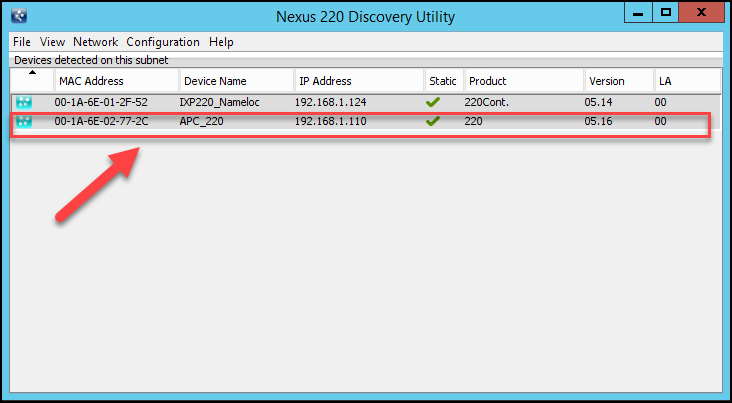
With the IP Address set on the APC Controller, it is now time to swap the Controllers in the Nexus220 Software.
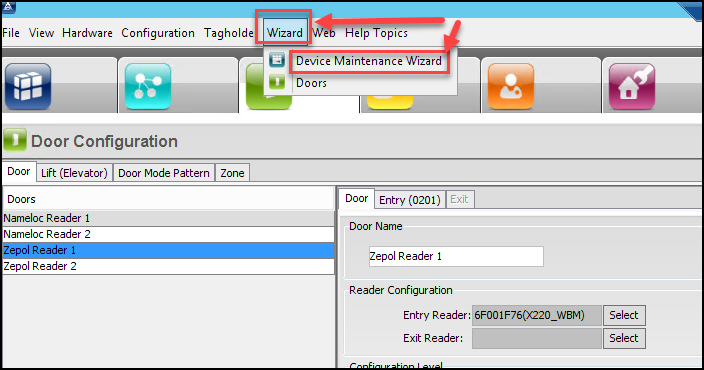
In the Nexus220 Software, select the Wizard, then choose Device Maintenance Wizard.
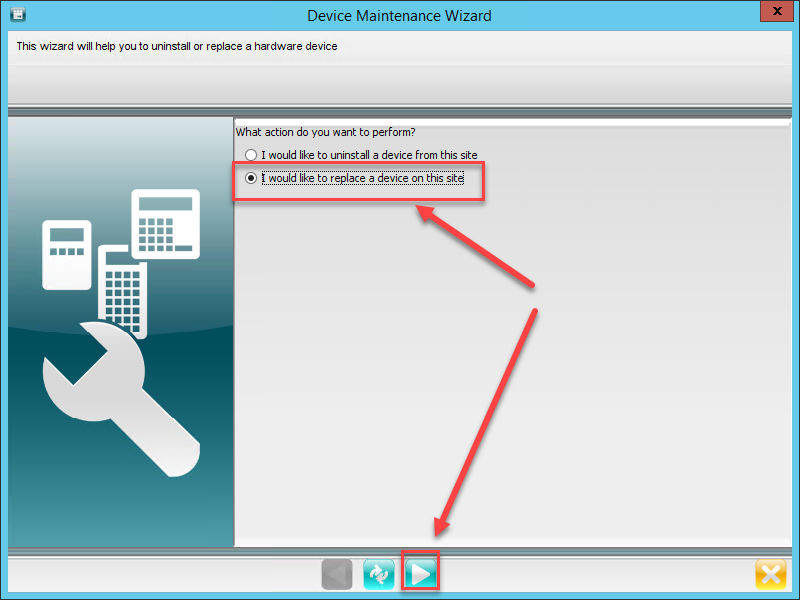
A Device Maintenance Wizard window will appear. Select I would like to replace a device on this site. Then Select the Next Arrow
Select the Controller you want to replace. Ensure you place a tick mark in the box, selecting the Controller. Then Select the Next Button
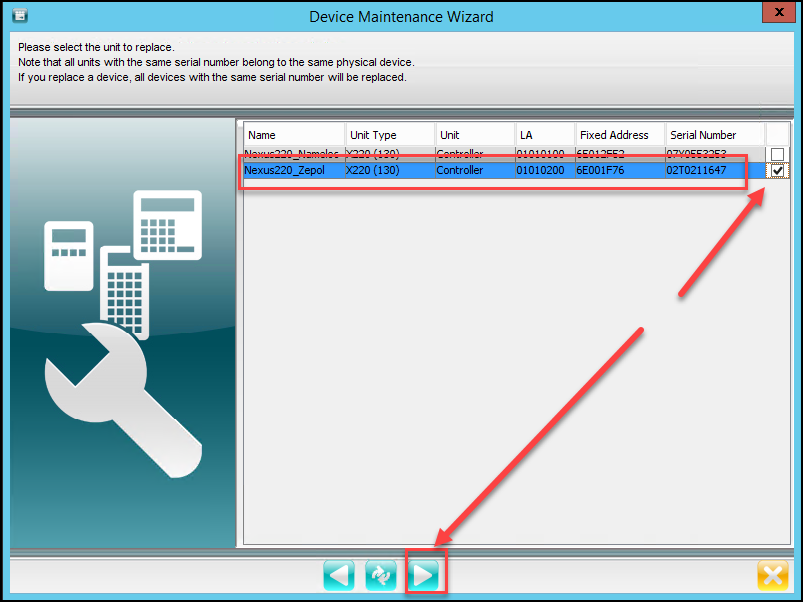
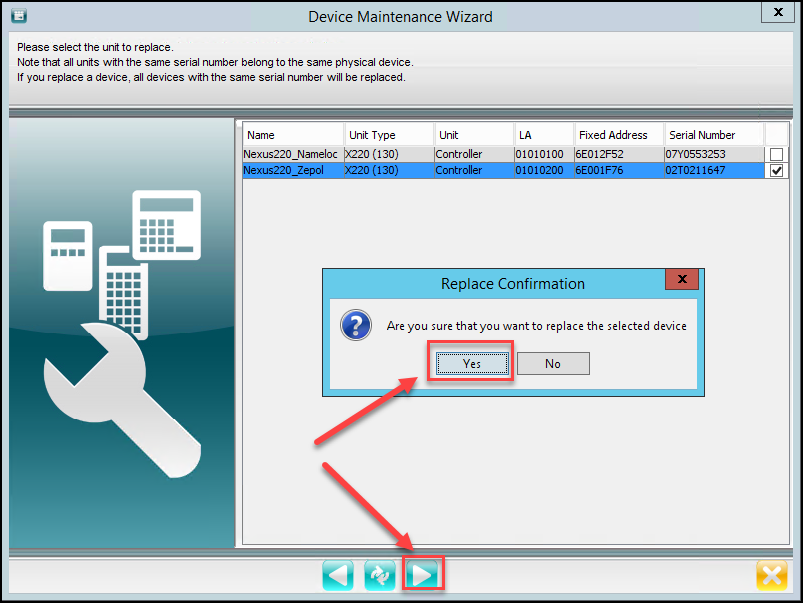
Choose Yes for the Replace Confirmation
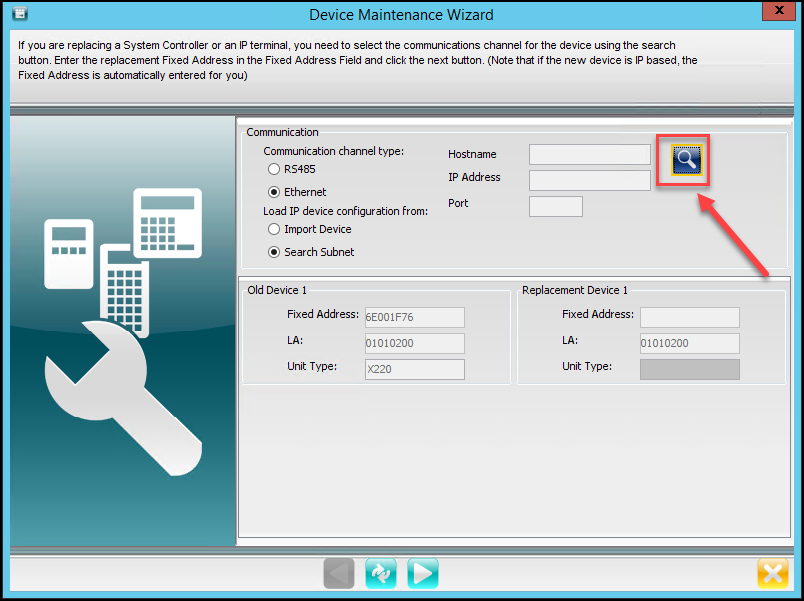
In the next window, in the Communication Section. You can choose:
Type of Communication Channel;
- RS485 or
- Ethernet
How to Load the IP Device Configuration;
- Import or
- Search Subnet
For our Example, Select Ethernet for the Communication Channel and Select Search Subnet for the Load IP From. Then select the Search Icon
NOTICE: The Fixed Address, the Logical Address (LA), and the unit type for the old device is auto populated from previous selection.
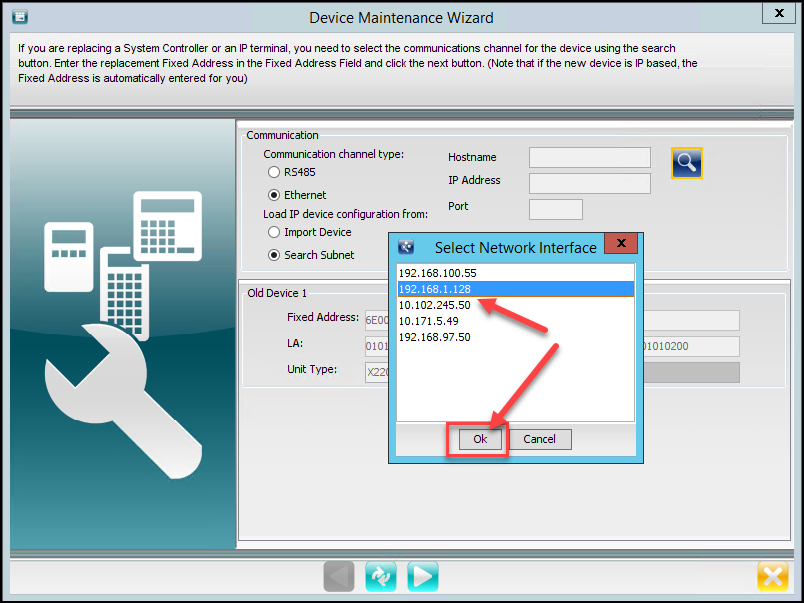
After Selecting the Search Icon, Select the Network Interface and select OK.
Select the Subnet Mask then select the Green Check to continue.
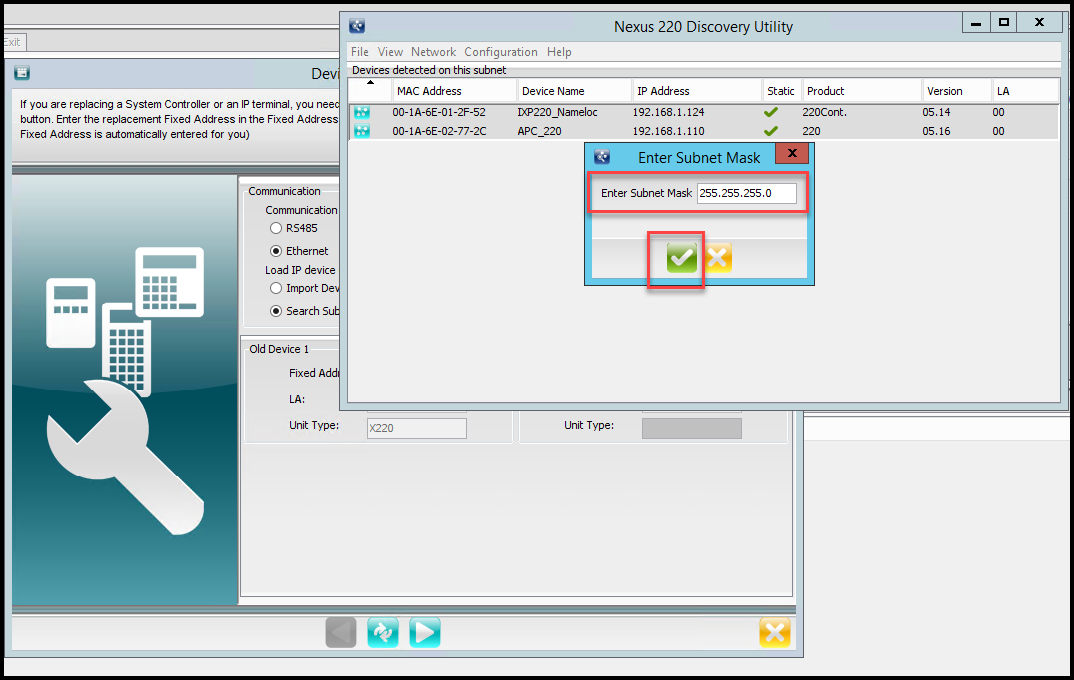
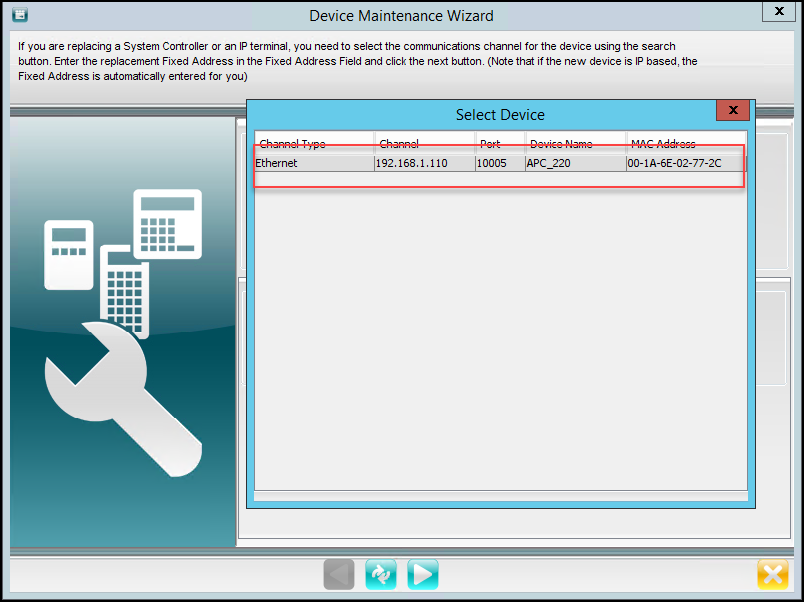
After a few seconds the Select Device window will appear. Select the APC controller by double clicking the controller.
The information from the APC controller will now appear in the Device Maintenance Wizard Window. Select Next
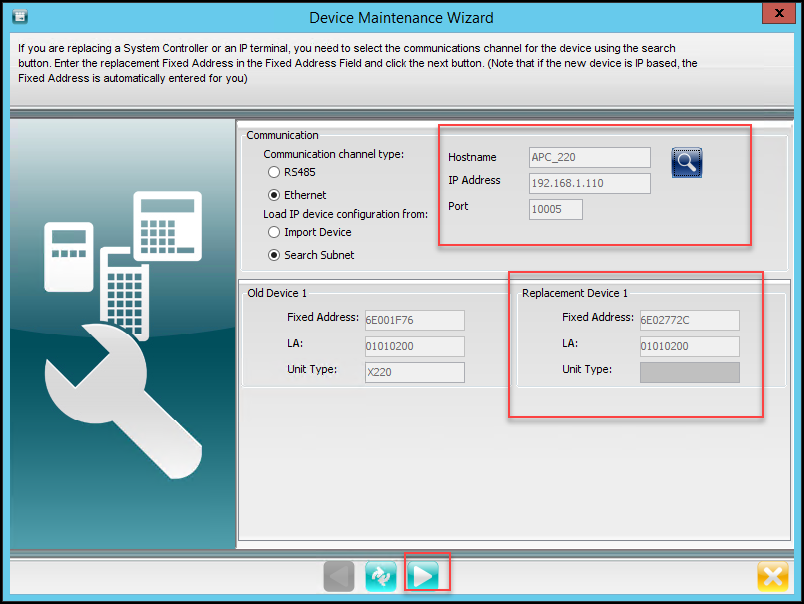
The Device Maintenance Window will Close when the swap has been completed.
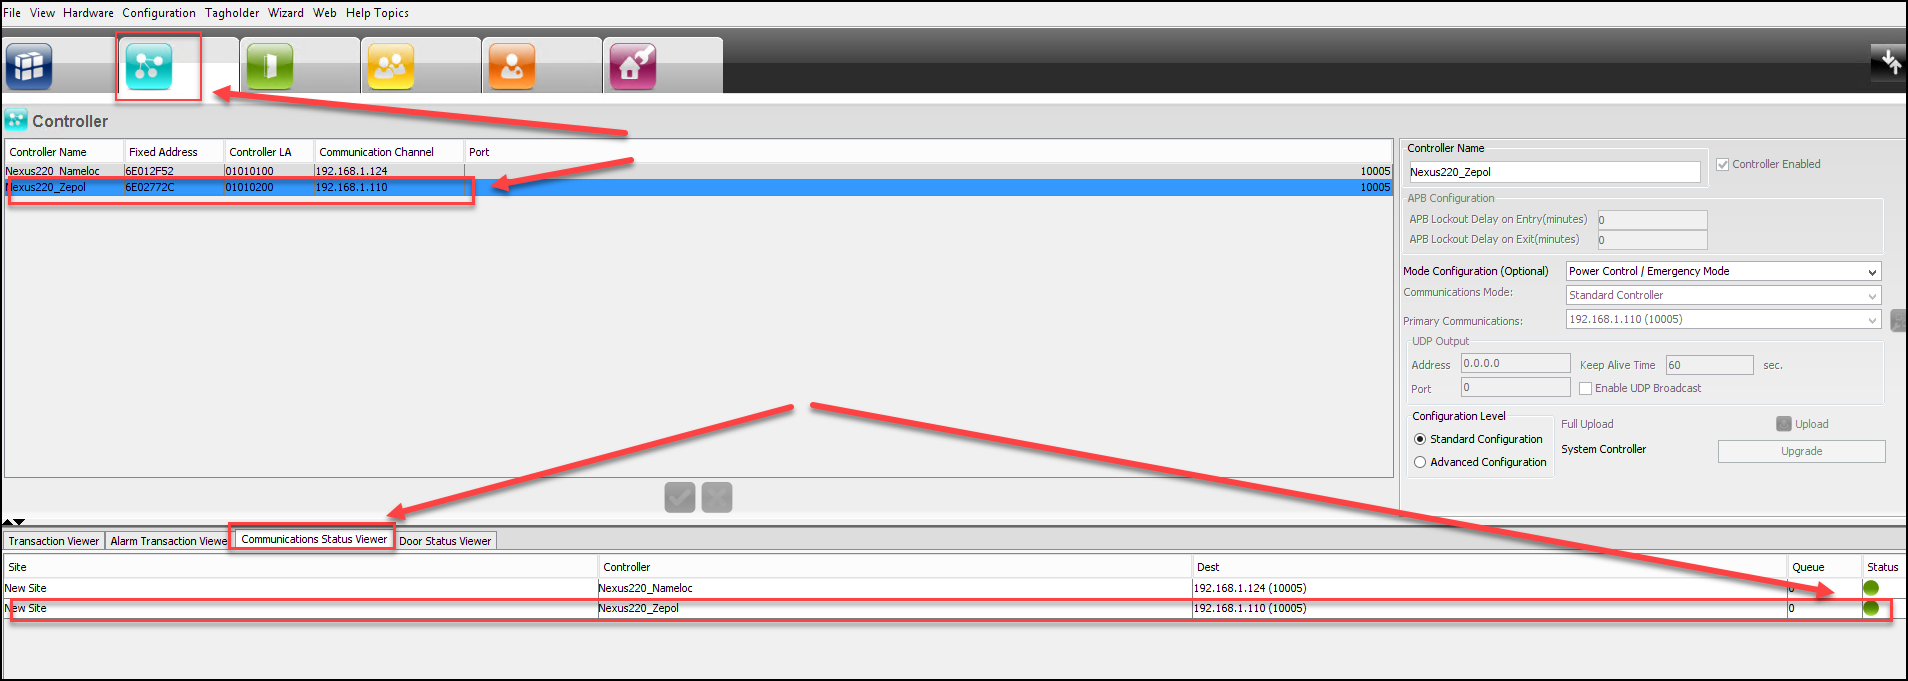
To Verify swap was completed, Select the Controller Tab and verify the Fixed Address has changed to the New APC Controllers Fixed Address. If you are still in the Controller Tab, Select another Tab then go back into the Controller Tab to refresh the new Controller information.
You will notice the New APC Controller has retained the same Controller Name, Controller Logical Address (LA) and the Controllers IP address as the old Nexus220 Controller.
You can verify communication/connectivity to the Controller by Selecting the Communications Status Viewer Tab. Here you will see if the software is communicating with the New APC Controller.
Once we have the Nexus220 Controller replaced and communicating with the software. It is time to replace/swap the Fixed Addresses for the Doors that were associated with the Nexus220 Controller with the Fixed Addresses that are associated with the new Wiegand Reader Module.
Go to the Doors Tab, and select one of the Doors that was previously associated with the Nexus220 controller.
NOTE: Notice the Door Readers Fixed Address, they will have a Fixed Address similar to the Fixed Address of the New APC Controller. This is not correct because we will need to use the Fixed Addresses of the Wiegand Reader Module that is connected to the APC Controller instead.
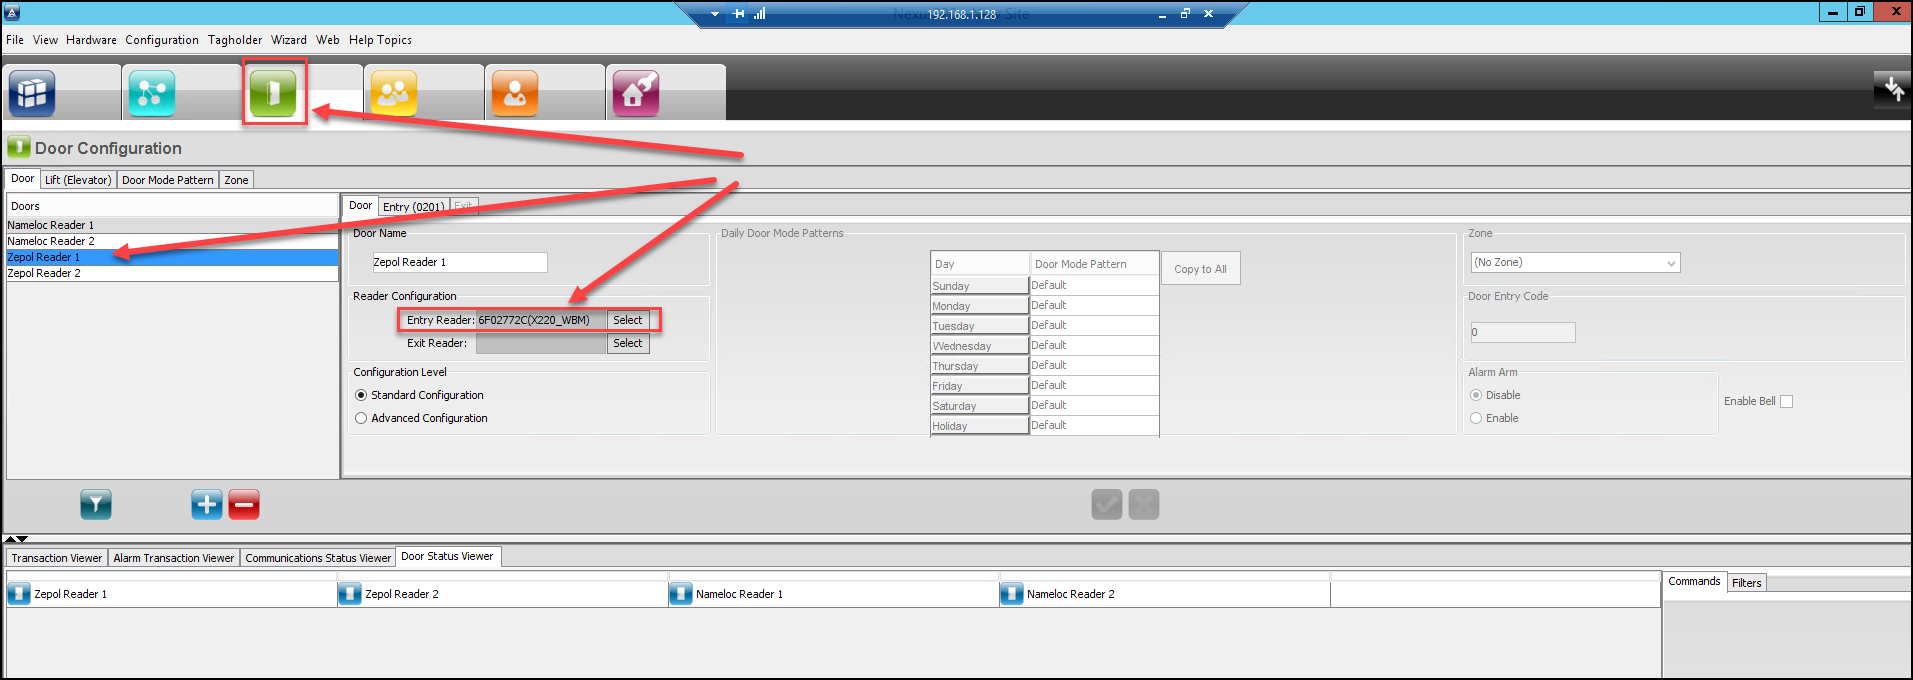
To Install the Wiegand Reader Modules Fixed Addresses, we will need to perform an AutoID for that Controller.
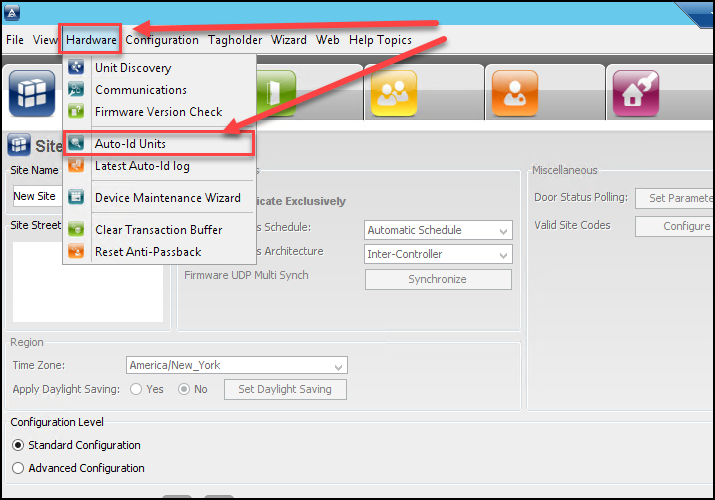
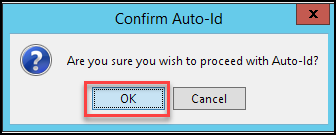
Select Hardware from the Nexus220 Software. From the drop down menu, select Auto ID units. Select OK for the Confirm Auto ID
Select the New APC Controller by placing a tick mark in the Auto ID Channel box. The Select the Green Check box. This will install the Wiegand Reader Modules reader ports Fixed Addresses.
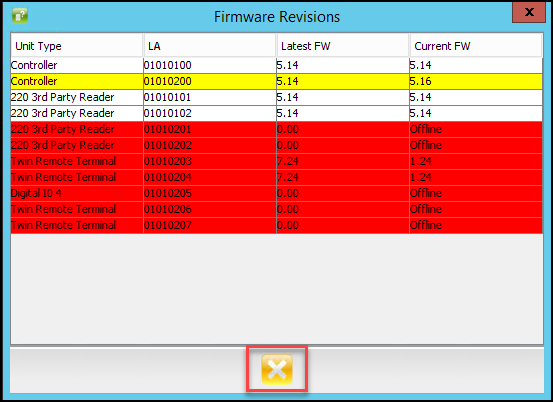
NOTE: After the completion of the Auto ID a Firmware Revisions Screen will appear providing information about the version of firmware that is installed. Close this window.
Go to the Doors Tab, Select the Door to replace, then click on the Select button in the Reader Configuration section.
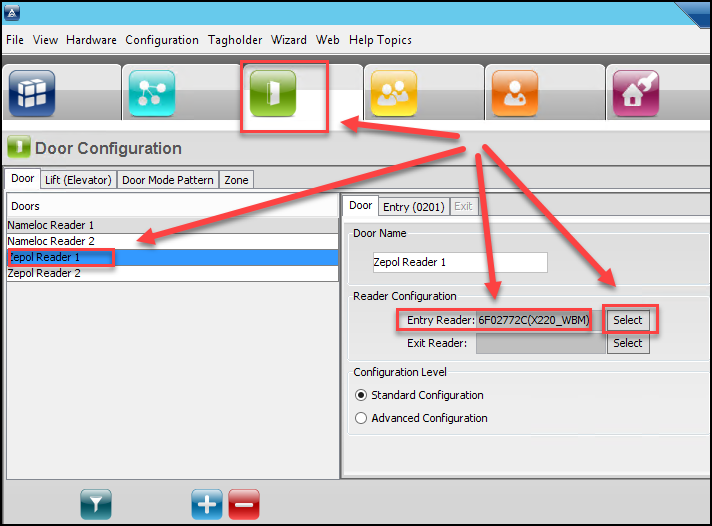
From the Unassigned Readers Window, select the correct reader and then select next to continue.
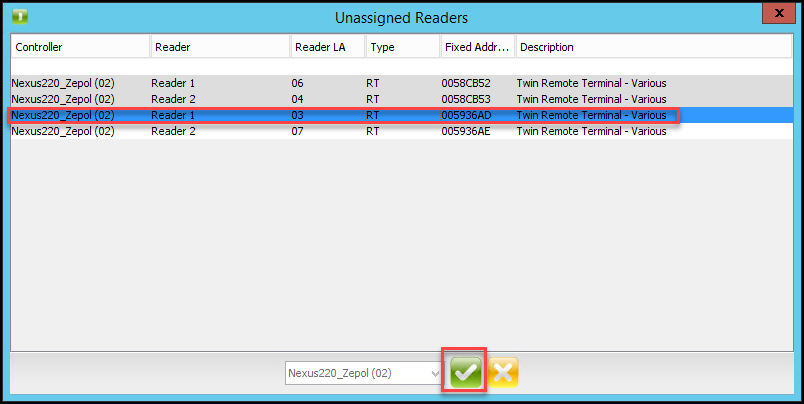
We can now see the door has the new Wiegand Reader Modules Fixed Address. Select Next to save this configuration.
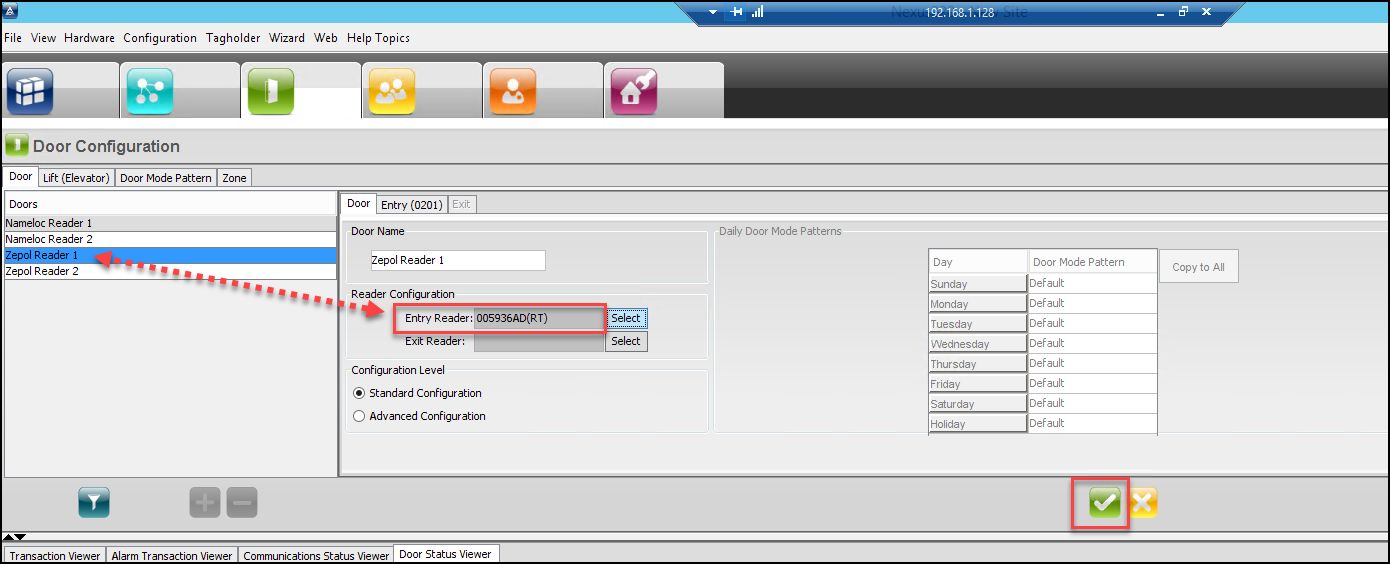
Perform the same action for the next door.
After replacing the Fixed Addresses for the doors. Perform a Full Upload to the New APC Controller. Go to Configuration and from the drop down menu, select Full Upload
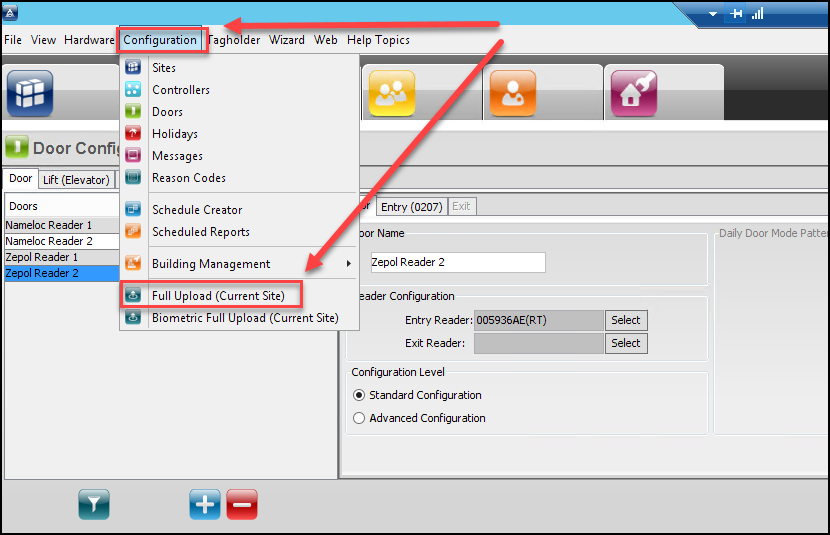
This completes the Controller and Terminal replacement.
Need further assistance?
