How to get PMTSecurity a copy of the AmanoNet Access Control Database
How to get PMTSecurity a copy of the AmanoNet Access Control Database
Before we can upgrade your AmanoNet Access Control System to OMNIA, we will need a copy of your Current Database to run an Evaluation.
The Evaluation is needed to determine what installed Hardware is compatible with OMNIA.
Get a copy/Make a backup of the Database
AmanoNet will have either a Firebird Database or a SQL Database
Navigate to C:\AmanoNet\Database
NOTE: There may be multiple database’s in that database folder
An Active AmanoNet Firebird Database will be named AmanoNet.FDB only, will not have any other wording or symbols before, in the middle, or after it. The current database should have the current date on the file.
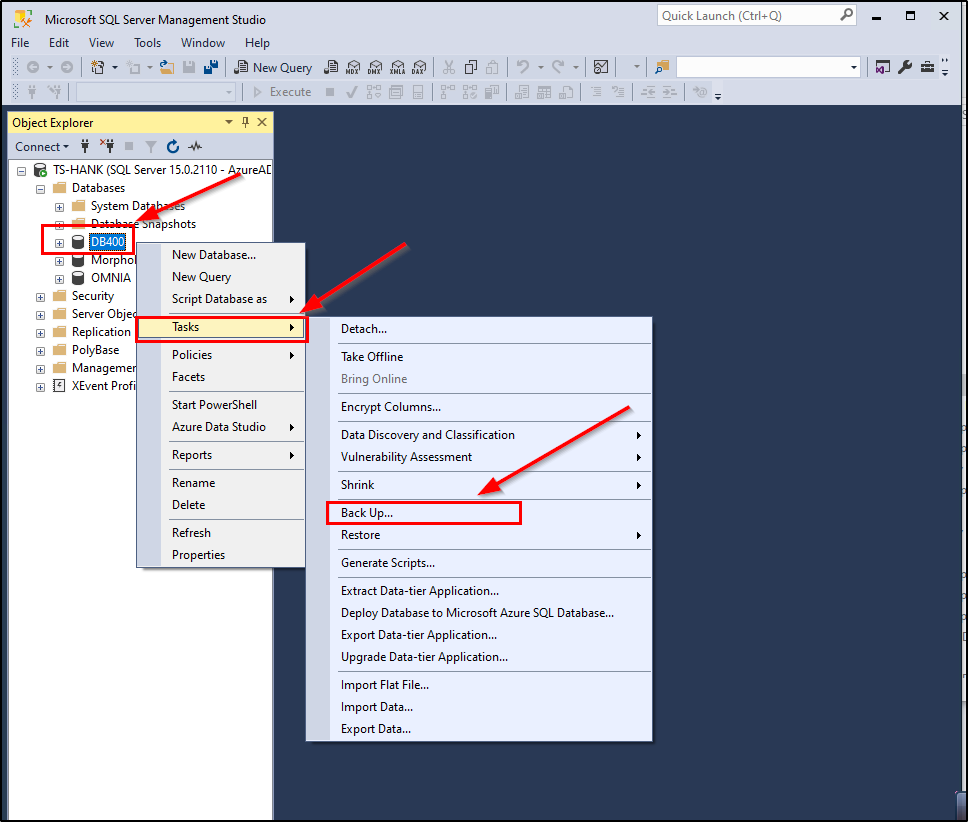
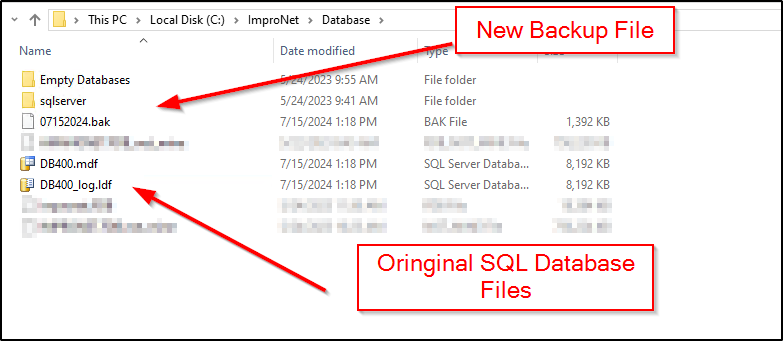
An AmanoNet SQL Database will have two files associated with it, named DB400 and DB400_log.
Please ensure you include both DB400 and DB400_log for the upload.
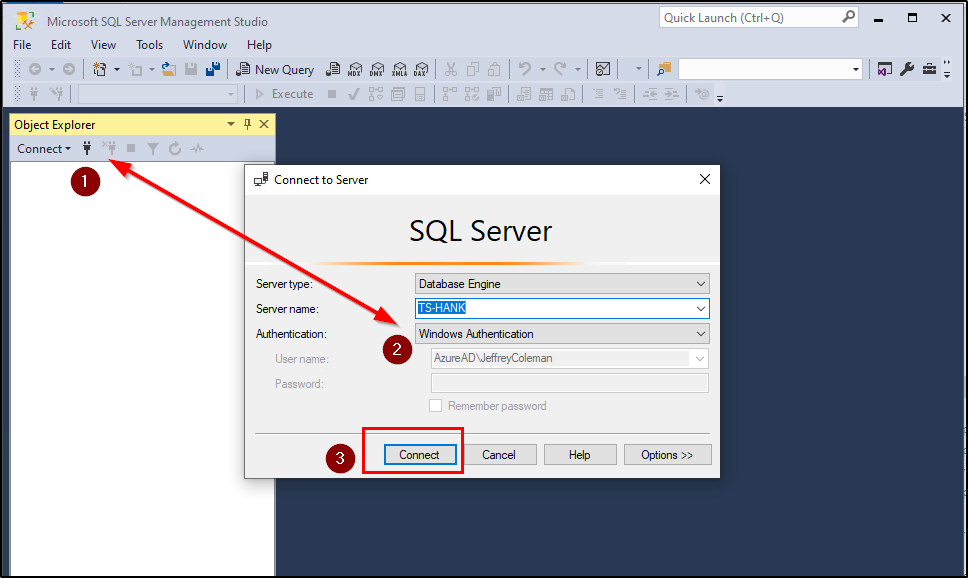
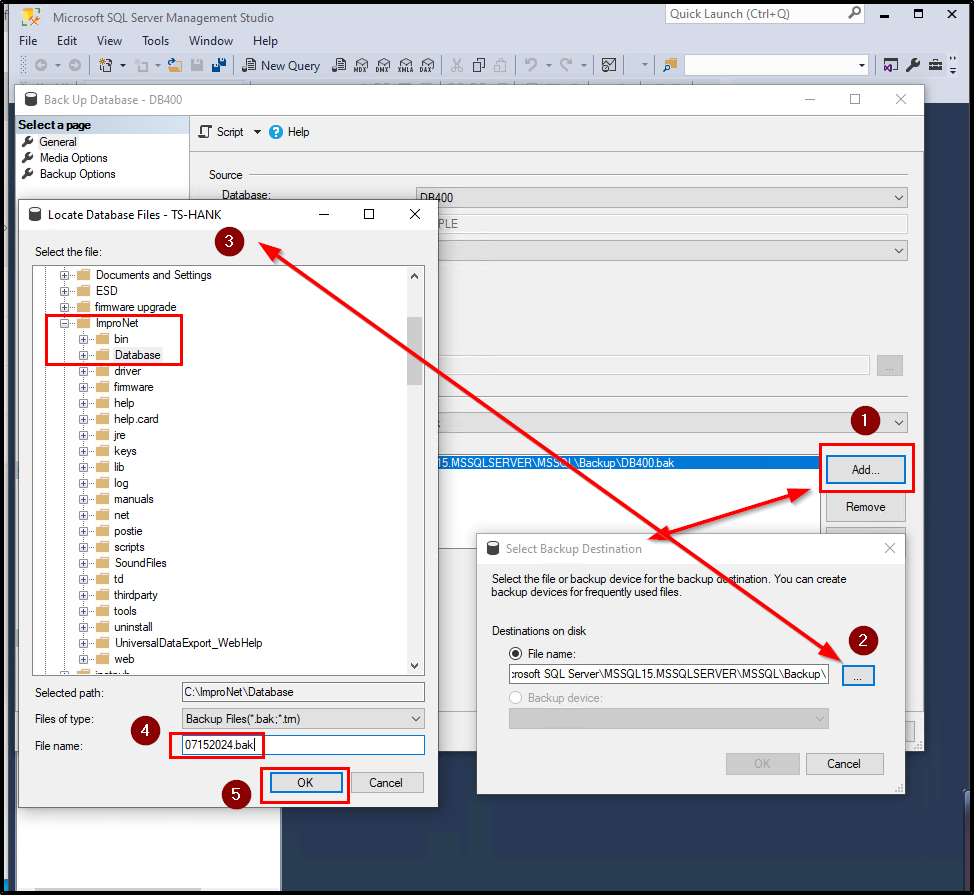
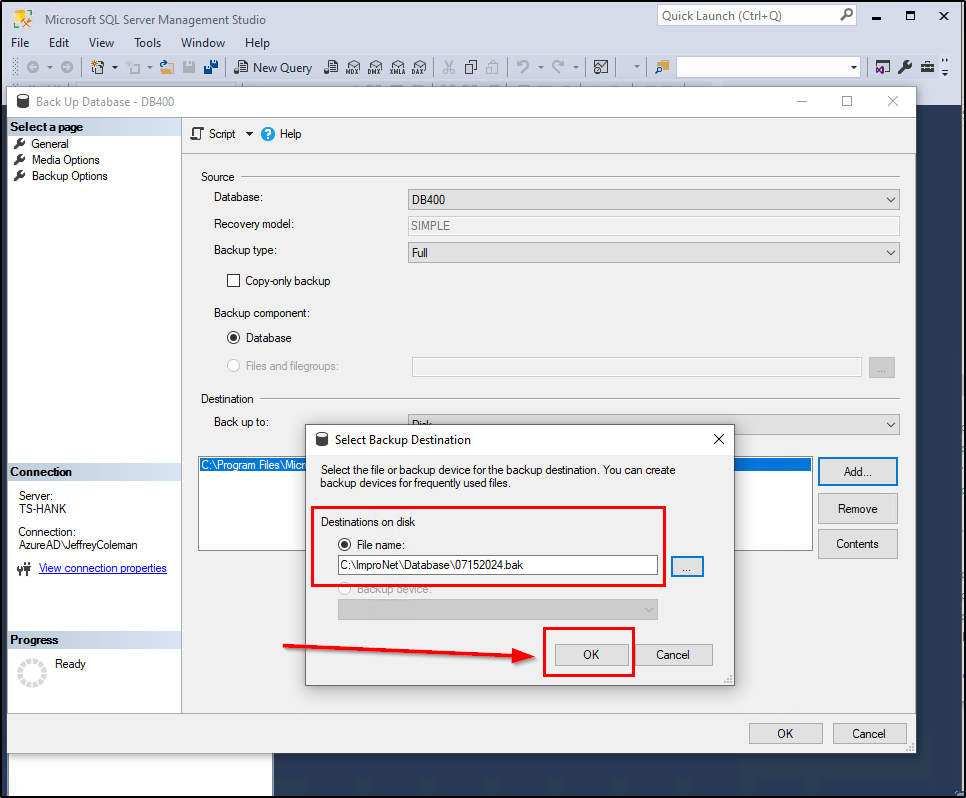
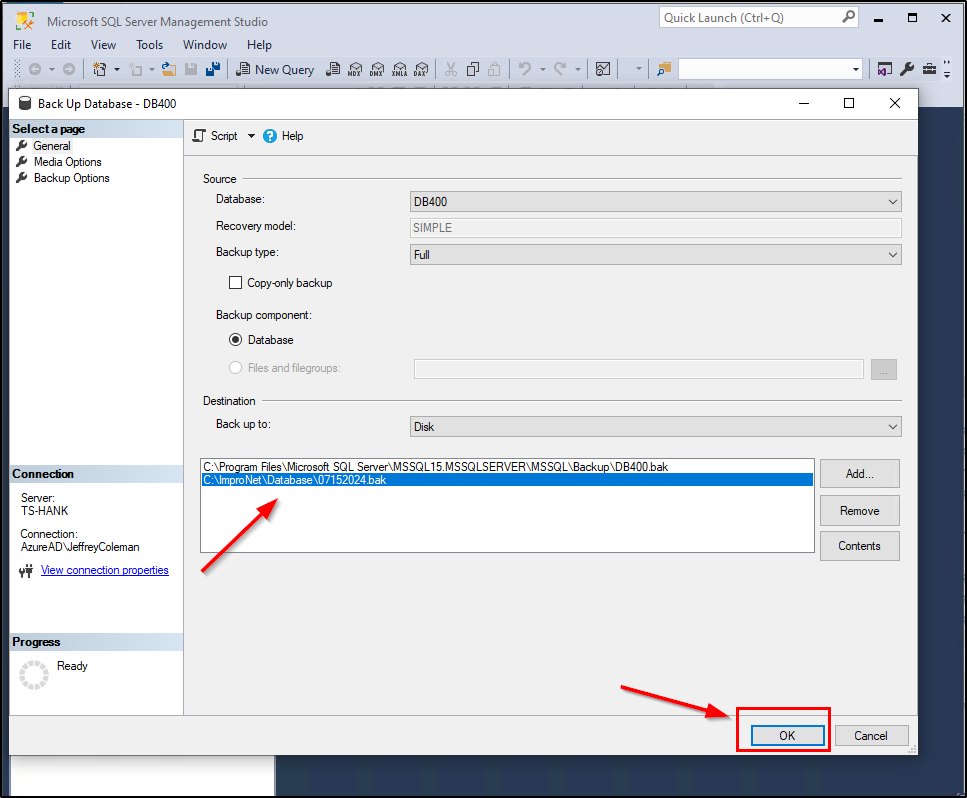
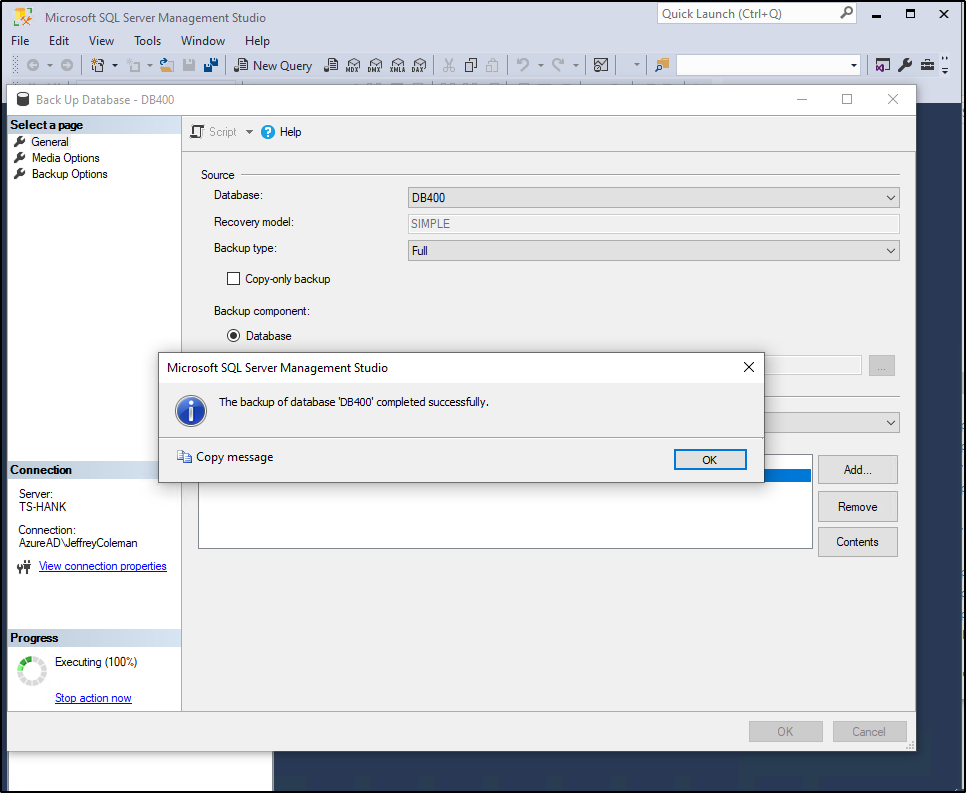
To Ensure a proper non corrupted copy. It is highy suggested you make a backup of the Database and then upload a copy of the backup to the upload link provided in this Article.
Below are Knowledge Base Article links regarding backing up an AmanoNet Database
Use the below Upload Link
Need further assistance?