Unlock On First Tag In OMNIA
Steps to set up unlock on first tag presentation in OMNIA
Purpose:
Unlock on First Tag feature provides the facility of unlocking selected door(s) when the first valid Tag is presented during a specified time period. The door remains unlocked for that time period, but is locked outside that time period, opening only on presentation of a valid Tag.
In the following example procedure, activate the Unlock on First Tag feature only on weekdays from 7 am to 5 pm. This means that, in OMNIA, you must create the following Device Time Patterns, Create a New Reader Profile, Create New Relay Actions using the New Device Time Patterns, then apply the New Actions to the Allowed Normal In Events for the desired Readers.
Step 1:
Create Device Time Patterns
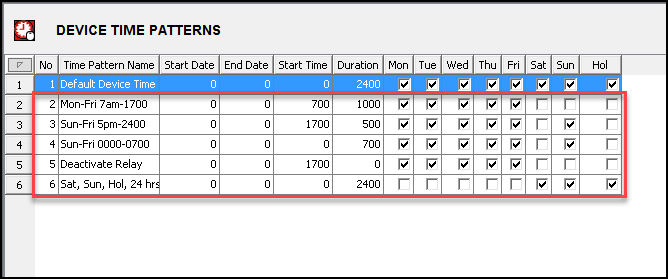
- A Device Time Pattern from 7 am until 5 pm on weekdays (Monday to Friday). This is the period for which the Unlock on First Tag feature must be enabled.
- A Device Time Pattern from Sunday until Friday, 5 pm until 12 am. This is the remaining time on each of the above days during which the Unlock on First Tag feature must be disabled.
- A Device Time Pattern from Sunday until Friday, 12 am until 7 am. The Sunday period covers the time from midnight to 7 am on Monday.
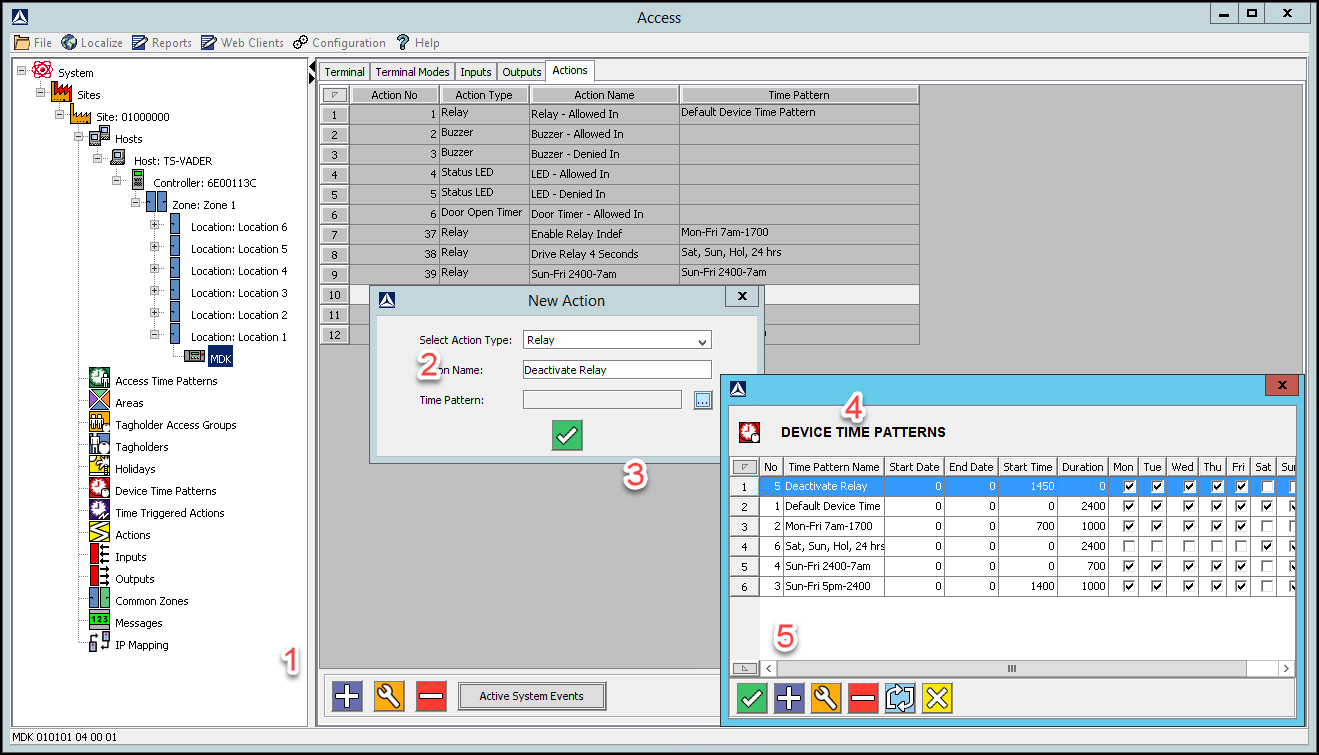
- A Device Time Pattern called Deactivate Relay at 5pm. Set the start time to 5 pm and select Monday to Friday. This will End the Unlock on First Tag
- A Device Time Pattern for Saturday, Sunday and public holidays for the full 24 hours. These are the days on which the Unlock on First Tag feature must be disabled.
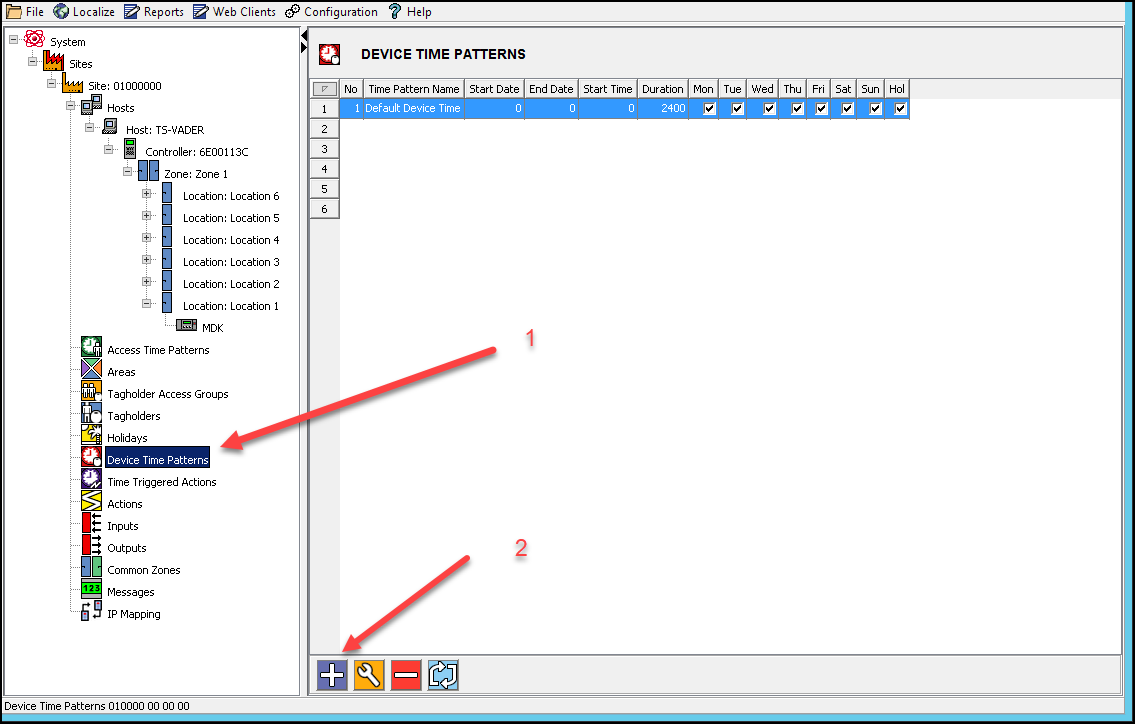
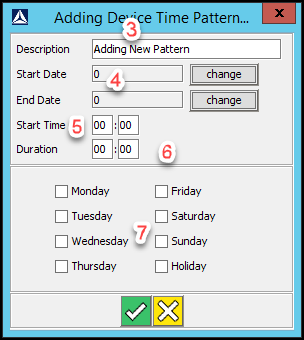
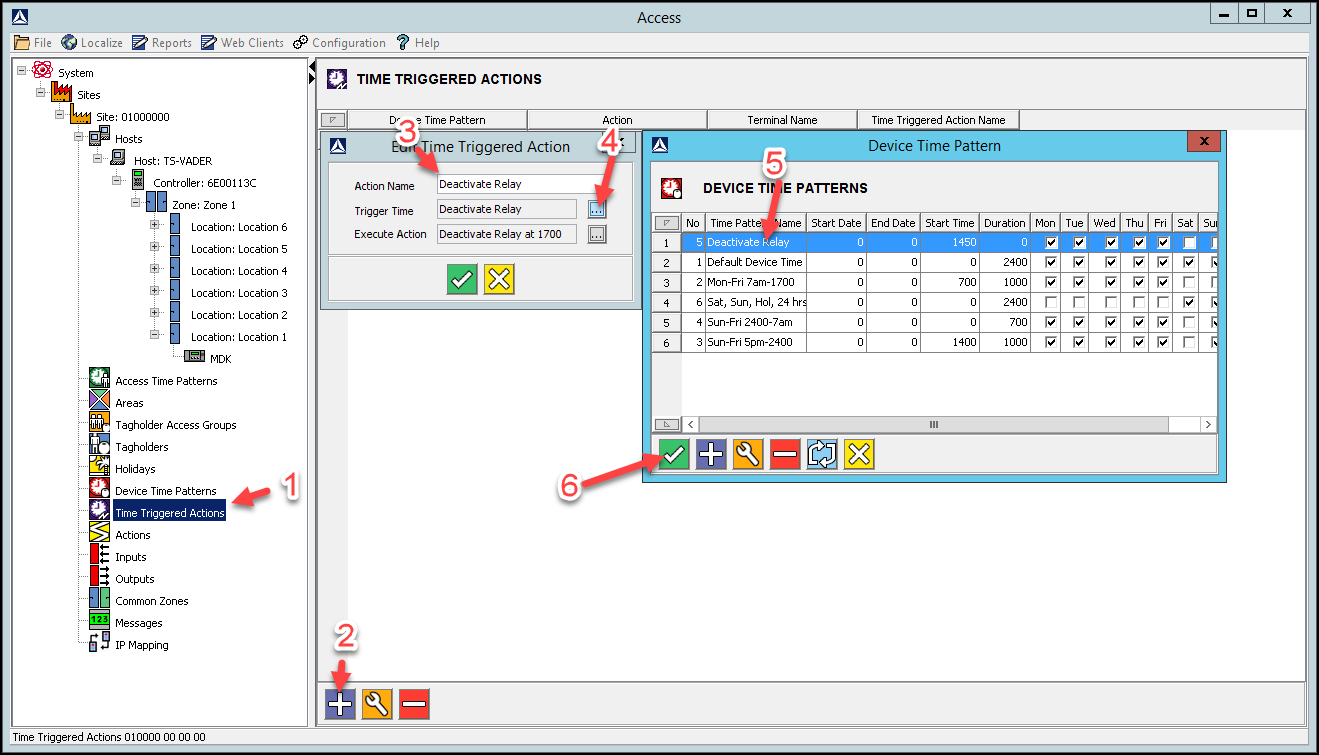
Create Device Time Pattern
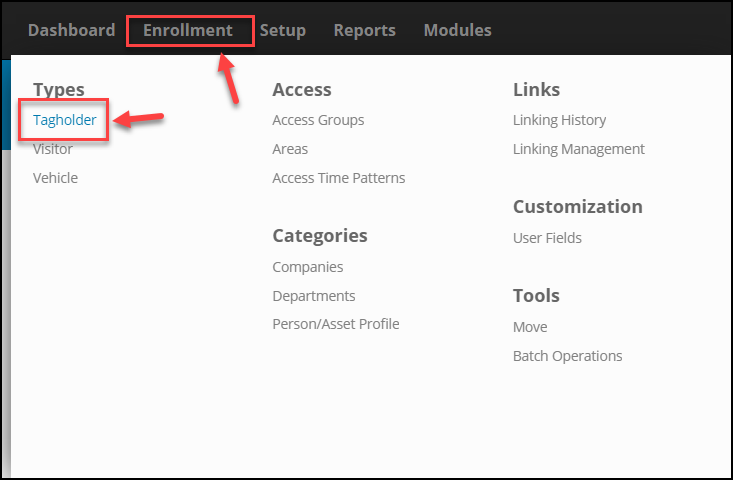
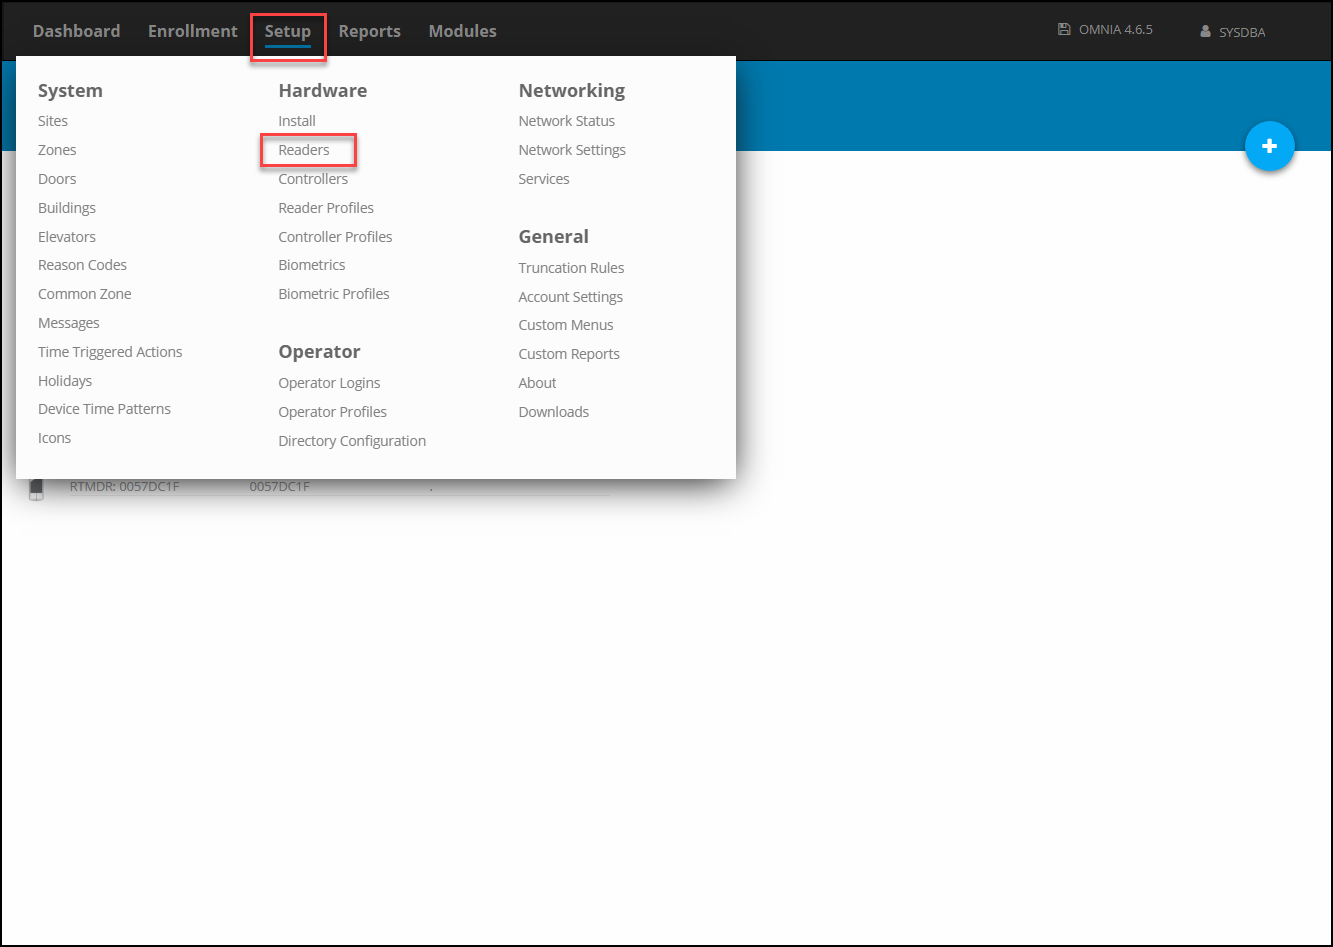
1. Go to Setup
2. Device Time Patterns.
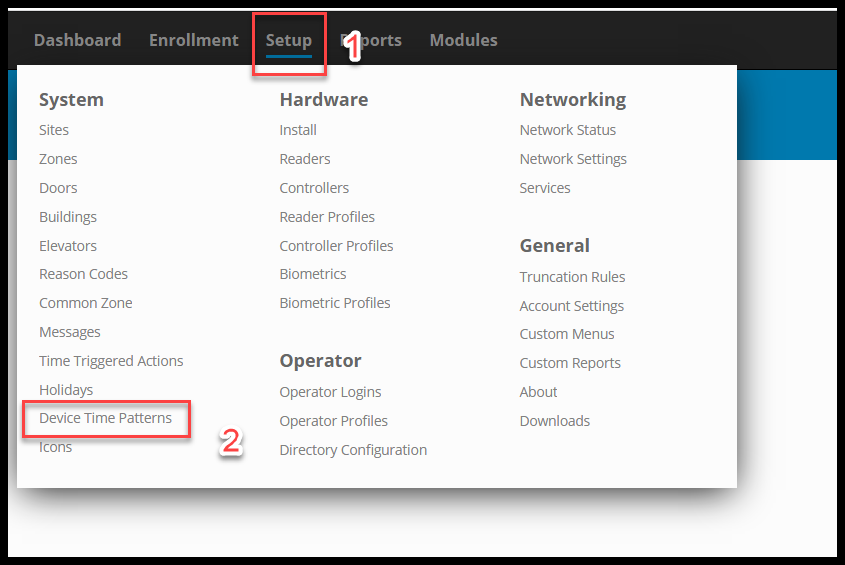
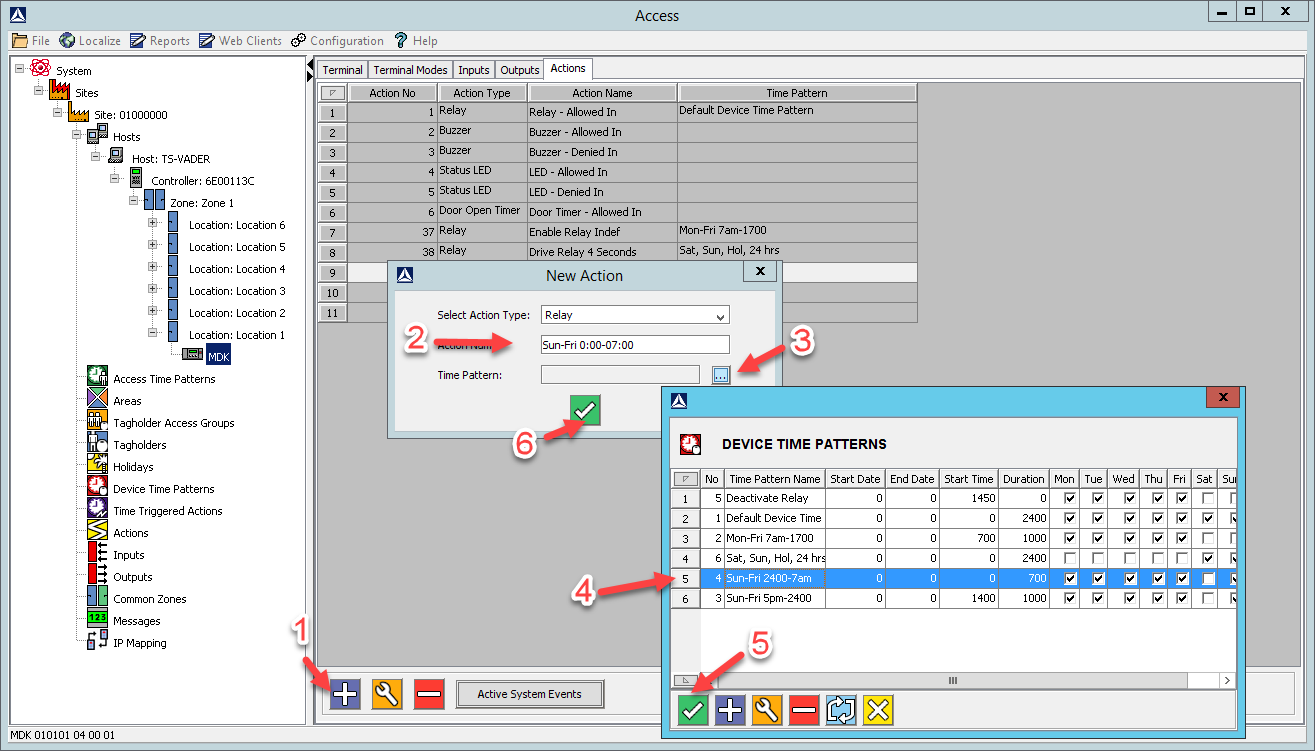
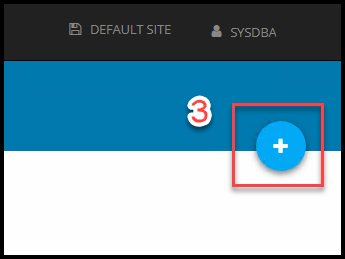
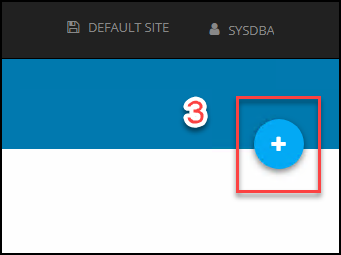
3. Click the plus to create a new Time pattern
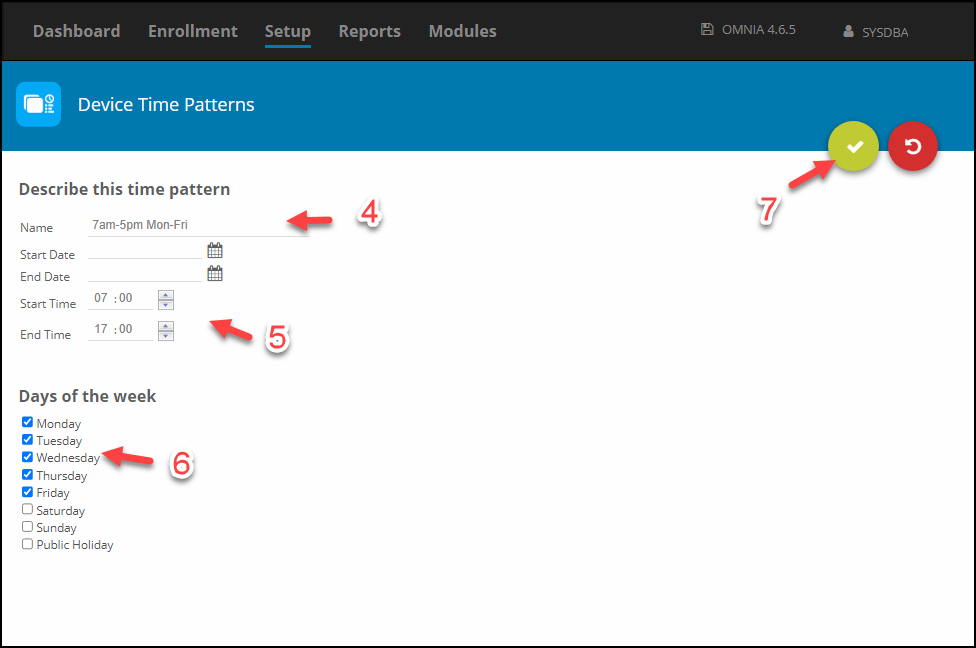
4. Name the Time Pattern something familiar
5. Enter the Start Time and End Time: This will be the time frame that the unlock on first tag will be valid for.
6. Select the Days of the Week for this time pattern.
7. Select the Save Button
Repeat the processes mentioned in steps 2 to 7 for the remaining Device Time Patterns.
Step 2:
Create a Reader Profile for the readers/doors needing the Unlock on First Tag Scenario
Create Reader Profile
1. In the OMNIA URL, Go to Setup
2. Reader Profiles
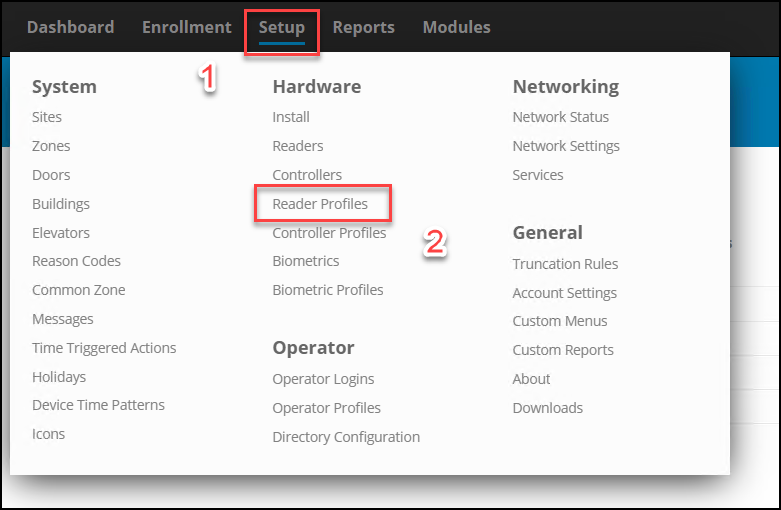
3. Click the plus to create a new Reader Profile
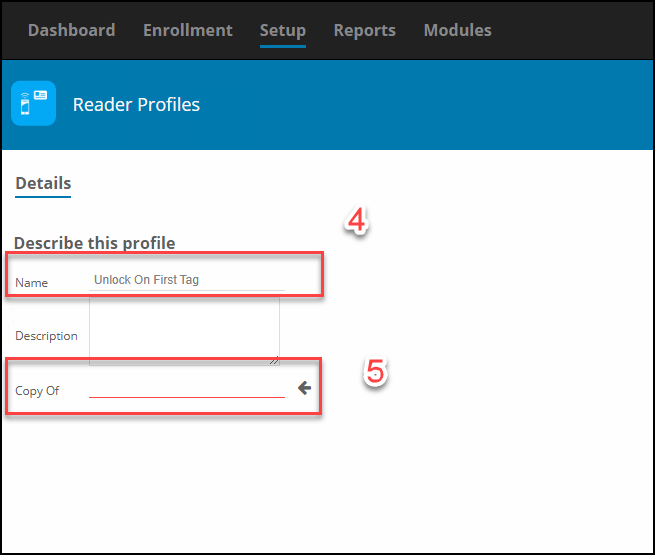
4. Name the Reader Profile something familiar
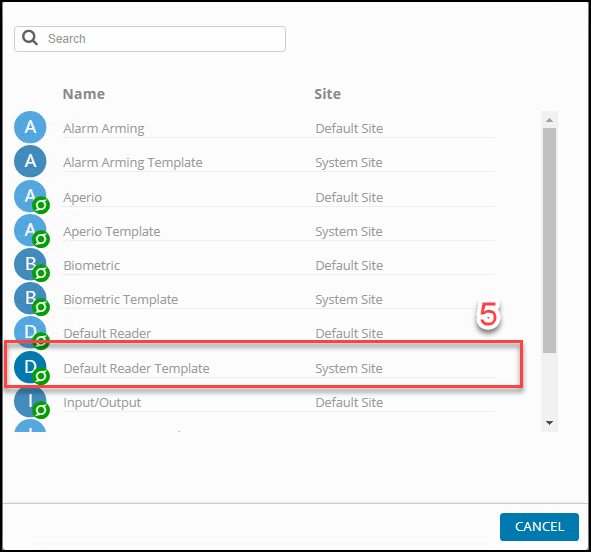
5. Select Copy of Default Reader Template, System Site
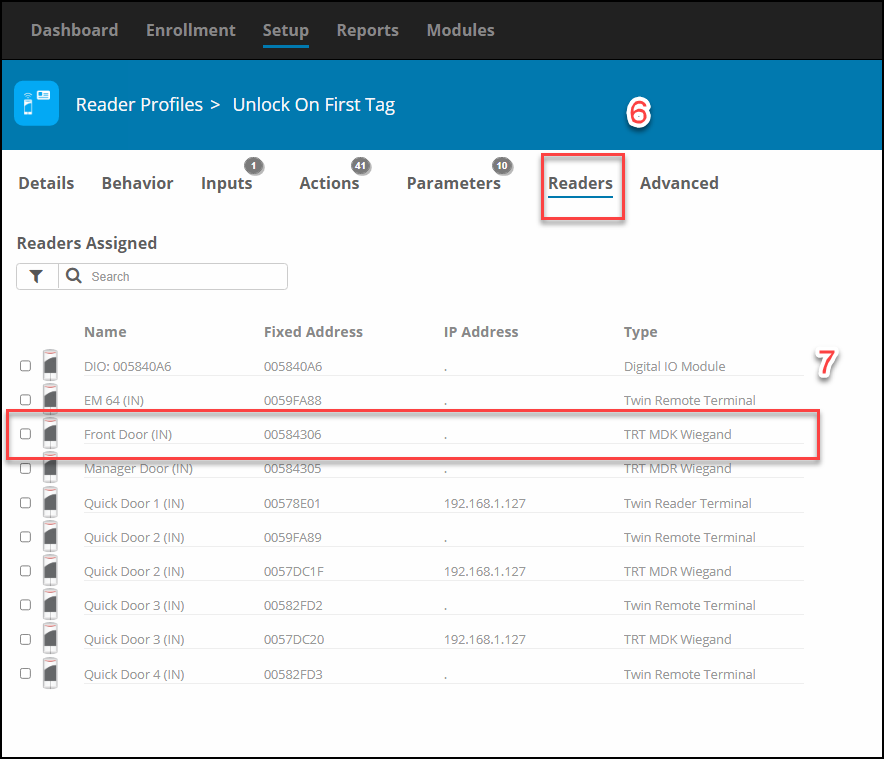
6. In the Reader Profile, Select Readers
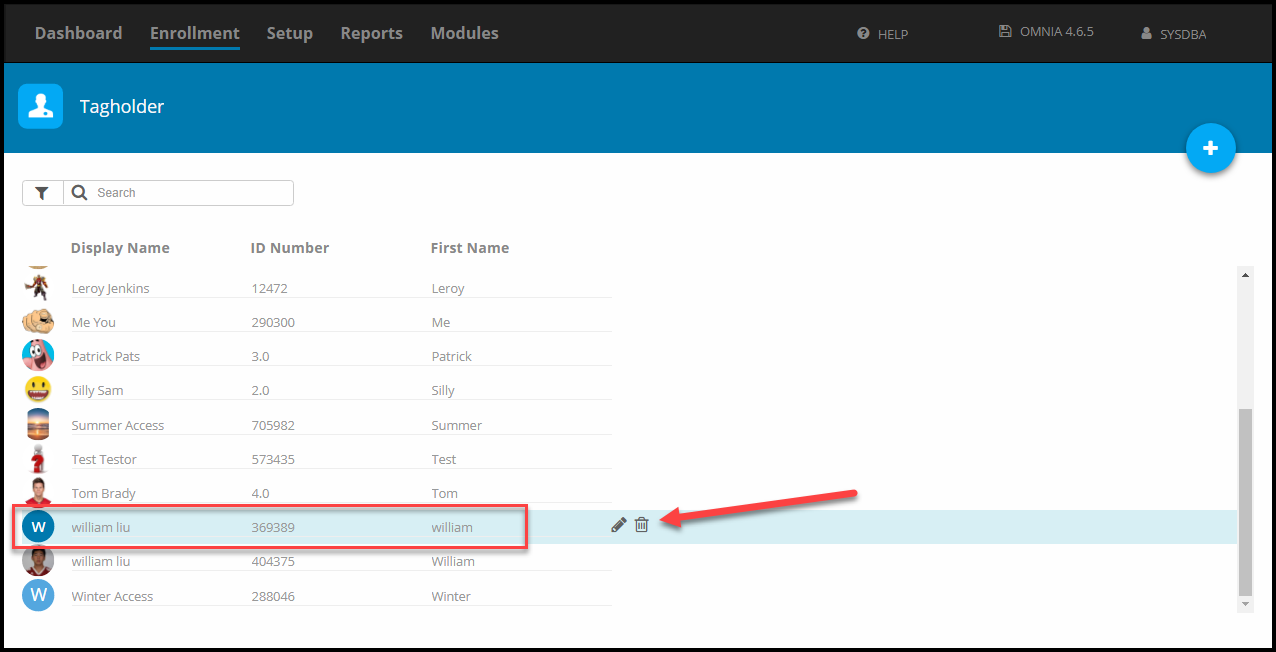
7. Select the Reader the Unlock On First Tag will be applied to. Select all doors that will have the First Tag Unlock.
In this example we will be using the Front Door
Step 3:
Create New Actions in the Unlock On First Tag Reader Profile
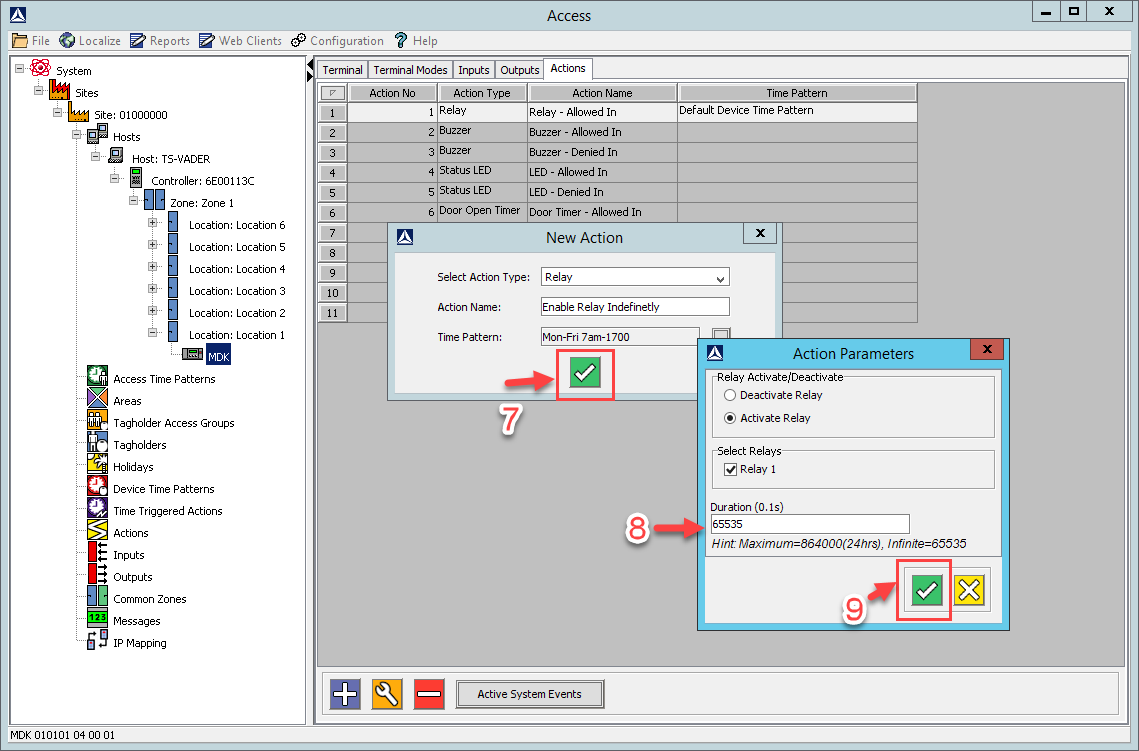
Create New Action 7am-5pm Mon-Fri
Go to Setup/Reader Profiles/Unlock on First Tag
NOTE: This Action enables the relay for an indefinite period.
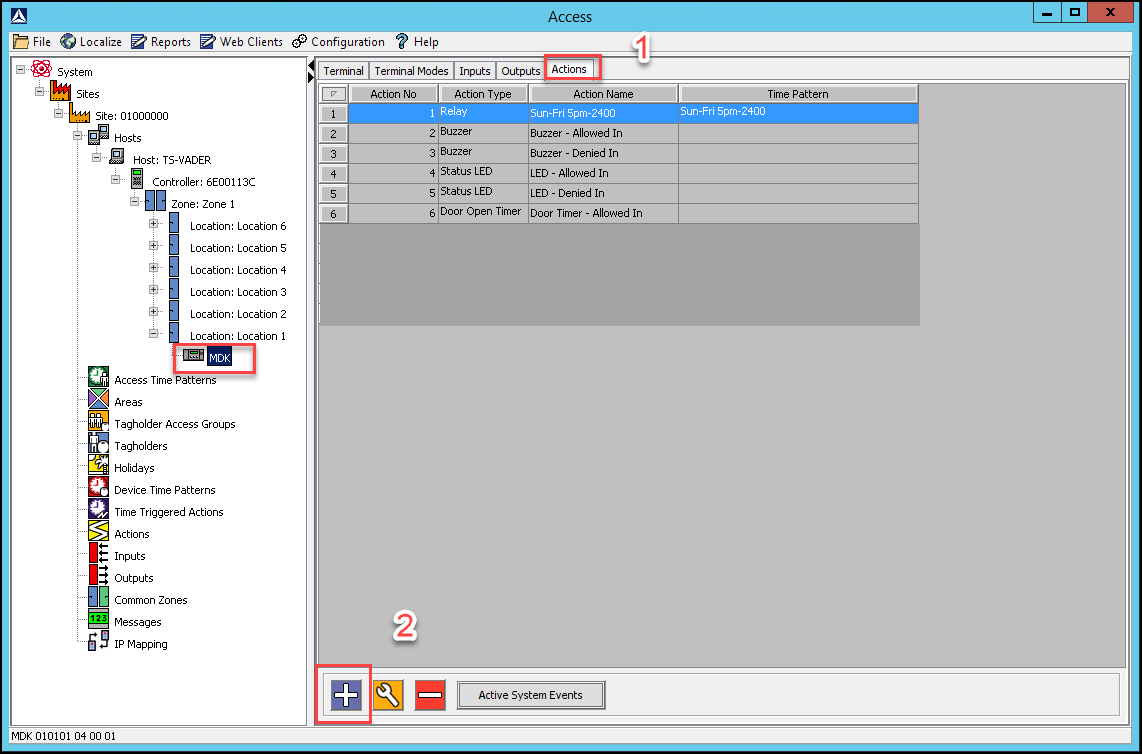
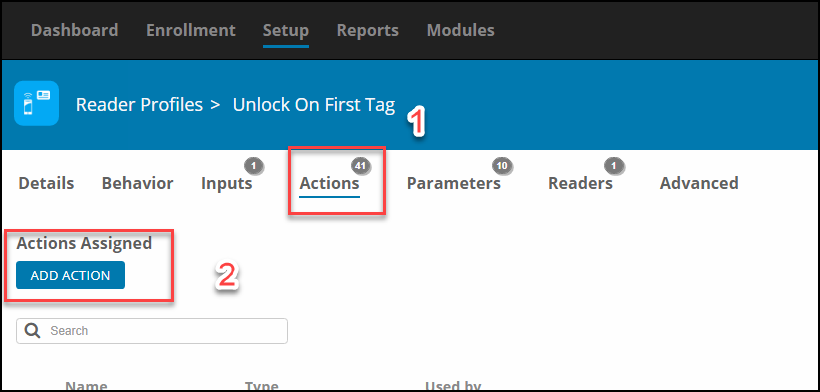
1. Select Actions
2. Select Add Action
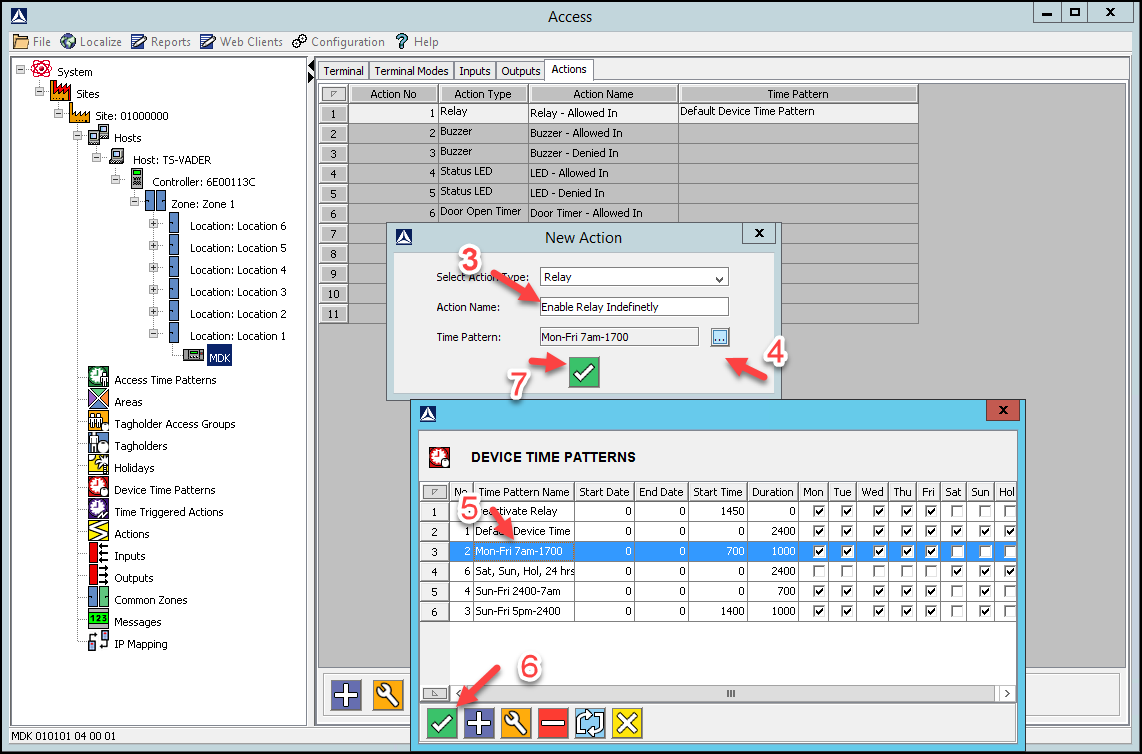
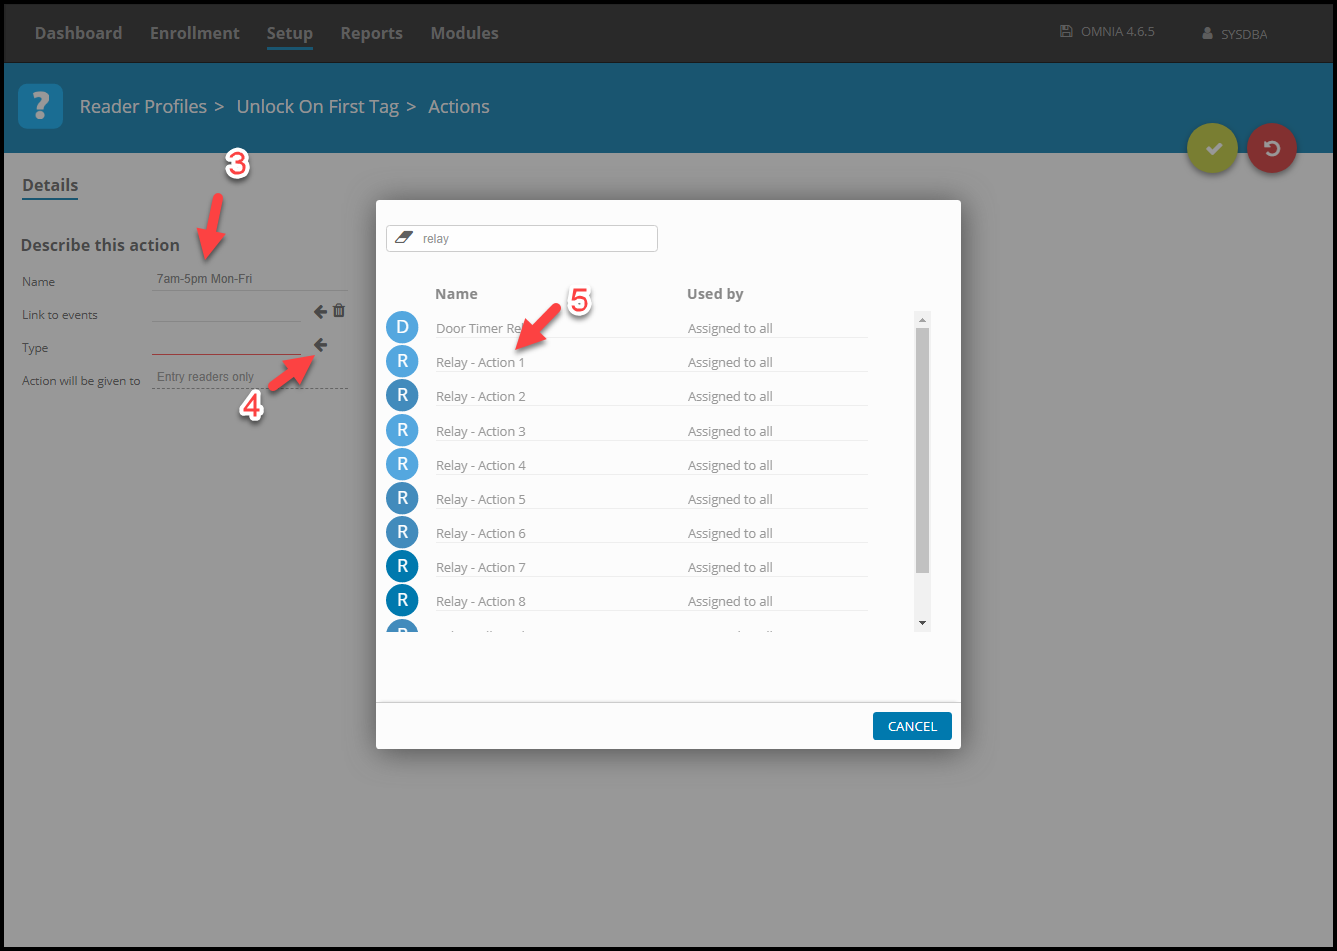
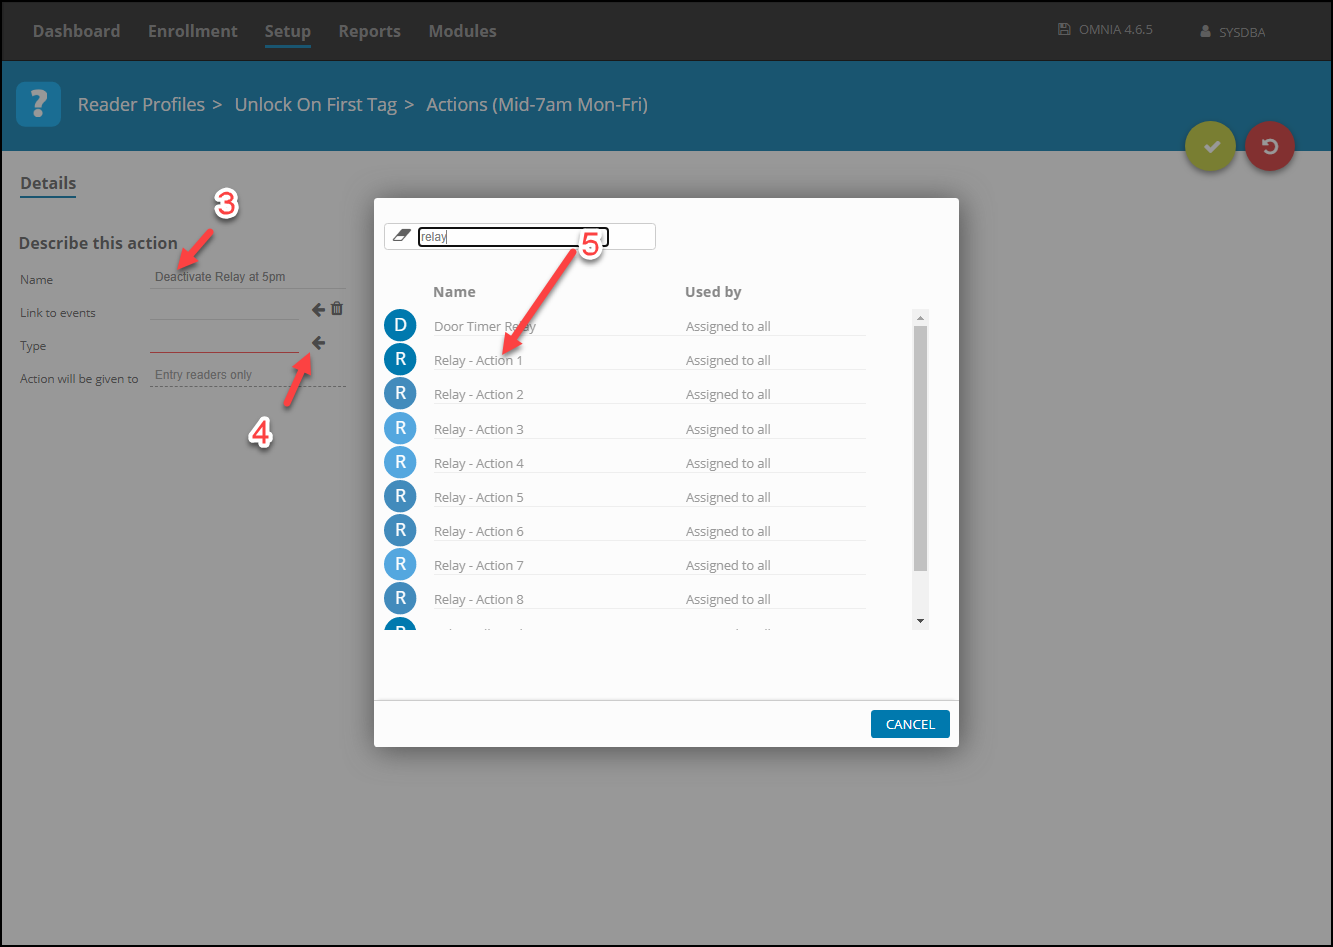
3. Name the Action
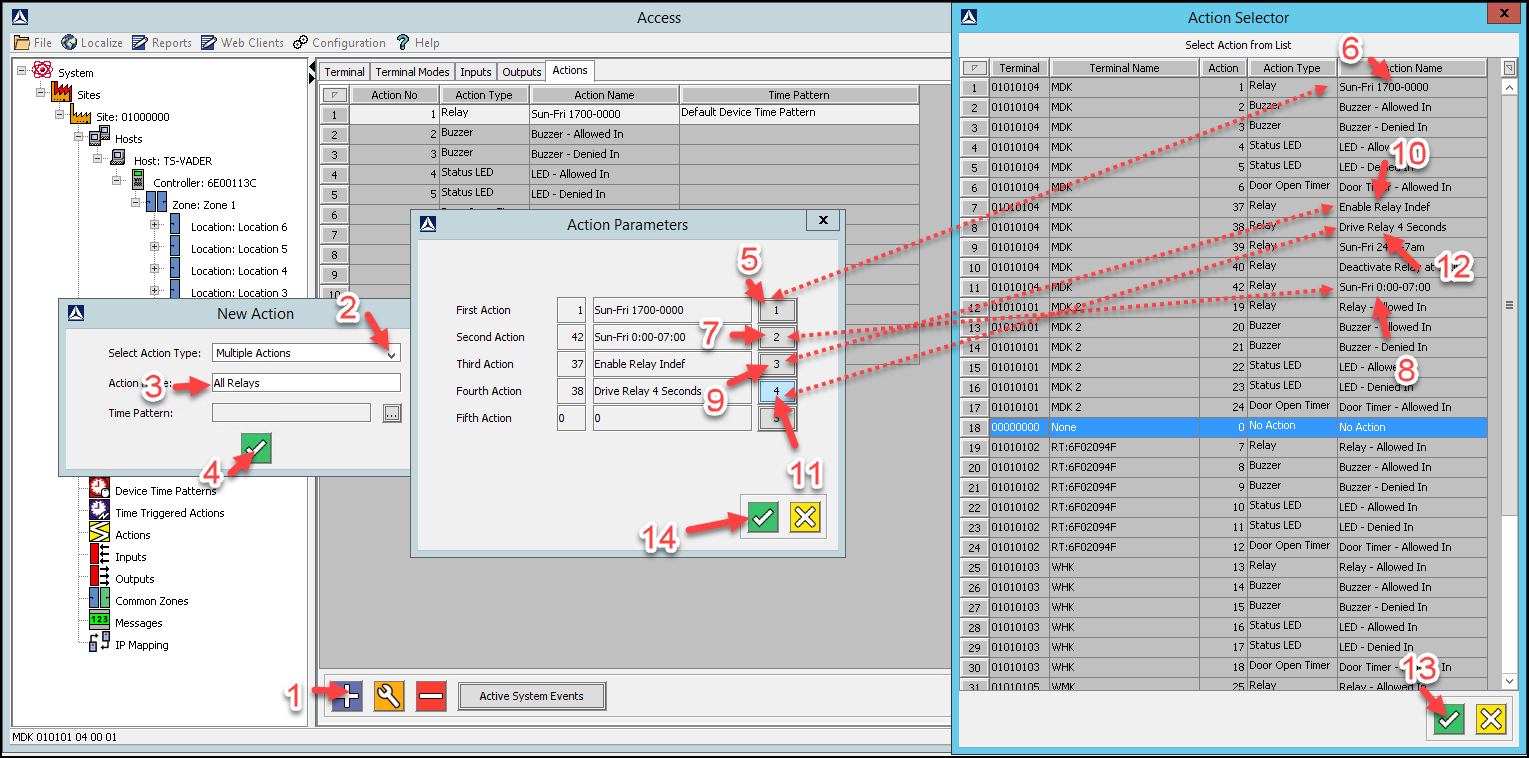
4. Along side the Type Section, Select the Browse Arrow
5. From the list displayed select Relay – Action 1
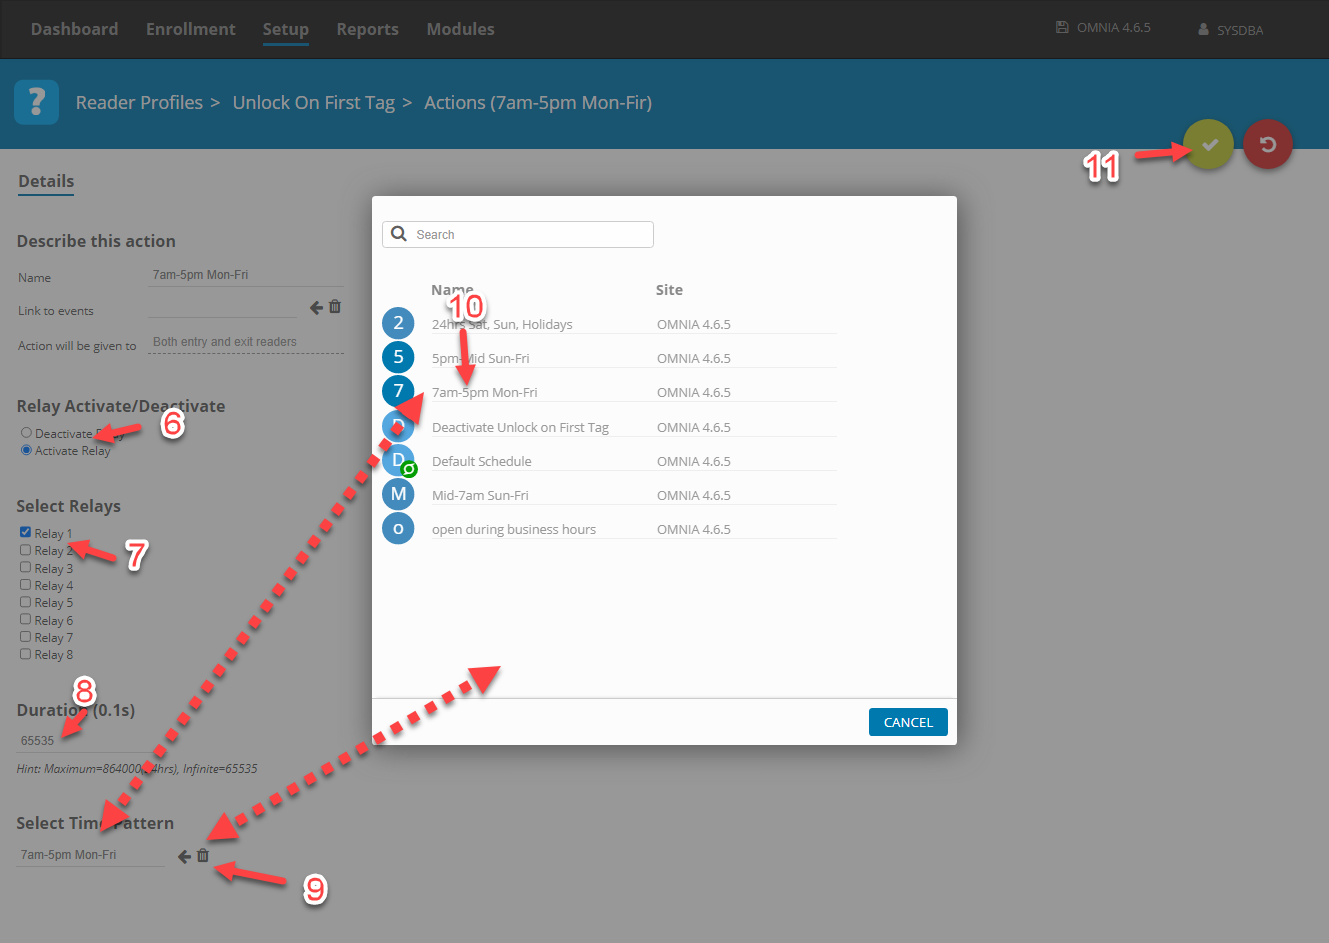
6. Select Activate Relay
7. Select Relay 1
8. Set the Duration to 65535 (Indefinite)
9. Select the Browse Arrow to open the Device Time Pattern Selection
10. From the list of Displayed Time Patterns, select the 7am-5pm Mon-Fri Device Time Pattern.
11. Select Save
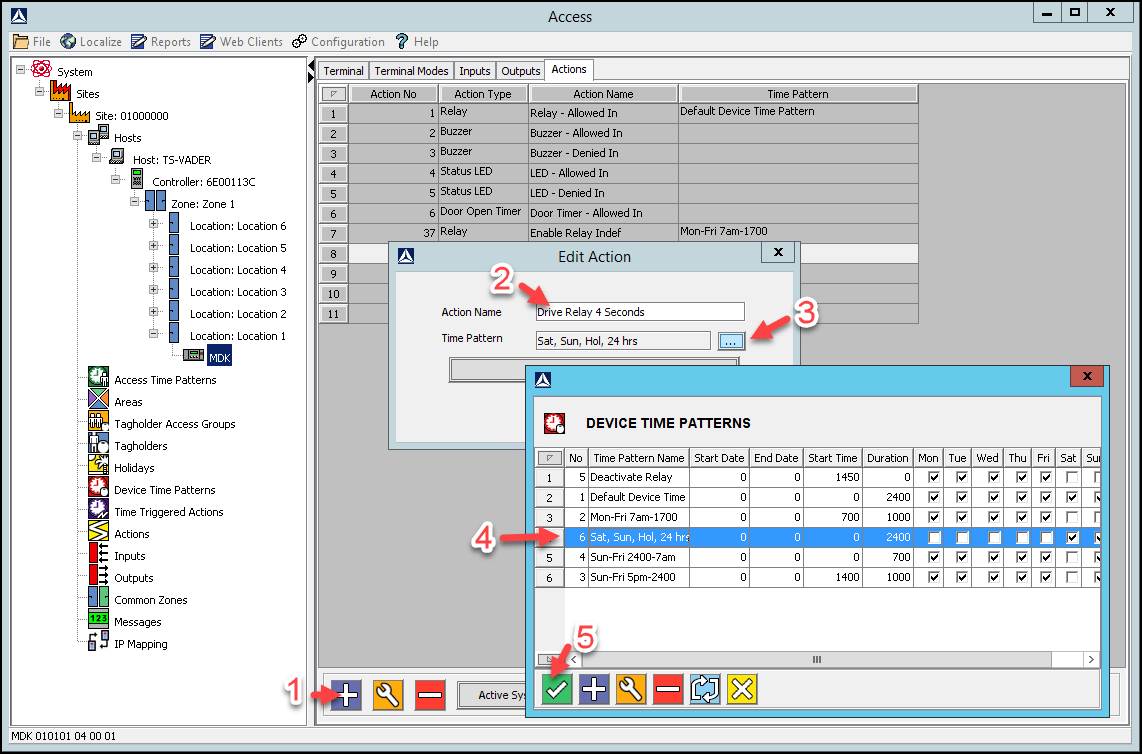
Create New Action Mid-7am Mon-Fri
NOTE: This action prevents First Tag Unlock before the Unlock on First Tag Time Period
1. Select Actions
2. Select Add Action
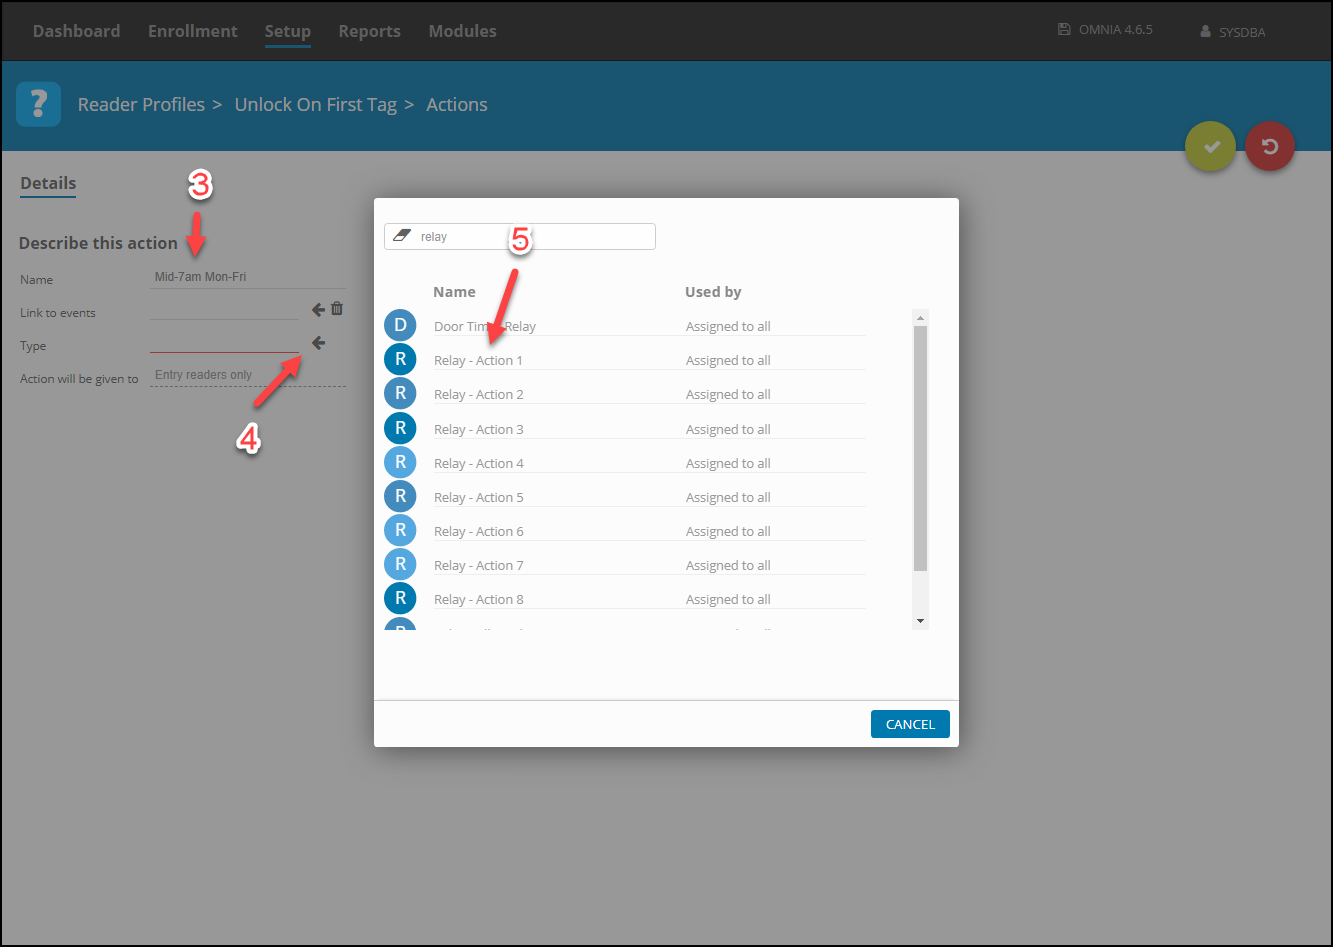
3. Name the Action
4. Along side the Type Section, Select the Browse Arrow
5. From the list displayed select Relay – Action 1
6. Select Activate Relay
7. Select Relay 1
8. Keep the duration at 40
9. Select the Browse Arrow to open the Device Time Pattern Selection
10. From the list of Displayed Time Patterns, select the Mid-7am Mon-Fri Device Time Pattern.
11. Select Save

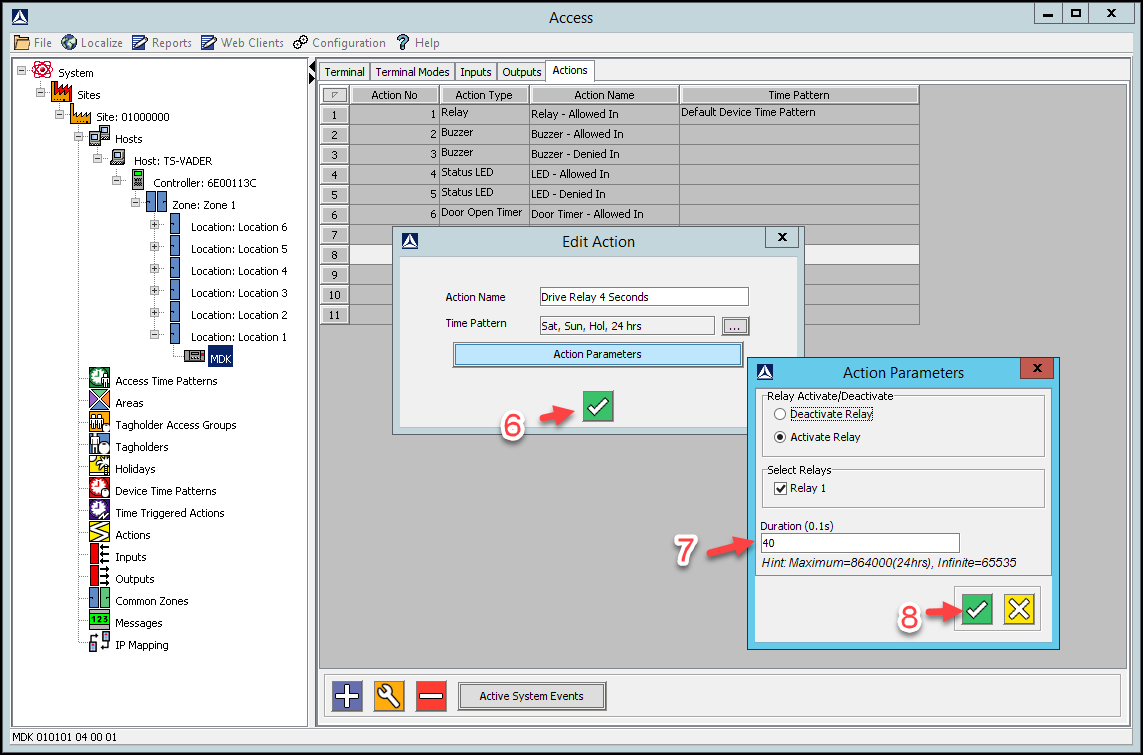
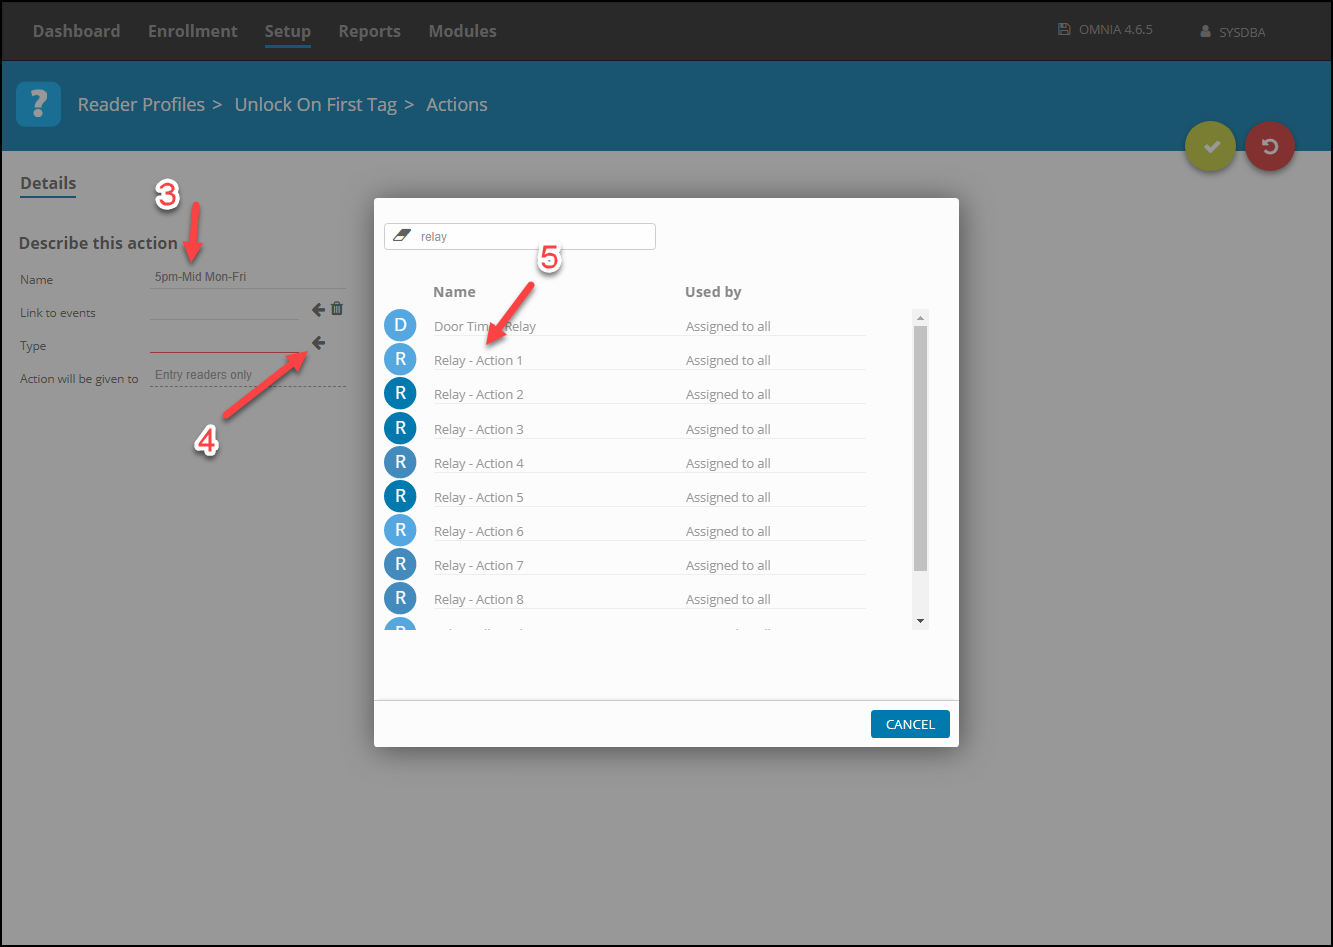
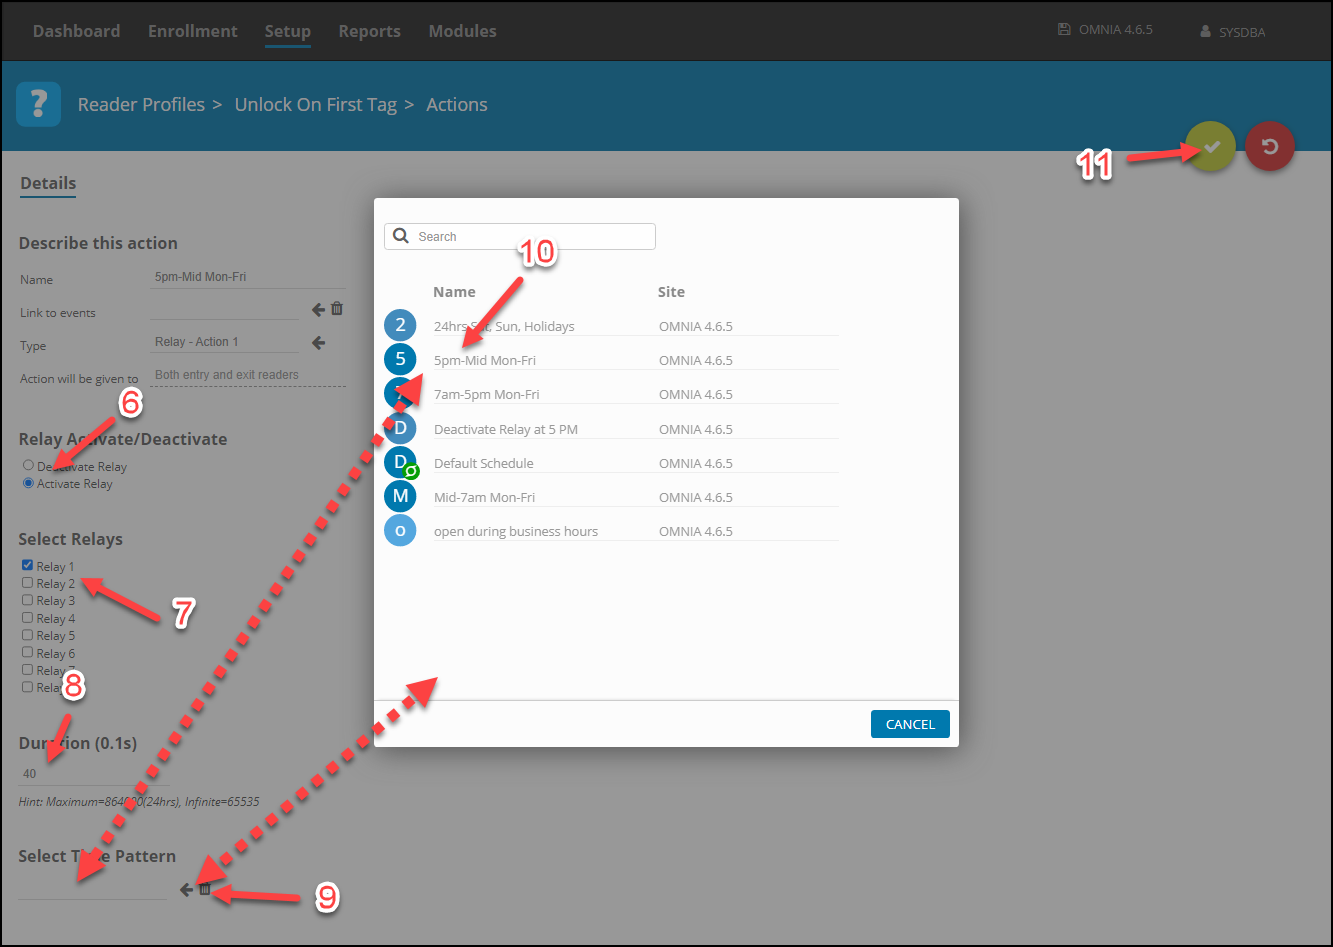
Create New Action 5pm-Mid Mon-Fri
NOTE: This action prevents First Tag Unlock after the Unlock on First Tag Time Period
1. Select Actions
2. Select Add Action
3. Name the Action
4. Along side the Type Section, Select the Browse Arrow
5. From the list displayed select Relay – Action 1
6. Select Activate Relay
7. Select Relay 1
8. Keep the duration at 40
9. Select the Browse Arrow to open the Device Time Pattern Selection
10. From the list of Displayed Time Patterns, select the 5pm-Mid Mon-Fri Device Time Pattern.
11. Select Save
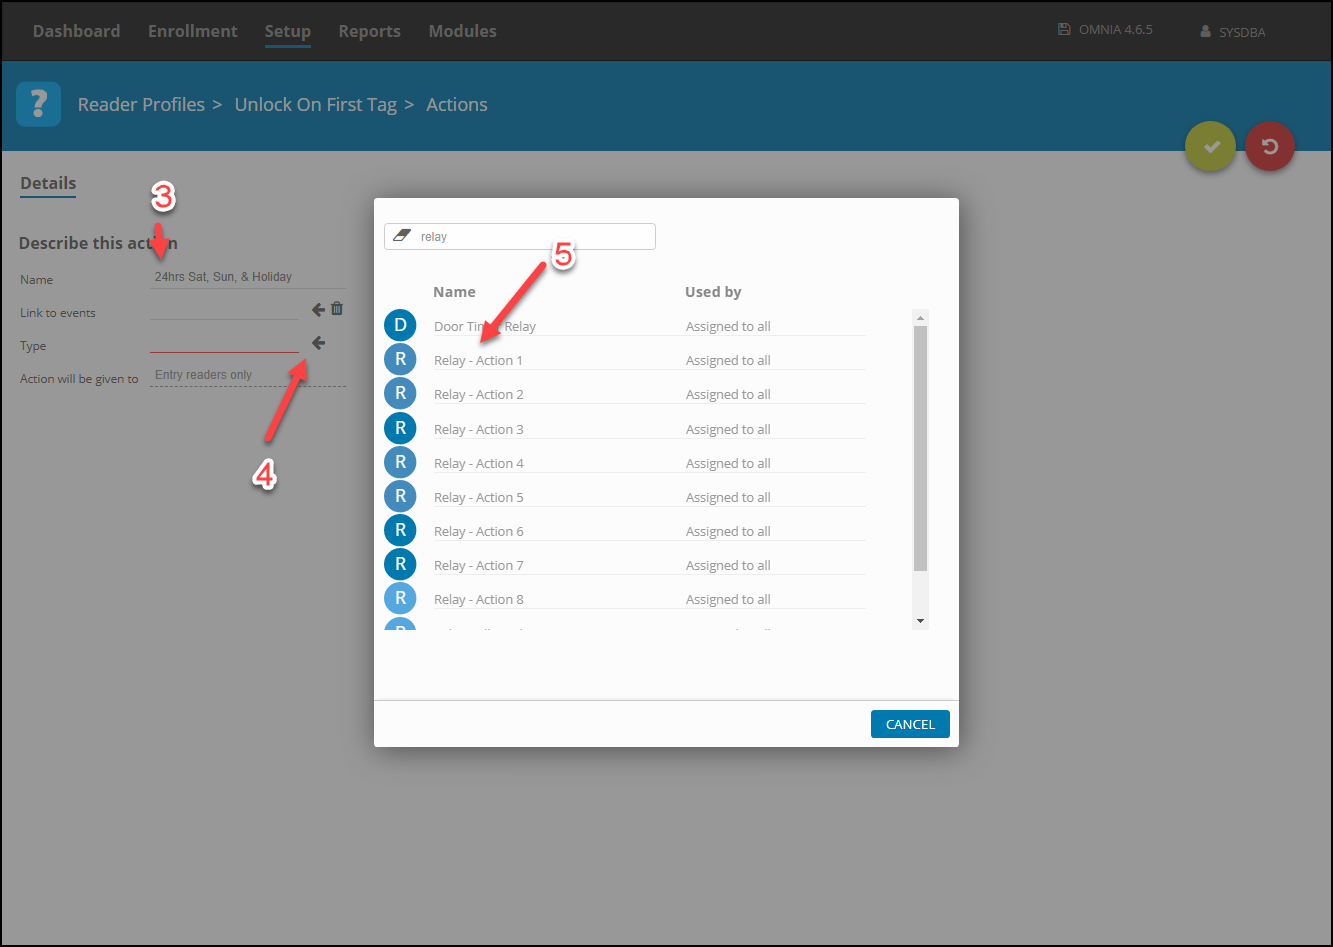
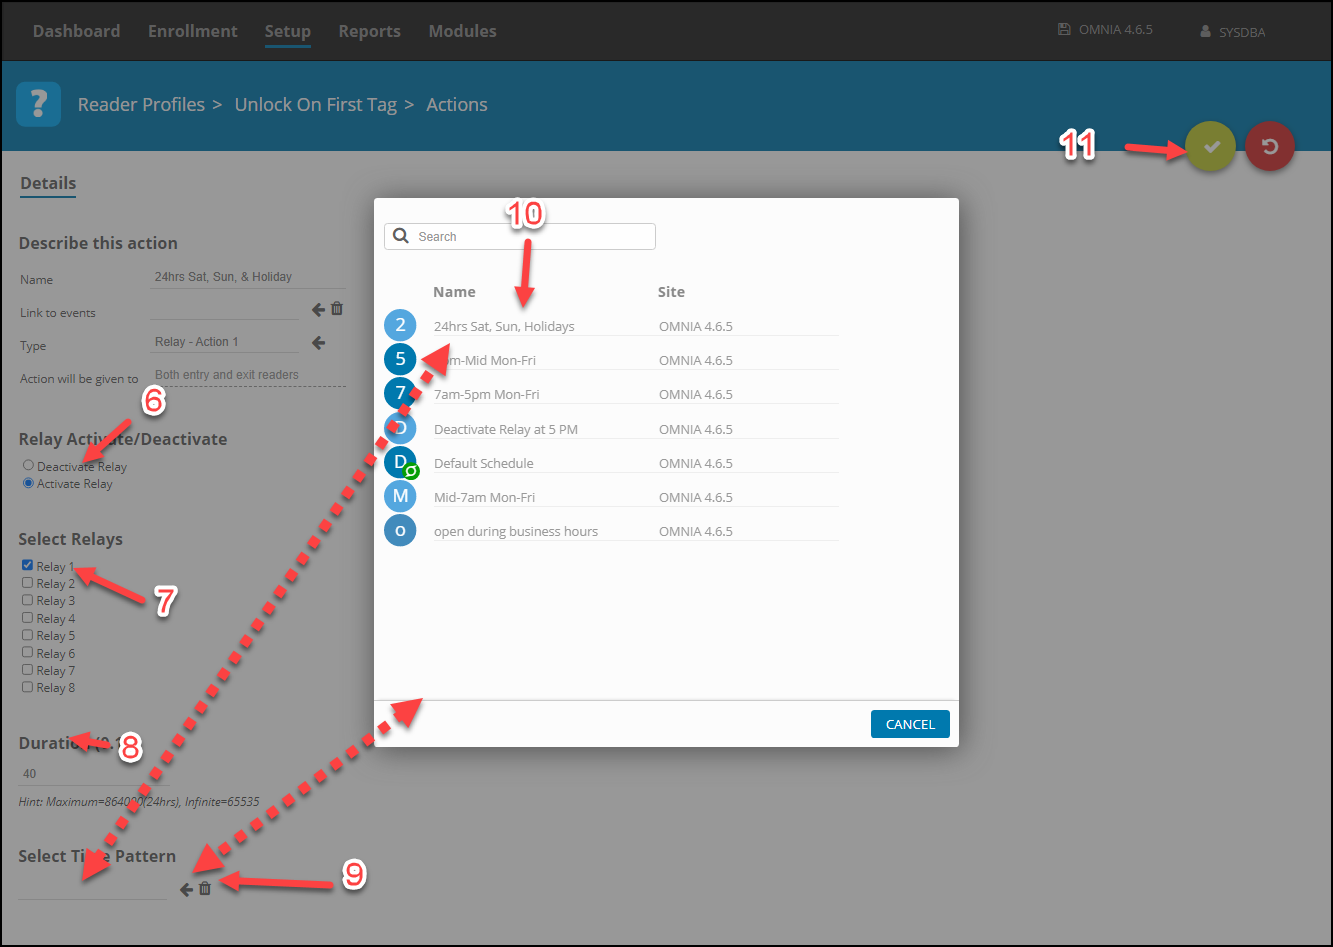
Create New Action 24hrs Sat, Sun, Holiday
NOTE: This action prevents Unlock on First Tag for Saturday, Sundays and Holidays.
1. Select Actions
2. Select Add Action
3. Name the Action
4. Along side the Type Section, Select the Browse Arrow
5. From the list displayed select Relay – Action 1
6. Select Activate Relay
7. Select Relay 1
8. Keep the duration at 40
9. Select the Browse Arrow to open the Device Time Pattern Selection
10. From the list of Displayed Time Patterns, select the 24hrs Sat, Sun, Holidays Device Time Pattern.
11. Select Save
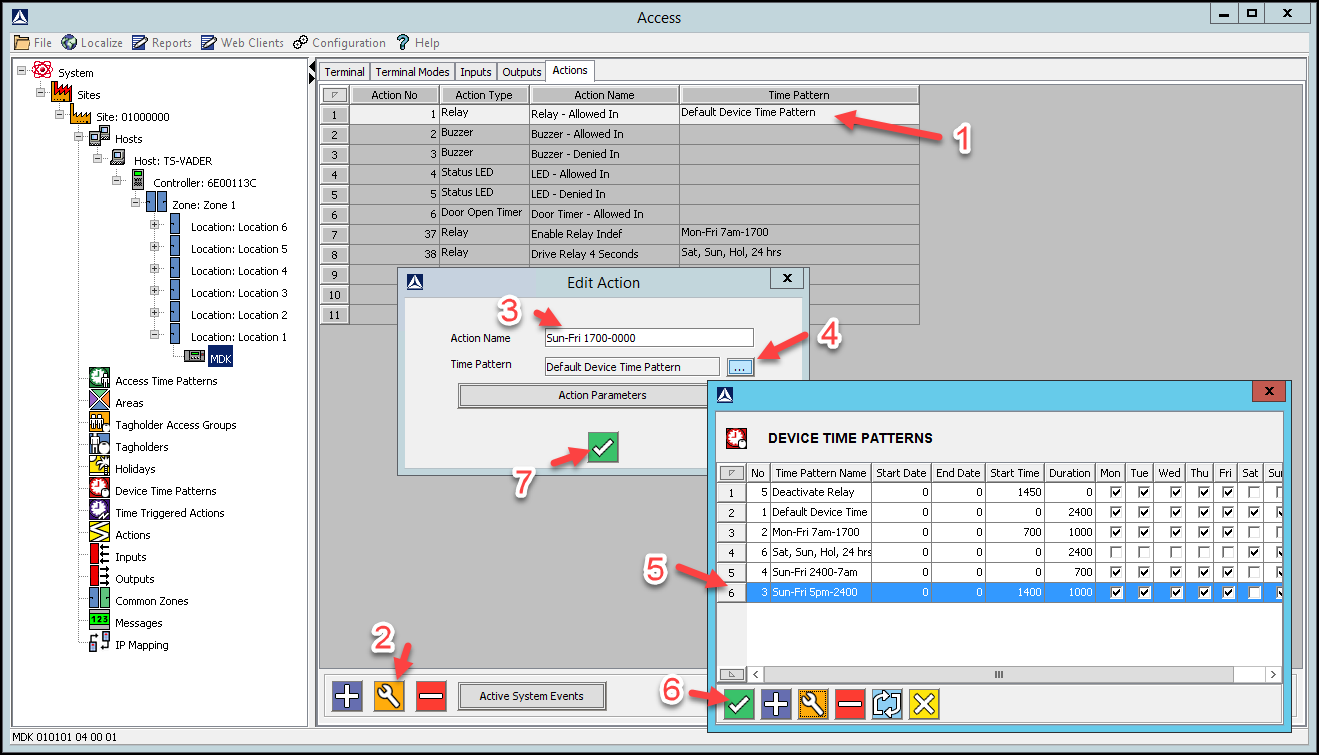
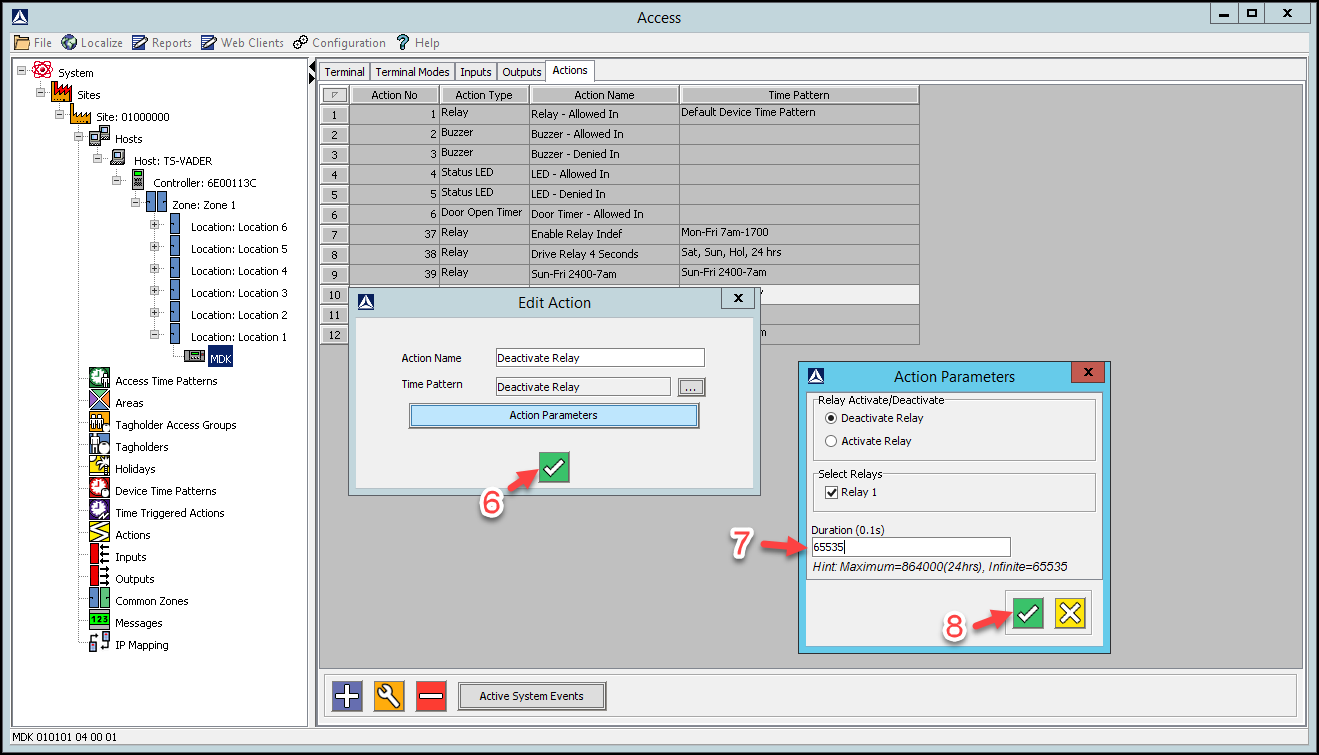
Create New Action Deactivate Relay at 5 pm
Note: This action locks the door at 5pm
1. Select Actions
2. Select Add Action
3. Name the Action
4. Along side the Type Section, Select the Browse Arrow
5. From the list displayed select Relay – Action 1
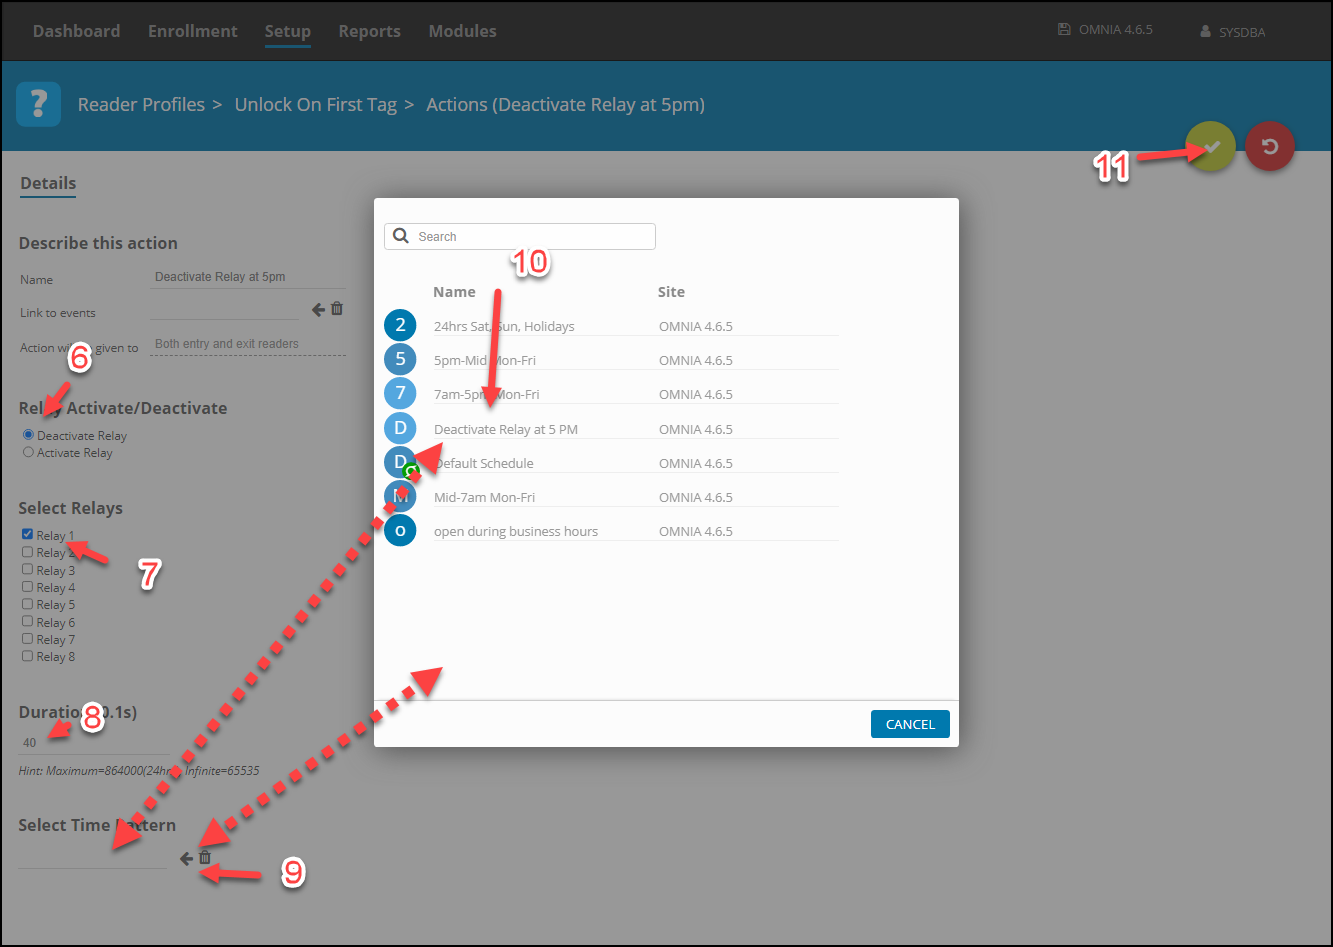
6. Select Deactivate Relay
7. Select Relay 1
8. Keep the duration at 40
9. Select the Browse Arrow to open the Device Time Pattern Selection
10. From the list of Displayed Time Patterns, select the Deactivate Relay at 5pm Device Time Pattern.
11. Select Save
Step 4
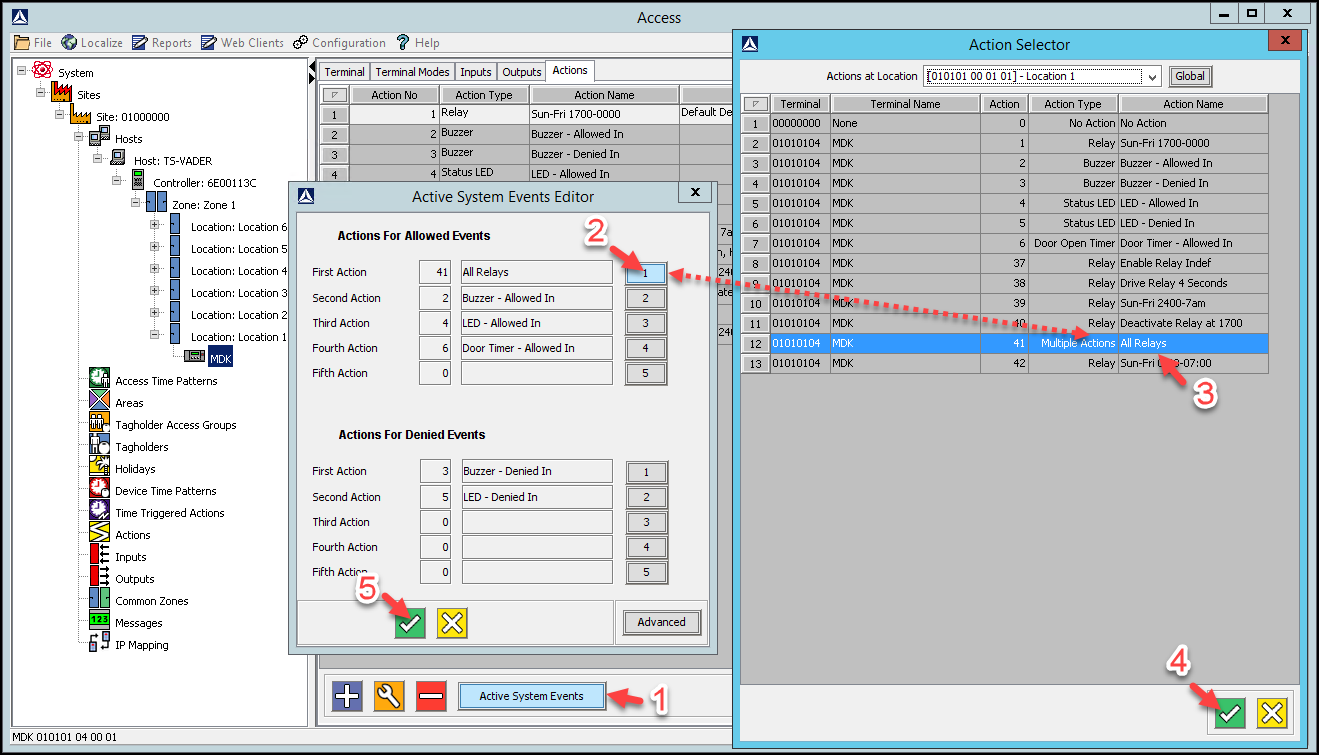
Assign the Newly Created Actions to the Allowed Normal In Events for the Reader\Door.
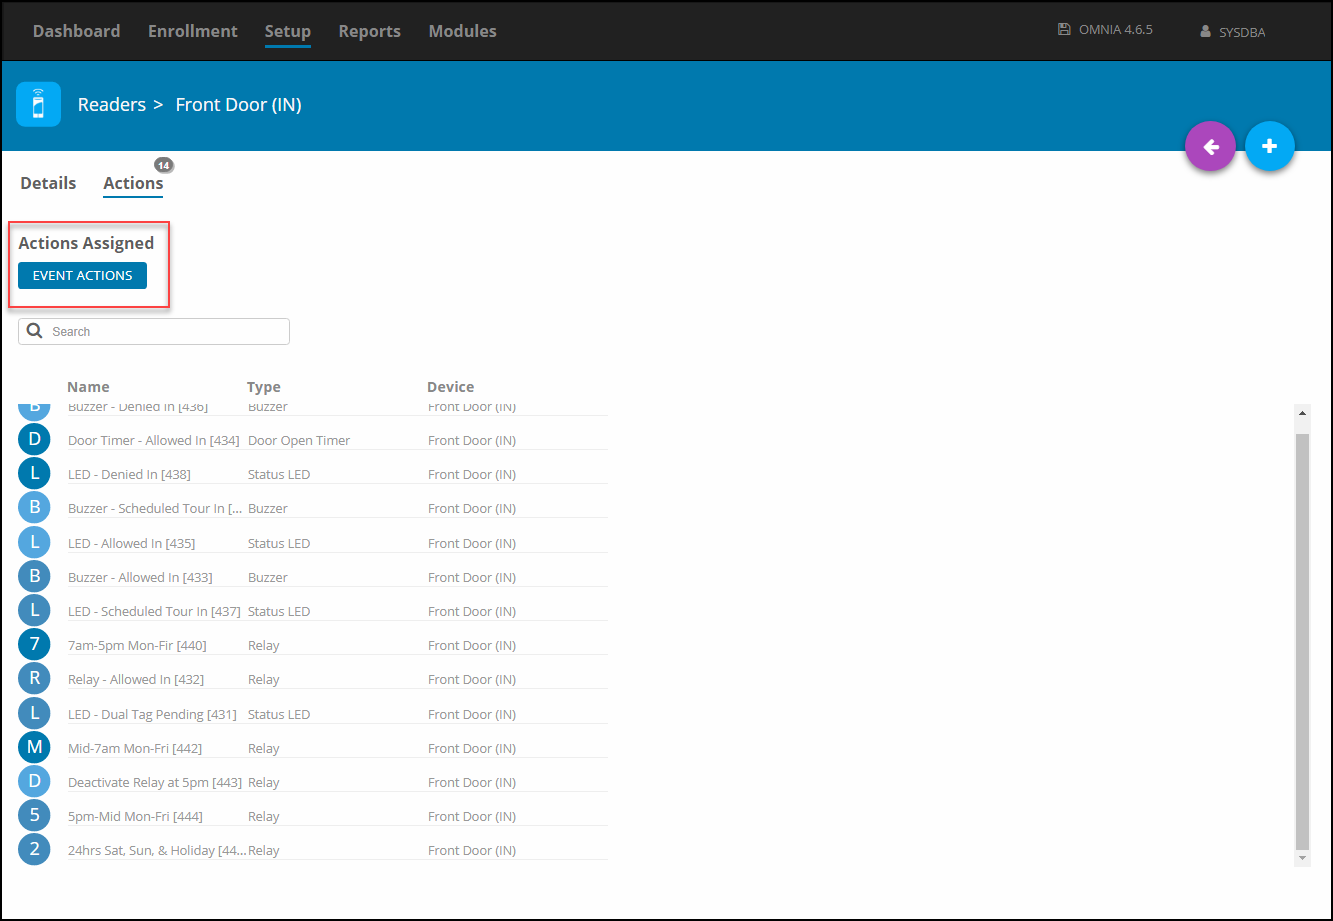
Go To Setup\Readers\Front Door\Actions
Select Actions
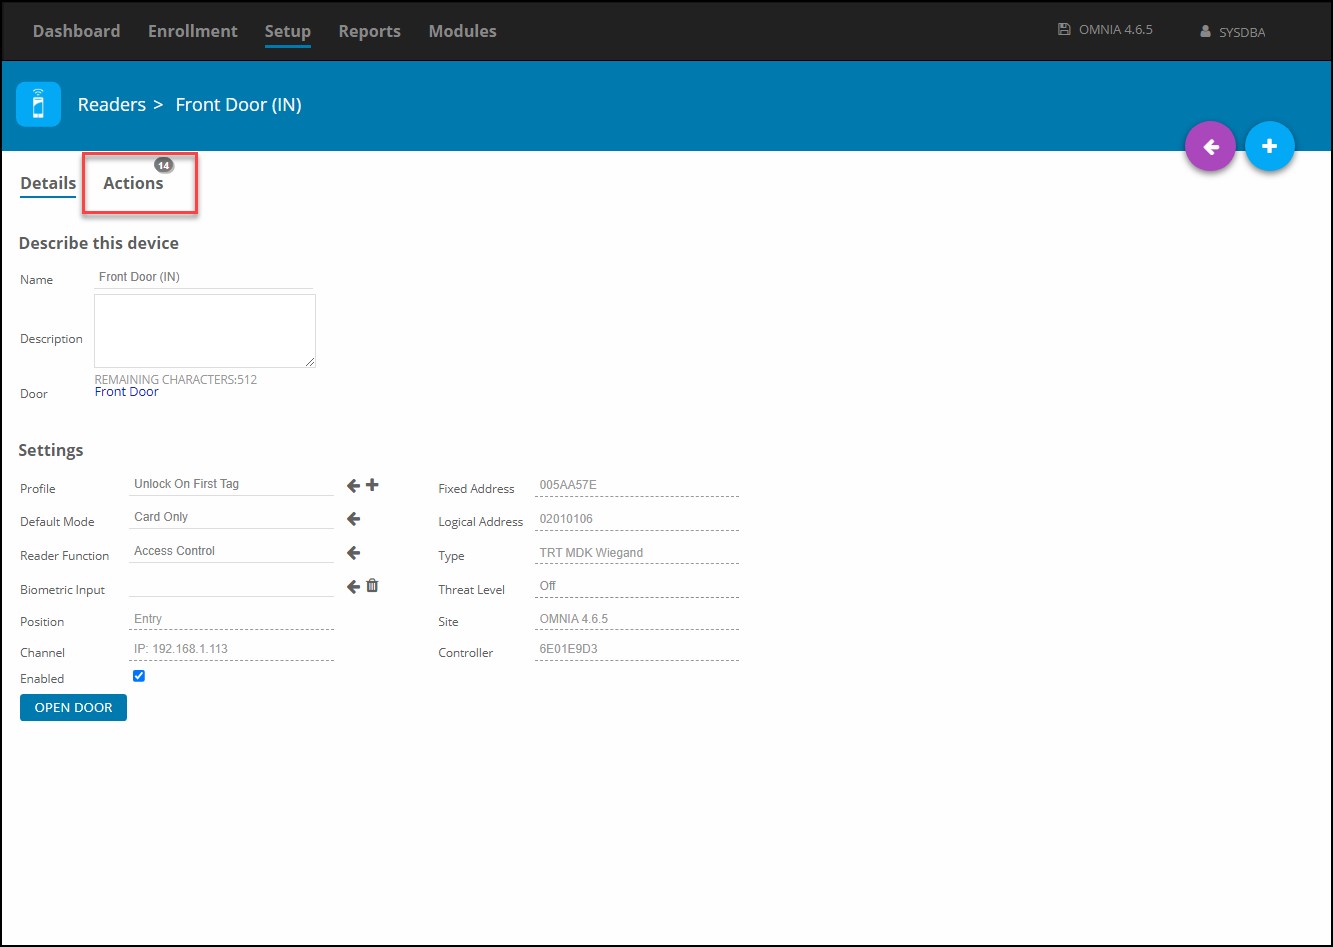
Select Event Actions
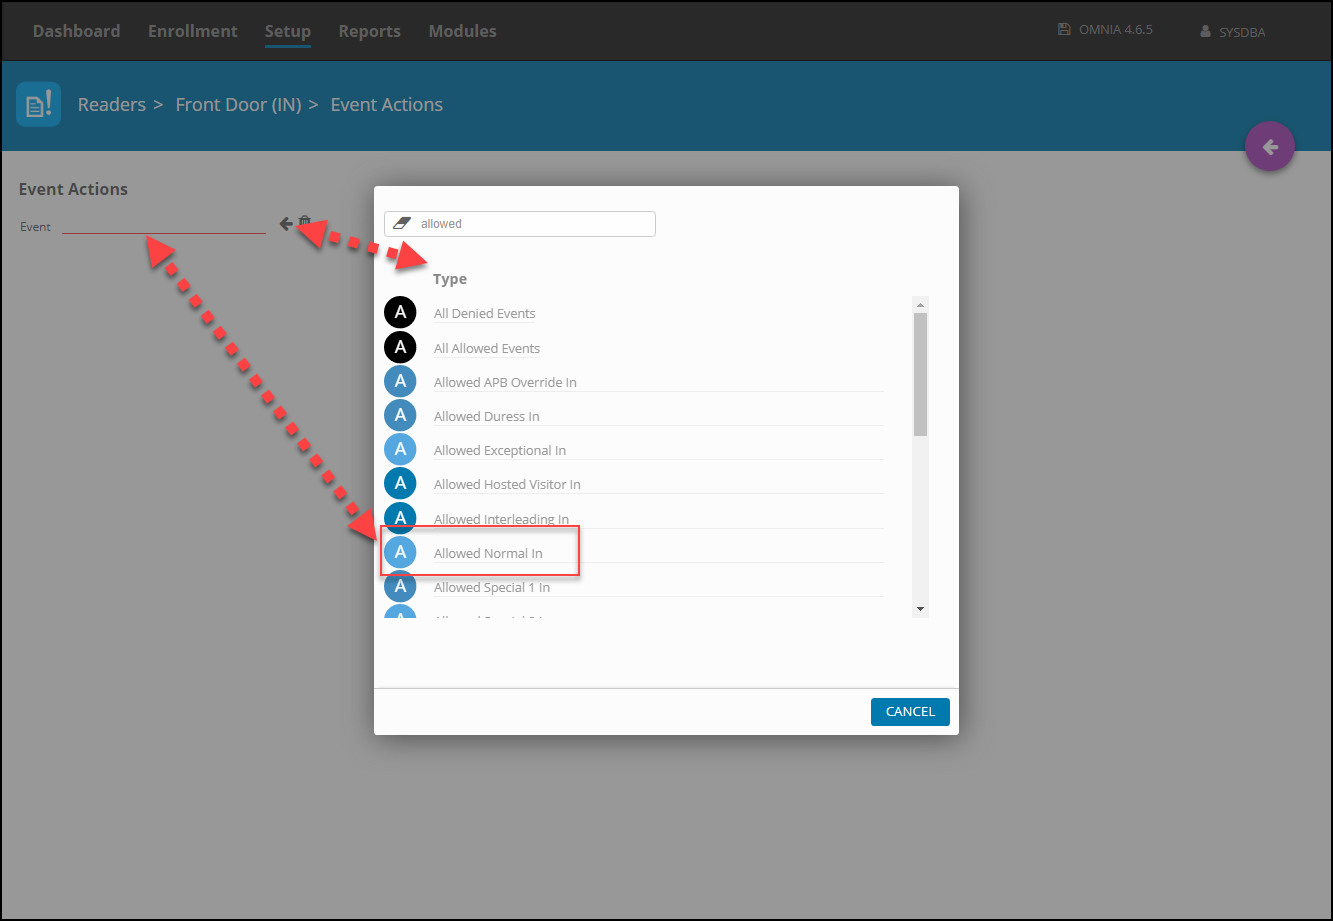
Select the Browse Arrow the Event and scroll or search for Allowed Normal In
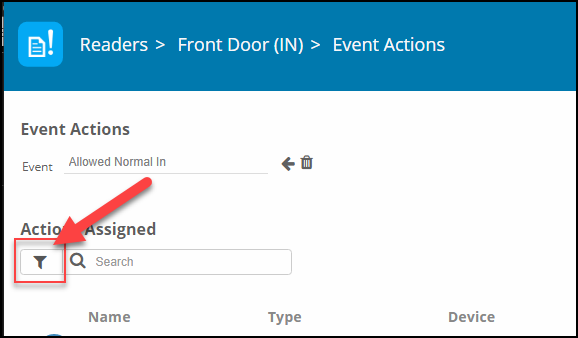
Select the Filter Option for Actions Assigned and select the show assigned actions
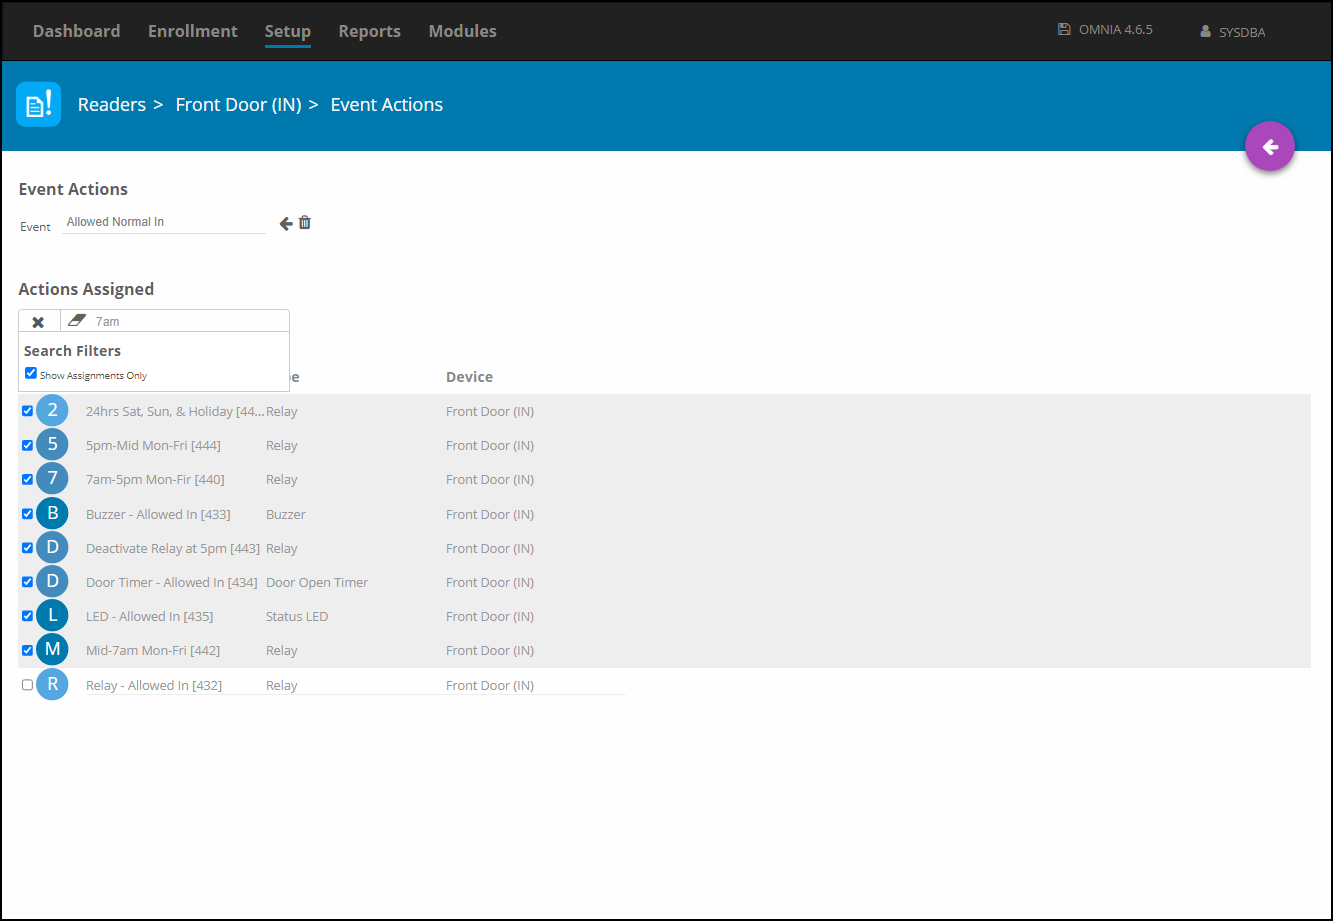
The Default Actions are displayed, The Newly Created Actions need to be added to the actions that will occur when an Allowed Normal In Event happens at this reader/door. The Default relay action needs to removed.

Uncheck the Show Assignments Only box and search for and add the newly created actions.
Add the Actions to the Event by putting a check in the box the left of the action.
Knowledge Base Article Writing Area
Text
Need further assistance?