Akuvox R20A Doorphone and C315 Indoor monitor
Basic Setup Guide: Akuvox
Akuvox R20A Doorphone and C315 Indoor monitor
How to Configure the Akuvox R20A and C315 Indoor Monitor
Basic Setup Guide:
Akuvox R20A Doorphone and C315 Indoor monitor
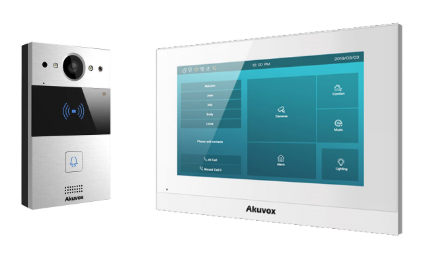
Akuvox R20A Doorphone


- Connect the unit to the network, using a web-browser, browse the R20A device homepage by typing the IP address into the browser address bar, you will be required to log in.
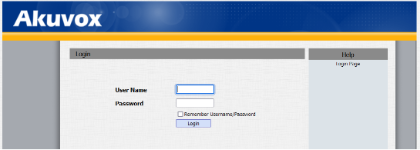
Default credentials are user: admin, password: admin
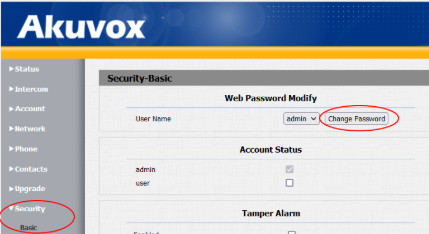
- On first login, you will be required to change the default password.
The password must be at least eight characters long containing one uppercase letter, one lowercase letter, and one digit.
ENSURE THAT YOU RECORD THE NEW PASSWORD.
- Browse to NETWORK \ BASIC and set the unit to use a STATIC IP, fill in the IP information as required or as provided by the customer.

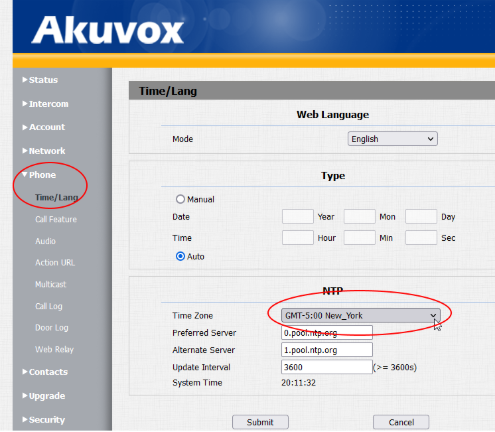
- Set your timezone: Go to PHONE \ TIME \ LANG and set the timezone.
Akuvox C315 Indoor monitor

- On power-up, select ‘ETHERNET’ or ‘WIRELESS’ depending on your needs and run through the setup wizard. Be sure to uncheck the ‘DHCP’ box. Choose a theme and tap ‘DONE’
- Connect the unit to the network, using a web-browser, browse the monitor homepage by typing the IP address into the browser address bar, you will be required to log in.

Default credentials are user: admin, password: admin
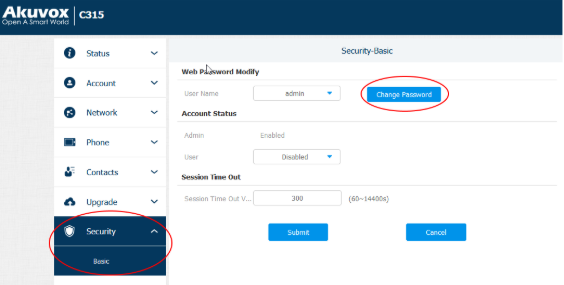
- Browse to SECURITY \ BASIC and change the admin password.
The password must be at least eight characters long containing one uppercase letter, one lowercase letter and one digit.
ENSURE THAT YOU RECORD THE NEW PASSWORD.
Connecting the doorphone and monitor
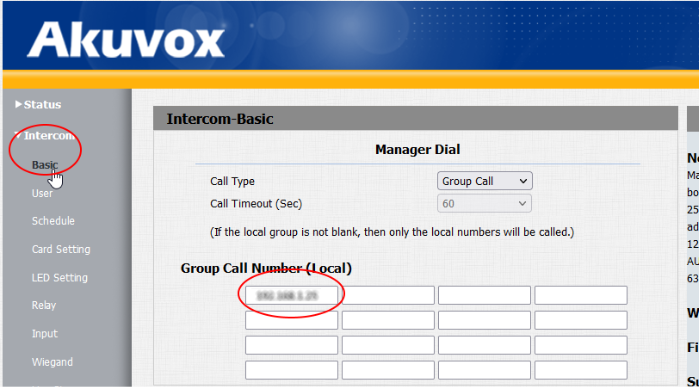
- Log into the doorphone web interface, browse to INTERCOM \ BASIC and under the first box in the GROUP CALL NUMBER(LOCAL) insert the IP address of the monitor, click SUBMIT to save changes.
- Log into the monitor web interface, browse to CONTACTS \ LOCAL CONTACTS and under CONTACT SETTINGS add a name for the doorphone under NAME, in the NUMBER 1 box, insert the IP address of the doorphone, click ADD.


- Set your timezone: Go to PHONE \ TIME \ LANG and set the timezone.

Other Things to do…
- Send the doorphone video stream to your Cathexis VMS system:
- In a web browser open the doorphone web interface and browse to INTERCOM \ RTSP, set a username and password and ensure RTSP is checked at the top.
- Log into a setup tab in Cathexis and add the RTSP stream as a camera feed.
- Use the doorphone built-in card reader as a reader in your OMNIA system
- Follow the wiring guide provided in the box with the doorphone.
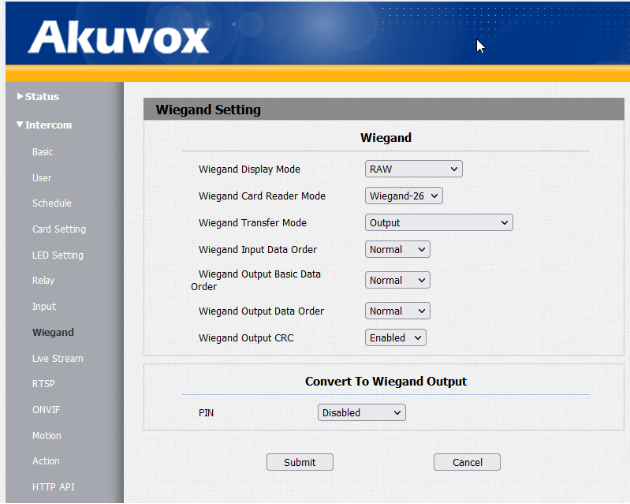
- Browse to INTERCOM \ WIEGAND, set WIEGAND DISPLAY MODE to RAW, set WIEGAND CARD READER MODE to WIEGAND-26, set WIEGAND TRANSFER MODE to OUTPUT, click SUBMIT.

Need further assistance?